Want straight greetings every time? Want perfect ink coverage every time? Want to stamp multiples easily? Want to try fun new techniques? Then you need the Stamparatus!
It’s very easy to use the Stamparatus, no special skills required. But there are a few tips and tricks that will make your stamping experience extra special.
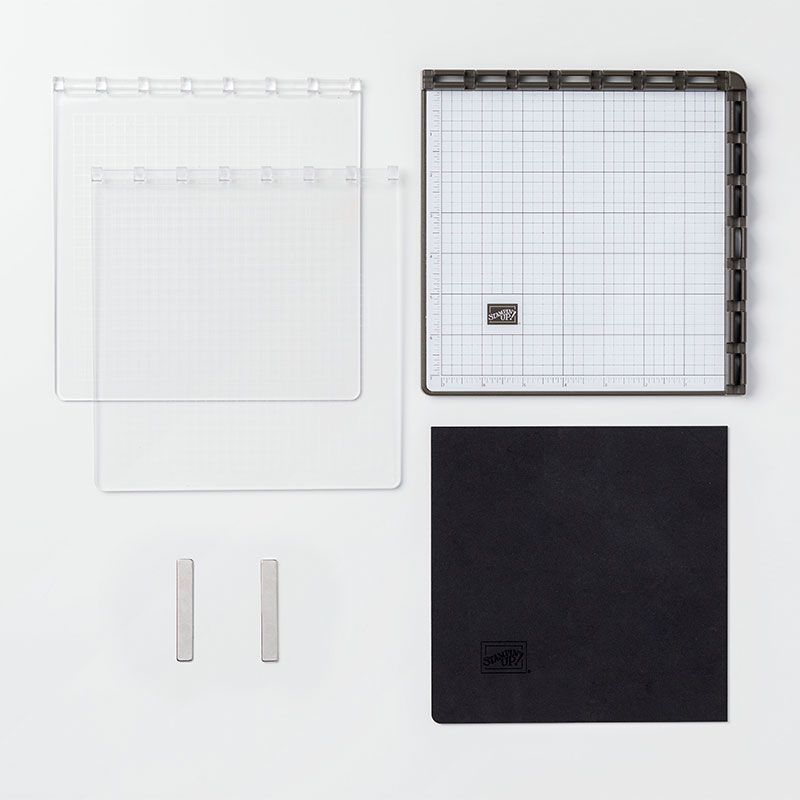
1) The back of the Stamparatus has special indentations to hold two very special magnets. Man these things are strong! Rare earth magnets are great but are brittle by nature. So keep the magnets away from each other. Fold a piece of washi tape around the middle of each magnet and back on itself – this creates a handle to make it easier to pick up.
2) Use the foam mat when stamping with photopolymer stamps. Placing a silicone craft sheet under the foam mat may also be needed if your photopolymer stamp is placed really close to a hinge.
3) Use the rulers on two sides for quick measuring.
4) Use all four surfaces of the acrylic plates to speed up stamping.
5) Place your cardstock up in the corner for perfect placement every time. If you need to place cardstock in the middle because of the design of your card, make an L-shaped shim with cardboard and place it in the corner, then place your cardstock in the new artificial corner and hold it in place with one magnet for perfect placement.
6) Or turn the card around so the image you want to make is in the middle rather than against the edge (in other words, you can leave the paper edged up in the corner but stamp the corner that is now in the middle of the tool).
7) There is a gap by the hinges between the plate and the platform of the Stamparatus. If you are stamping near these edges, you may need to push a bit harder (the plates are flexible, so pressure can be applied).
8) Press on top of the stamp itself and not just on the edge of the plate.
9) Use ink spots to ink up your stamps. You can create beautiful rainbow color effects much easier than using a full-size ink pad.
10) Place a clear mount stamp case under the open acrylic plate to create a level surface before you ink your stamp.
11) Use a silicone mat to keep the acrylic doors from touching when storing your Stamparatus. Do not store with plates attached.
12) Create a repetitive background with hinge stamping: Ink and stamp once. Pick up acrylic plate and move down one hinge if your stamp is under 1” in height. Ink and stamp. Repeat as many times as you’d like to create perfectly even rows of stamped images. NOTE: If your stamp is more than 1” in height, move down 2 hinges.
13) Use the silicone mat for the mirror or reflection technique. Place silicone mat on bottom of Stamparatus. Ink stamp and stamp image on silicone mat. Lay cardstock on top of stamped image and rub.
14) Use for template stamping (when you need multiples of a stamped cut out image: Cut out however many of the shapes you need with the Big Shot and thinlit. Then cut one more of the shape out of scrap cardstock. Line up this piece of cardstock in corner of Stamparatus. Position coordinating stamp over the cut out template and pick up on acrylic plate. Position a blank shape in the template. Ink and stamp. Repeat until all cutouts are stamped.
Watch for upcoming projects using these tips and tricks. I can hardly wait to see what you do with the Stamparatus.
Leave a Reply