Papercrafting Threads

  • Tutorials
    • PDF Tutorials
    • 3D Projects
    • Cardmaking
    • Fun Fold
    • Product Tips & Tricks
    • Projects
    • Techniques
  • Catalogs
  • Shop & Specials
    • Shop My Stampin’ Up! Online Store
    • Special Offers
    • Buy Me A Coffee
    • My Favorite Things on Amazon
    • Gift Certificates
  • Contact Me
  • Join the Fun
    • Join the Fun
    • Special Join Offers
  • Calendar of Events
  • Paper Pumpkin
    • Paper Pumpkin Kits
    • Paper Pumpkin Stamp Case Inserts
  • Nav Social Menu

    • Email
    • Facebook
    • Instagram
    • Pinterest
    • YouTube

Welcome Little One

July 29, 2018 Leave a Comment

29 Jul

Welcome Little One

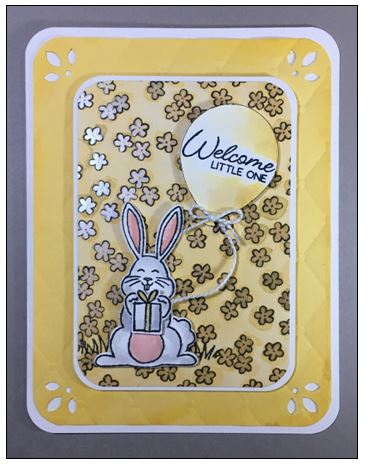
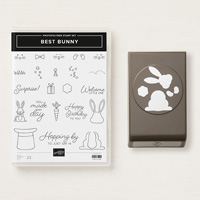
When the new 2018-19 Annual Catalog came out the beginning of June I couldn’t resist getting the Best Bunny Bundle, which includes the stamp set and punch. It’s so sweet, and I immediately saw baby cards coming to life to welcome little ones!

This is my first baby card using this set . . . I’m sure there will be many more before I lay this little guy to rest.

Step by Step Directions:

  1. Score 8-1/2” x 5-1/2” Whisper White Thick Card Stock at 4-1/4”; fold away from score line to create card base.
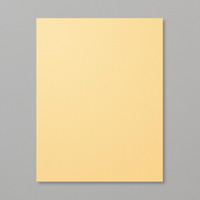
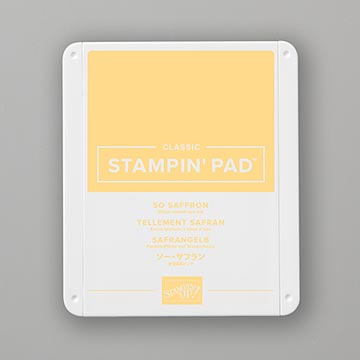
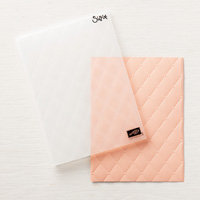
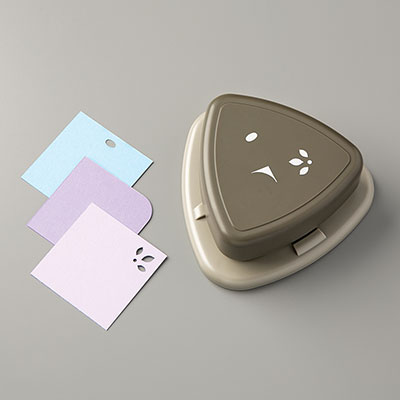
  2. Use Big Shot and Embossing Folder to add texture to 5-1/4” x 4” So Saffron card stock. Use Flower side of Detailed Trio Punch to cut flowers in each corner, then turn punch to Corner Rounder side and punch each corner again. Use Aqua Painter and So Saffron Ink to add shading around edges of So Saffron card stock. Use SNAIL Adhesive to adhere to card front.
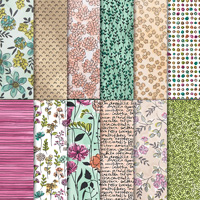
  3. Use Corner Rounder Corner of Detailed Trio Punch to round corners of the card base, 4-1/4” x 3” Whisper White card stock, and DSP.
  4. Stamp grass as shown near bottom left of DSP. Use SNAIL Adhesive to adhere DSP to 4-1/4” x 3” Whisper White card stock; use Stampin’ Dimensionals to adhere to card front.
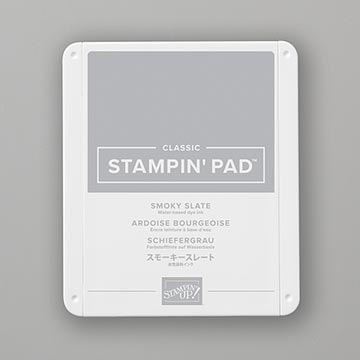
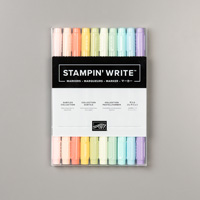
  5. Use Memento Ink Pad to stamp bunny head, body, tail, paws, and gift package on scraps of Whisper White card stock. Use Powder Pink Stampin’ Write Marker to color in center of ears and tummy; use So Saffron Stampin’ Write Marker to color ribbon on package; use Aqua Painter and Smoky Slate Ink to shade in gift package, bunny body, head, tail and paws. Punch out images with Bunny Builder punch. (NOTE: Gift package will need to be fussy cut.) Assemble bunny head, body and tail with Liquid Glue; adhere to card with Stampin’ Dimensionals. Assemble gift package and paws; adhere to bunny with Stampin’ Dimensionals.
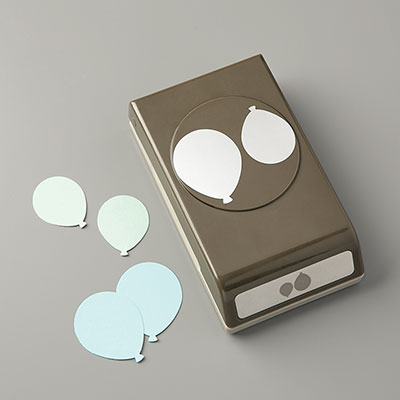
  6. Stamp sentiment on scrap of Whisper White card stock; punch out with Balloon Bouquet punch. Shade balloon with Aqua Painter and So Saffron Ink. Lightly run side of brush end of Basic Black Stampin’ Write Marker around edge of balloon. This will create a very thin line to define the outer edge of the balloon. Adhere to card with Stampin’ Dimensionals.
  7. Cut about 1-1/2” of Whisper White Solid Baker’s Twine. Use Mini Glue Dots to adhere one end under balloon; adhere other end under bunny’s paw. Make a small bow with Baker’s Twine and adhere to balloon with rolled up Mini Glue Dot.

That’s it, you’re finished! Hope you enjoy making this sweet little bunny card as much as I did!

Supplies Used:


Best Bunny Photopolymer Bundle
$30.50

Share What You Love Specialty Designer Series Paper
$27.00

So Saffron 8-1/2″ X 11″ Cardstock
$8.50

Whisper White 8-1/2″ X 11″ Thick Cardstock
$7.75

Whisper White 8-1/2″ X 11″ Cardstock
$9.75

Tuxedo Black Memento Ink Pad
$6.00

So Saffron Classic Stampin’ Pad
$7.50

Smoky Slate Classic Stampin’ Pad
$7.50

Subtles Stampin’ Write Markers
$30.00

2017-2019 In Color Stampin’ Write Markers
$15.00

Basic Black Stampin’ Write Marker
$3.00

Tufted Dynamic Textured Impressions Embossing Folder
$9.00

Balloon Bouquet Punch
$18.00

Detailed Trio Punch
$20.00

Aqua Painters
$17.00

Whisper White Solid Baker’s Twine
$3.00

Big Shot
$110.00
Share:

Leave a Comment
see more related posts: Cardmaking

Previous Post: « Christmas in July
Next Post: Why I Love a Kit »

Reader Interactions

Leave a Reply Cancel reply

Your email address will not be published. Required fields are marked *

Primary Sidebar

Peri Beal

Cheesehead. Avid reader. Antique hunter.

Shop Online

Shop with me and get a FREE PDF tutorial bundle delivered to your inbox AND a handmade card via snail mail

Search

Papercrafting Threads

Gift Certificates
  • Email
  • Facebook
  • Instagram
  • Pinterest
  • YouTube

Sign up for my Newsletter

Sign up for my newsletter and get a free PDF tutorial as my welcome thank you!

Almost there...

Please check your email to confirm your subscription

Retired Product
Privacy Policy

The Fine Print

Just so you know... This is a personal website and I am responsible for its content. Stampin' Up!® does not endorse the use of or contents of the classes, services, or non-Stampin' Up! products I offer.

Sign up for my Newsletter

Sign up for my newsletter and get a free PDF tutorial as my welcome thank you!

Almost there...

Please check your email to confirm your subscription

Footer

  • Calendar of Events
  • 3D Projects
  • Cardmaking
  • Fun Fold
  • Product Tips & Tricks
  • Projects
  • Techniques
  • Of Interest
  • Catalogs
  • Join the Fun
  • Contact Me
  • Email
  • Facebook
  • Instagram
  • Pinterest
  • YouTube

PAPERCRAFTING THREADS

Copyright © 2025 · Refined theme customized by Catherine Carroll

Privacy Policy · Affiliate Disclosure