Papercrafting Threads

  • Tutorials
    • PDF Tutorials
    • 3D Projects
    • Cardmaking
    • Fun Fold
    • Product Tips & Tricks
    • Projects
    • Techniques
  • Catalogs
  • Shop & Specials
    • Shop My Stampin’ Up! Online Store
    • Special Offers
    • Buy Me A Coffee
    • My Favorite Things on Amazon
    • Gift Certificates
  • Contact Me
  • Join the Fun
    • Join the Fun
    • Special Join Offers
  • Calendar of Events
  • Paper Pumpkin
    • Paper Pumpkin Kits
    • Paper Pumpkin Stamp Case Inserts
  • Nav Social Menu

    • Email
    • Facebook
    • Instagram
    • Pinterest
    • YouTube

Seaside Inside Shadow Box

August 31, 2018 Leave a Comment

31 Aug


Isn’t the Seaside Inside Shadow Box adorable? And it’s quite easy to make. Follow my step-by-step instructions below to make your own Inside Shadow Box card now.

Cardstock Used:

Crumb Cake cardstock, 4 1/4 x 10 1/2, score long side at 5 1/2 (card base)  NOTE: The front panel of the card is the longer flap of the card base. The back flap will be 1/2″ shorter.
Crumb Cake cardstock, 4 1/4 x 11, score long side at 3/8″, 5 3/8″, and 5 7/8″ (mechanism)
Bermuda Bay cardstock, 4 1/4″ x 5″
Scrap of Whisper White cardstock
Scrap of Grapefruit Grove cardstock
Scraps of any color cardstock of your choice

Instructions for Inside Shadow Box:

Fold Crumb Cake cardstock on scored lines. Using the Big Shot, die cut the net and the large sand dollar from scraps of cardstock. These pieces will be used as stencils.

Stamp the front of the card as shown in sample (remember that the front is the longer flap) Sponge the starfish using the sand dollar stencil.

Inside Shadow Box

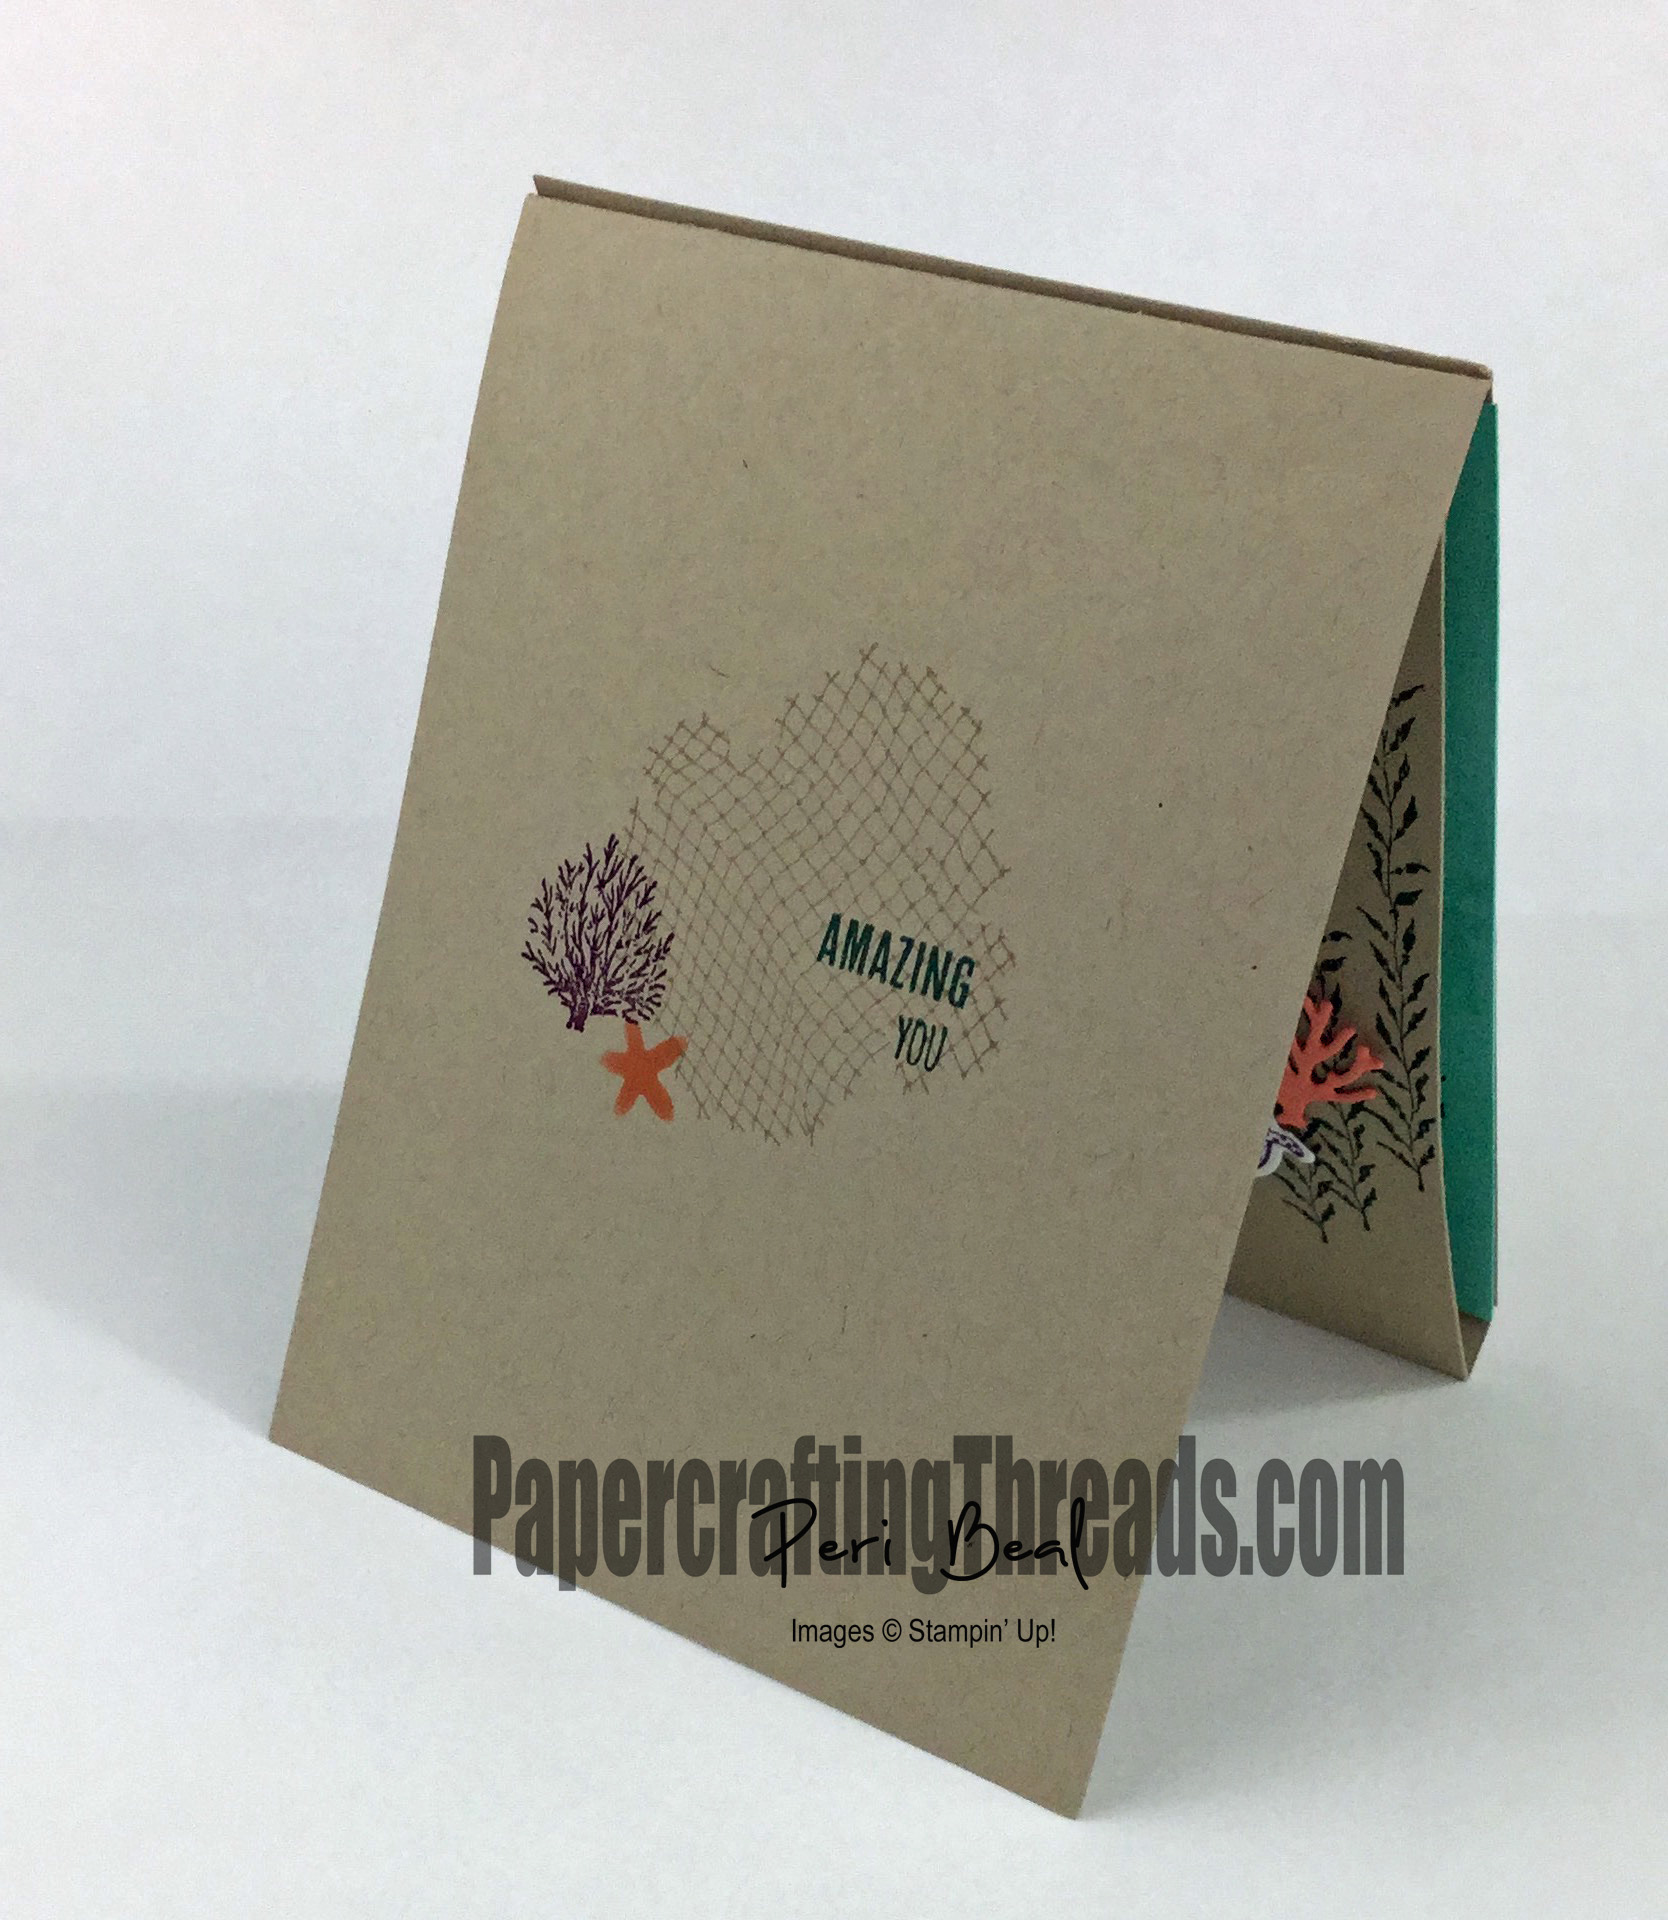
Sponge the “scales” using the net as a stencil on the Coastal Cabana cardstock. Add random sponging for more depth. Adhere the finished piece to the back inside flap of the card base.

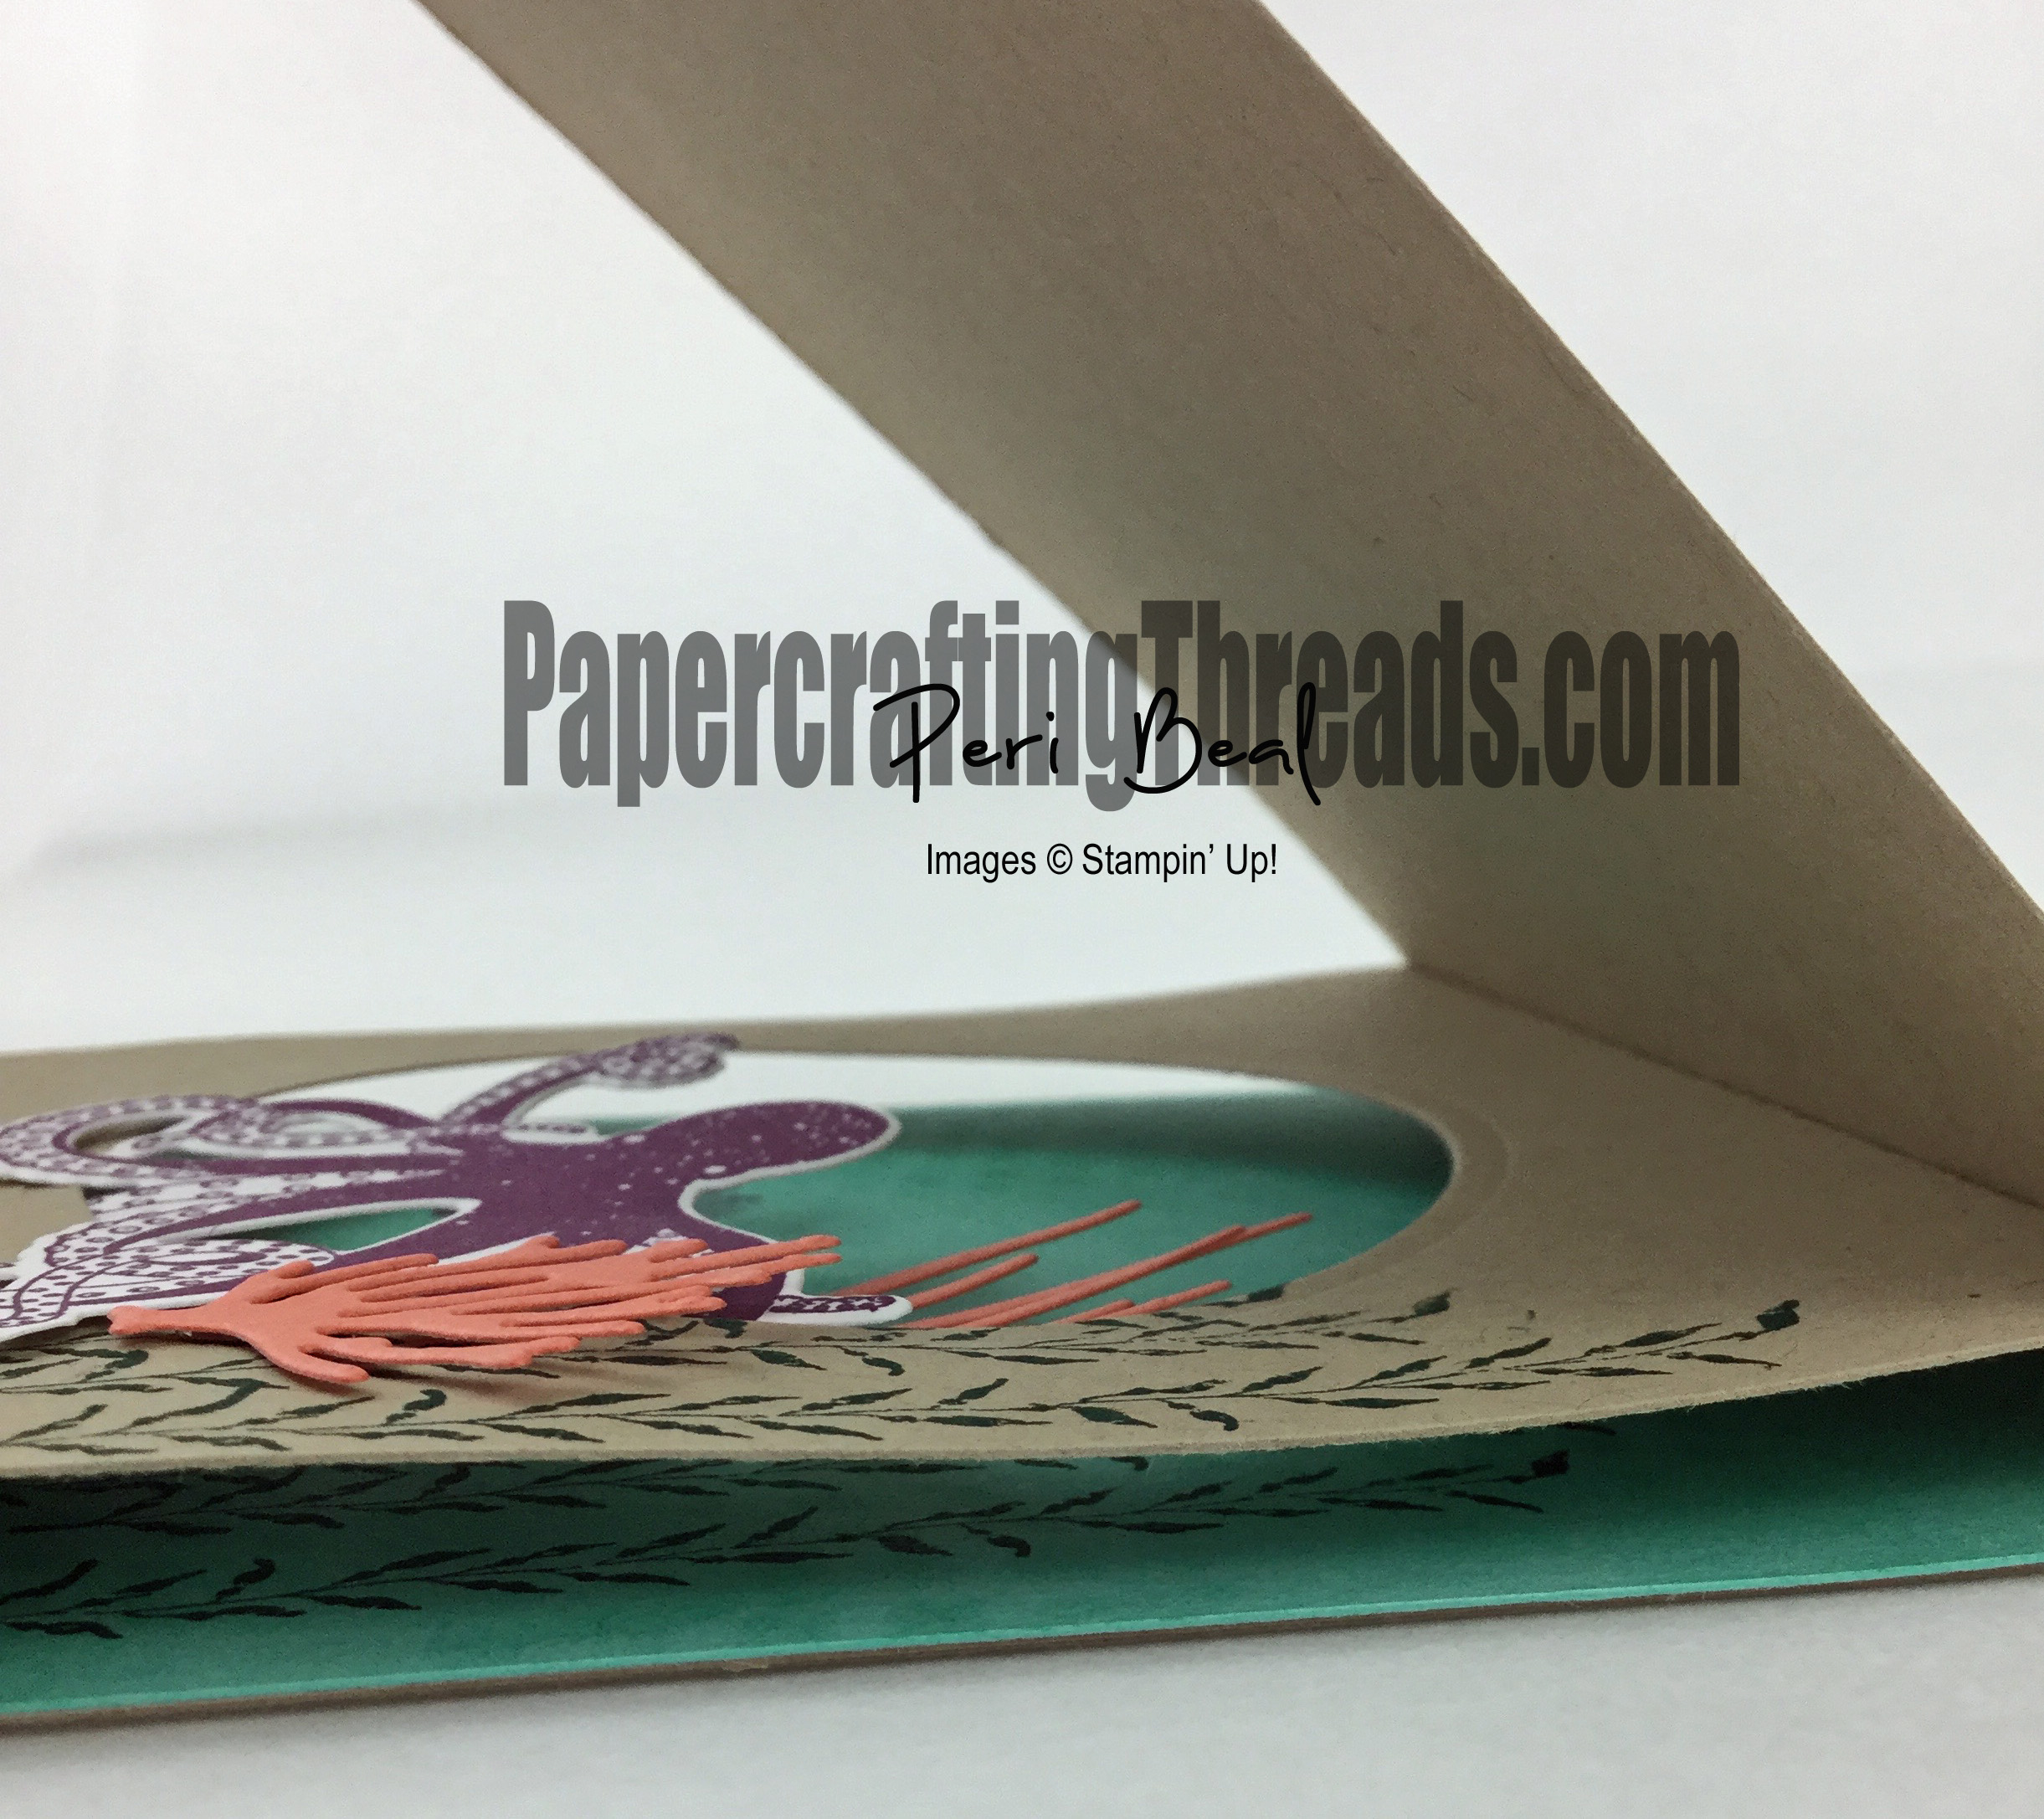
Add Tear N’ Tape to the small 1/2″ flap of the mechanism. Die cut a 2 7/8″ circle in the panel below the 1/2″ taped flap.

Open the base, place the mechanism inside with the adhesive edge lined up with the score line and close the card. One side of the mechanism should now be adhered to the base of the card.

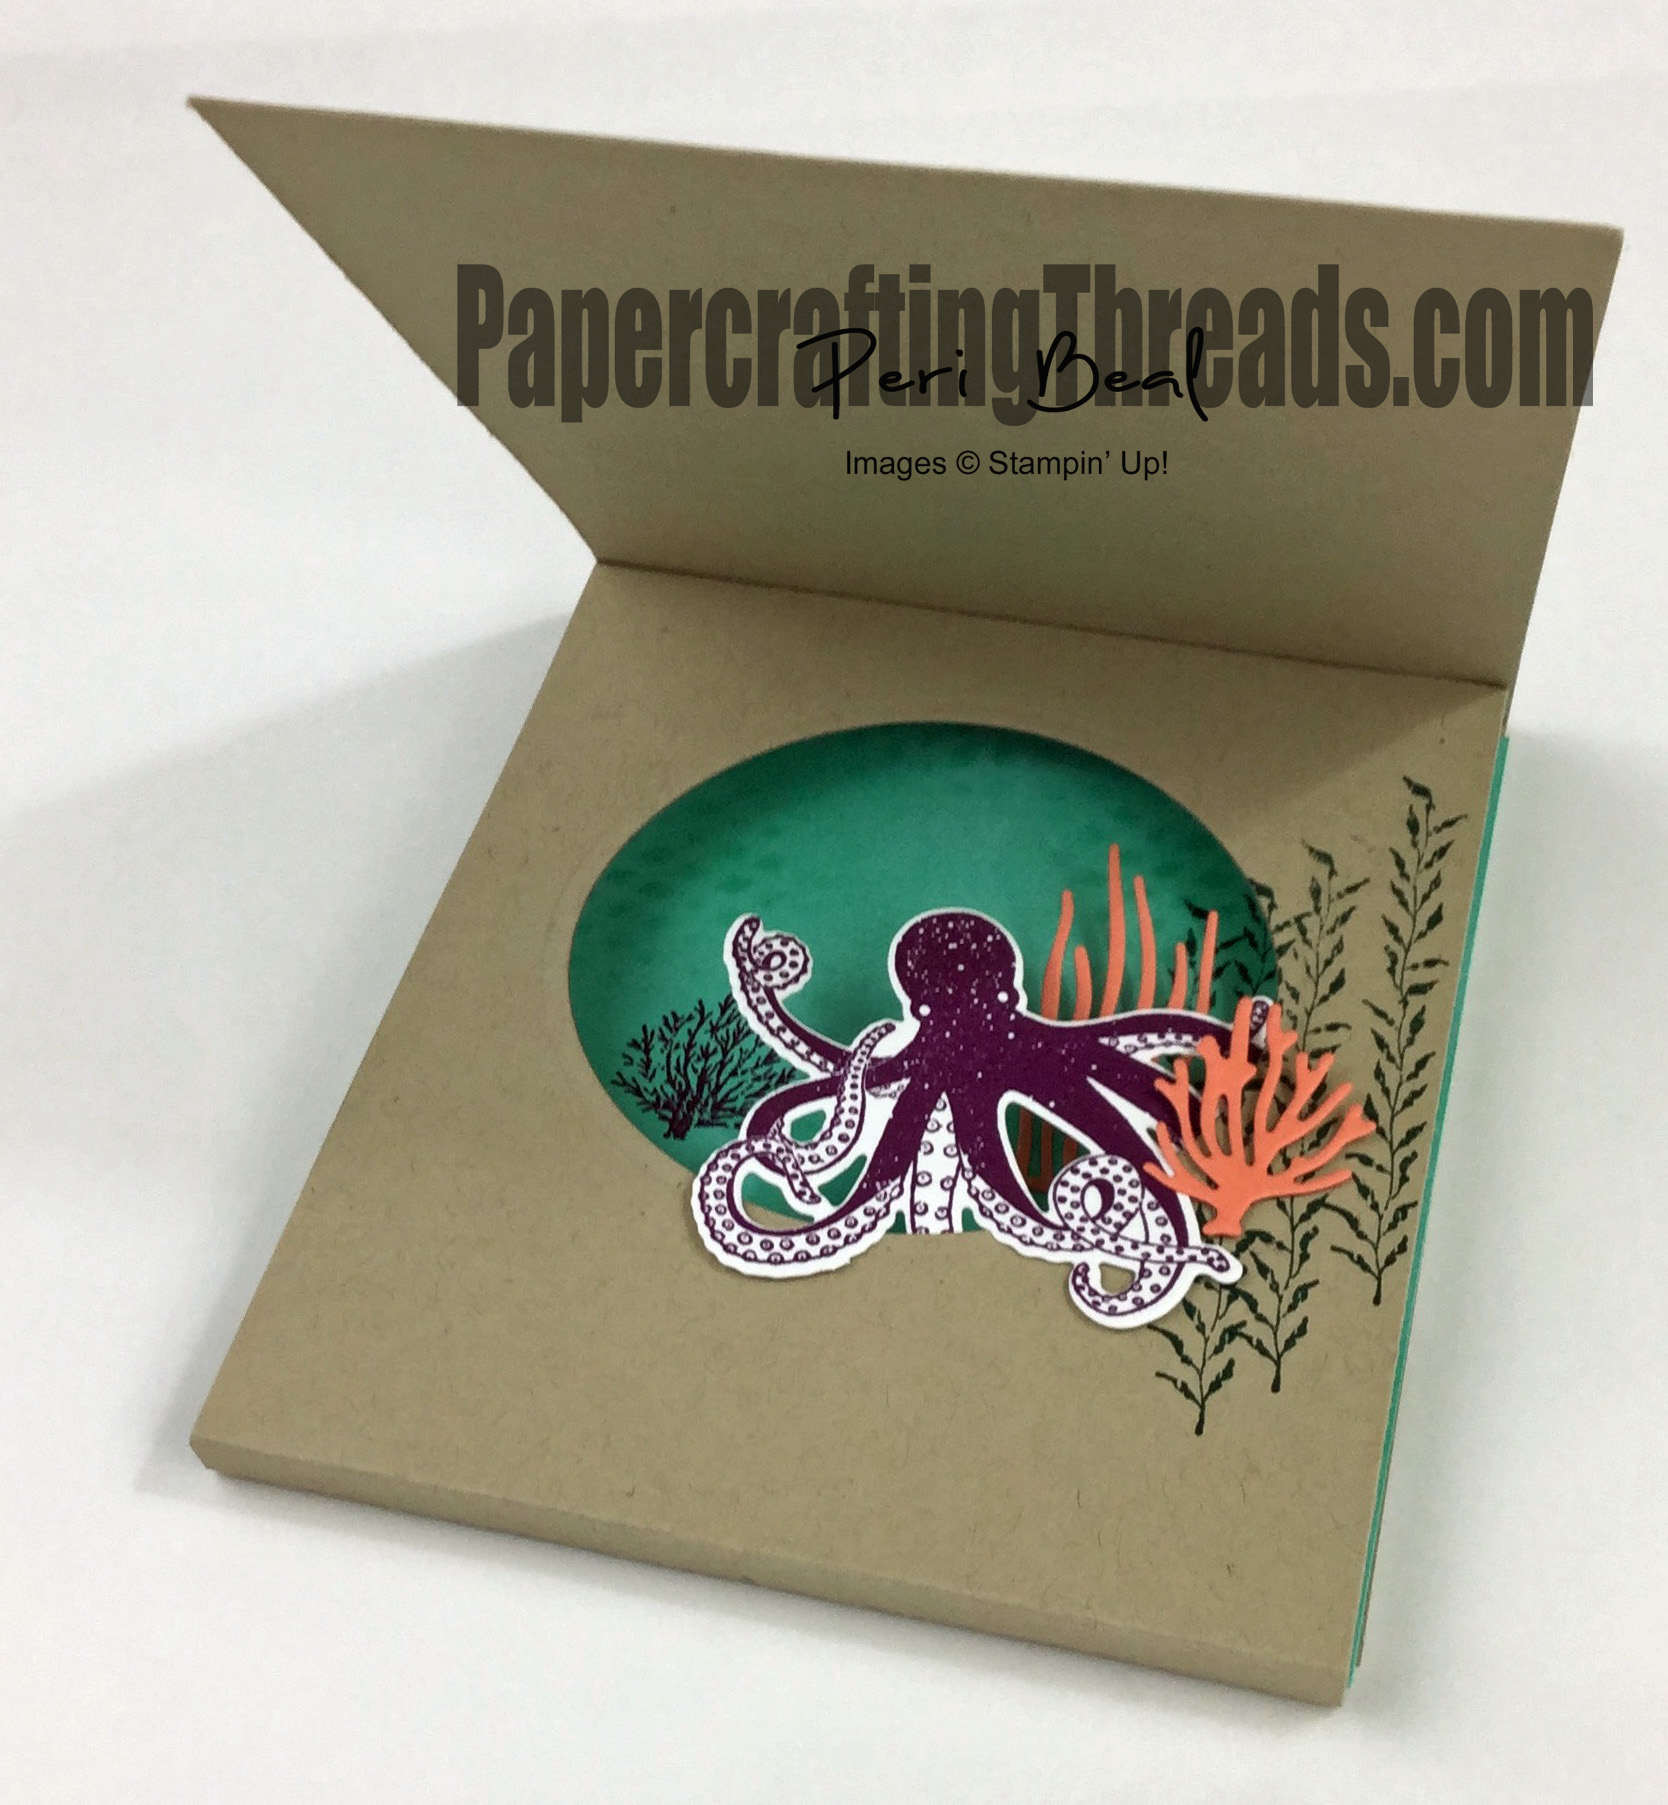
Ink the vegetation on the Coastal Cabana piece so it shows through the cut out circle. Stamp vegetation around the outside of the circle.

Stamp and die cut the octopus. Cut slits between the arms, and place octopus half in and half out of the circle, adhering with glue dots. Die cut the coral pieces and place some behind and in front of the octopus, adhering with glue dots.

Inside Shadow Box

Adhere the back flap of the mechanism to the back of the card base. And there you go – you have just created an Inside Shadow Box card that folds flat for mailing.

Inside Shadow Box

Order your Supplies today:


Sea Of Textures Clear-Mount Bundle
$45.00

Tabs For Everything Photopolymer Stamp Set
$17.00

Layering Circle Framelits Dies
$35.00

Blackberry Bliss Classic Stampin’ Pad
$7.50

Grapefruit Grove Classic Stampin’ Pad
$7.50

Tranquil Tide Classic Stampin’ Pad
$7.50

Coastal Cabana Classic Stampin’ Pad
$7.50

Crumb Cake Classic Stampin’ Pad
$7.50

Coastal Cabana 8-1/2″ X 11″ Cardstock
$8.50

Crumb Cake 8-1/2″ X 11″ Cardstock
$8.50

Grapefruit Grove 8-1/2″ X 11″ Cardstock
$8.50

Big Shot
$110.00
Share:

Leave a Comment
see more related posts: 3D Projects

Previous Post: « No More Sticky Mess with the Silicone Craft Sheet
Next Post: Holiday Catalog 2018 is Live! »

Reader Interactions

Leave a Reply Cancel reply

Your email address will not be published. Required fields are marked *

Primary Sidebar

Peri Beal

Cheesehead. Avid reader. Antique hunter.

Shop Online

Shop with me and get a FREE PDF tutorial bundle delivered to your inbox AND a handmade card via snail mail

Search

Papercrafting Threads

Gift Certificates
  • Email
  • Facebook
  • Instagram
  • Pinterest
  • YouTube

Sign up for my Newsletter

Sign up for my newsletter and get a free PDF tutorial as my welcome thank you!

Almost there...

Please check your email to confirm your subscription

Retired Product
Privacy Policy

The Fine Print

Just so you know... This is a personal website and I am responsible for its content. Stampin' Up!® does not endorse the use of or contents of the classes, services, or non-Stampin' Up! products I offer.

Sign up for my Newsletter

Sign up for my newsletter and get a free PDF tutorial as my welcome thank you!

Almost there...

Please check your email to confirm your subscription

Footer

  • Calendar of Events
  • 3D Projects
  • Cardmaking
  • Fun Fold
  • Product Tips & Tricks
  • Projects
  • Techniques
  • Of Interest
  • Catalogs
  • Join the Fun
  • Contact Me
  • Email
  • Facebook
  • Instagram
  • Pinterest
  • YouTube

PAPERCRAFTING THREADS

Copyright © 2025 · Refined theme customized by Catherine Carroll

Privacy Policy · Affiliate Disclosure