
I’m having a blast with the Waves of Inspiration stamp set, using ink blending to color different scenes. I’ve got a few tips for you to try this coloring technique. To start off my scene, I used the emboss resist technique for the wave. To emboss resist, add Versamark ink to your stamp, stamp the image, sprinkle with white embossing powder and heat set.
Ink blending tip #1
Work from lightest to darkest. Open all of your ink pads and lay them out in the order you intend to work, usually this means from lightest to darkest. For my wave, I began with Pool Party. Then I moved on to Bermuda Bay, Pacific Point and Night of Navy.
blending Tip #2
Swirl off on scrap paper every time the brush is loaded. Once I loaded a blending brush with Pool Party ink, I swirled it on scrap paper a few times before applying it to the wave. Swirling on scrap paper keeps blobs of intense ink off your project. I did this every time I loaded the blending brush, even when I was loading the same color.
inking Tip #3
Add layers of ink. I swirled Pool Party over the entire wave, reloaded and swirled again. Then I swirled Bermuda Bay over parts of the wave. Next I added a bit of Pacific Point mostly in the center of the wave. And last, I swirled a tiny bit of Night of Navy in the center.
ink blending tip #4
Go back over the blended image with the lightest color. Once I had all the layers done, I loaded a blending brush with Pool Party and went over the entire wage image again. This pulls all of the colors together as well as removes some of the darker ink from the embossed image, making the wave stand out more.
Once I had the wave done, I stamped the full moon from the To the Moon stamp set in Pale Papaya ink. Then I stamped the moon again on thin copy paper and cut it out. I used the cut out to mask the moon while I ink blended the night sky.
Inking tip #5
Use one or two of the same ink colors. Since both the wave and sky had blue in them, I used two of the wave colors on the sky. Doing this makes sure the two don’t clash. Again, I started with the lightest color, in this case Pacific Point and worked up to Night of Navy and Blackberry Bliss.
Finally I was ready to add some stars to the night sky. I tried using white craft ink, but that just absorbed and disappeared. A white gel pen was too precise, I wanted scattered stars. I ended up putting a drop off Dr. Ph Martin’s Bleed Proof White on a plastic lid and spritzing it with water to thin it. Then I used a stencil brush, picked up some the white, and flicked it onto the sky.
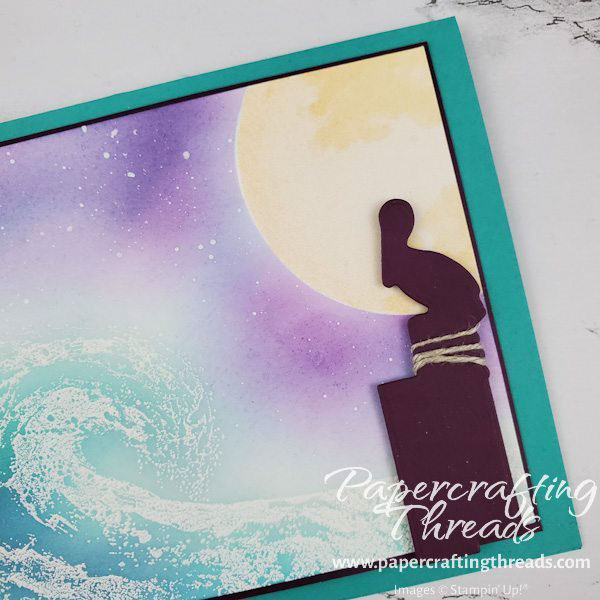
I mounted the wave scene on a piece of Blackberry Bliss cardstock and added the entire panel to a Bermuda Bay cardstock base. And to cap off my moonlit scene, I added a diecut pelican silhouette in Blackberry Bliss.
And there you have it – a gorgeous beachy moonlit scene! I hope you find these ink blending tips useful for coloring your own images. Order ink blending brushes in my online store anytime.
If you liked this post, you may also like this card making technique.

Leave a Reply