Papercrafting Threads

  • Tutorials
    • PDF Tutorials
    • 3D Projects
    • Cardmaking
    • Fun Fold
    • Product Tips & Tricks
    • Projects
    • Techniques
  • Catalogs
  • Shop & Specials
    • Shop My Stampin’ Up! Online Store
    • Special Offers
    • Buy Me A Coffee
    • My Favorite Things on Amazon
    • Gift Certificates
  • Contact Me
  • Join the Fun
    • Join the Fun
    • Special Join Offers
  • Calendar of Events
  • Paper Pumpkin
    • Paper Pumpkin Kits
    • Paper Pumpkin Stamp Case Inserts
  • Nav Social Menu

    • Email
    • Facebook
    • Instagram
    • Pinterest
    • YouTube

Easy Mirror Image Stamping

May 21, 2022 Leave a Comment

21 May
Easy Mirror Image Stamping example with multiple beer mugs and pilsner glasses on a diamond flip fold card in blue, yellows and white

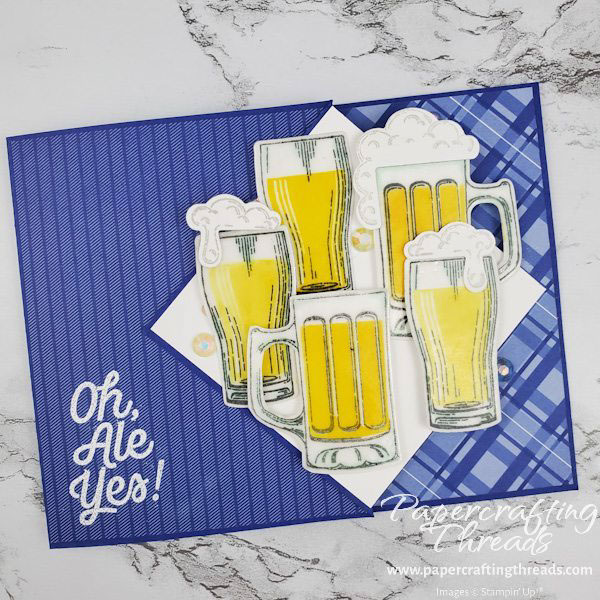
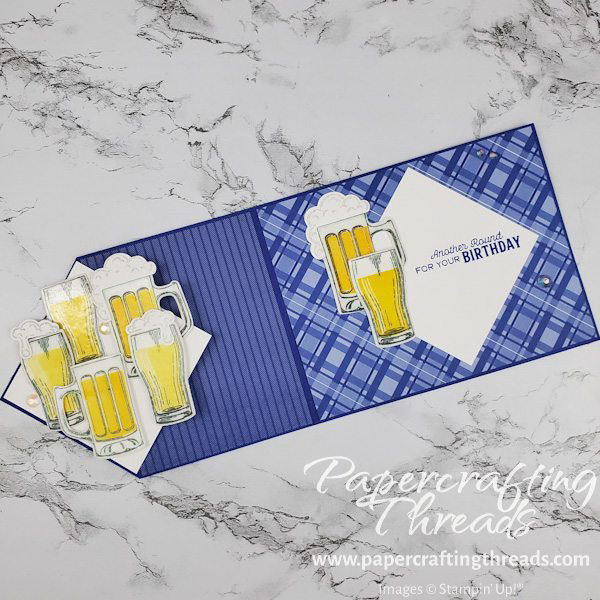
Expand your stamp collection for free with this Easy Mirror Image Stamping technique. Transform images that face left into right-facing images! On my sample above, I created a right facing mug and left facing foam on a pilsner glass of ale. Read on for the how-to.

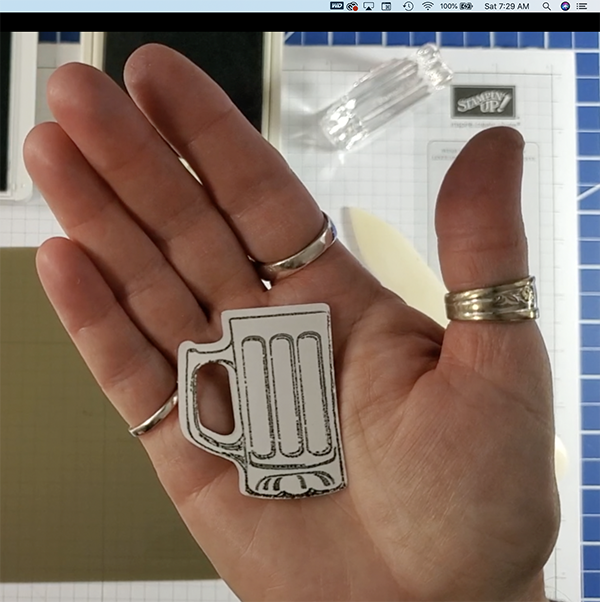
Diecut the chosen image(s) first. Have you ever noticed that diecuts have a right side and a ‘bad’ side? The reverse side of a diecut usually has bumps and ridges, and the older the cutting plates the worse it seems to be. But, these bumps can be flattened to make the reverse side useable. Just turn the diecut face down and rub over the ridges with a bone folder. TIP: Placing the diecut on a padded surface can help. I’ve used a pad of paper underneath for a little give. Once the diecut is ready, it’s time to stamp.

Bone Folder being used to rub out ridges on backside of diecut mug shape and beer foam shape

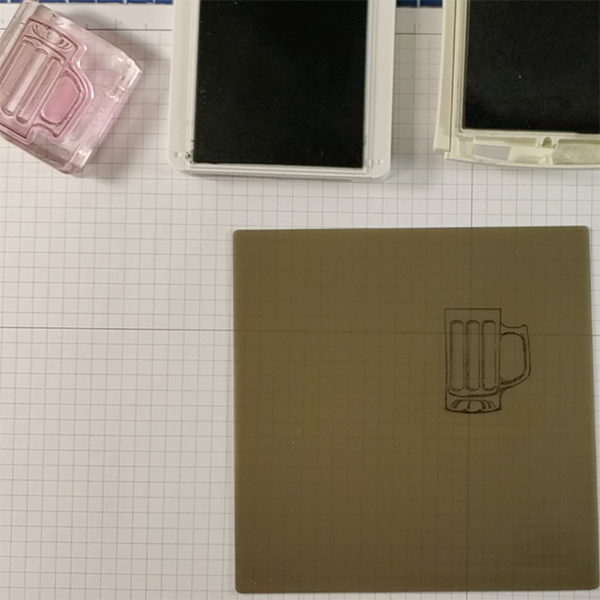
The Silicone Craft Sheet is the star of this show. Make sure the craft sheet is clean and on a flat surface in front of you. Stamp the image(s) in regular classic (water-based) ink directly on the craft sheet.

Mirror image of beer mug stamped in classic ink on Silicone Craft Sheet

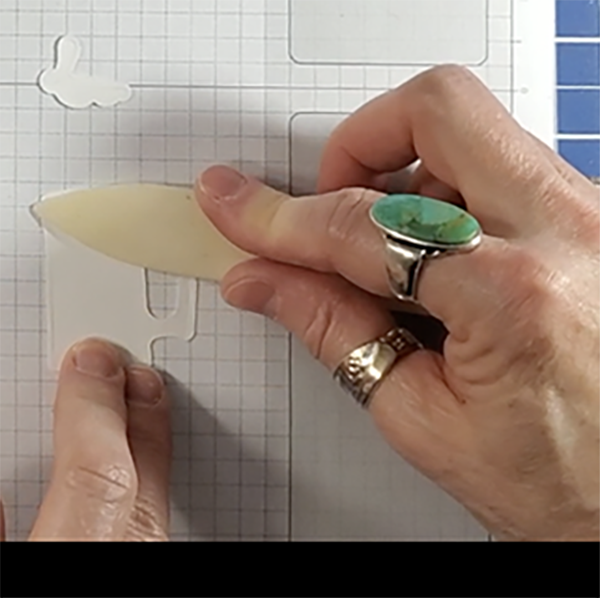
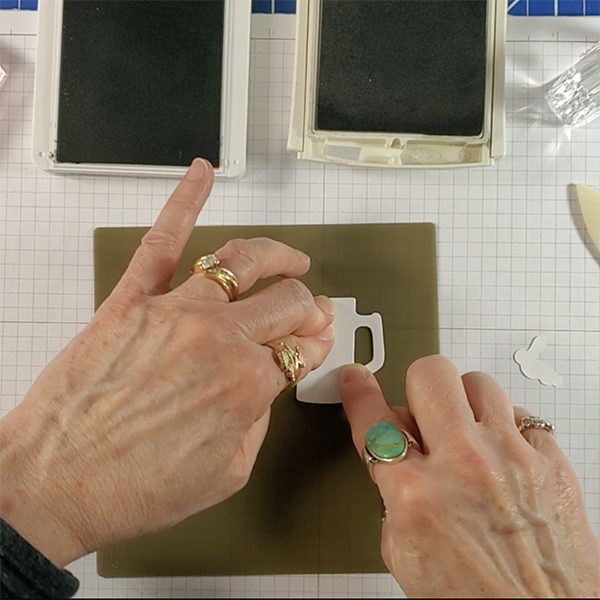
Then place the diecut right side up over the stamped image and rub with your finger to transfer the ink. Rub a little longer than you think is necessary to be sure to pick up all the ink.

Rubbing ink from Silicone Craft Sheet onto back of diecut for mirror image

Turn the diecut over and voilà, the image is now mirrored on the diecut!!

Closeup of Mirror Image Stamping with beer mug

This method can be used to mirror image any stamp image, with or without a diecut. If you’re not using a diecut, just press and rub a piece of cardstock over the mirrored image.

Mirror image card

I featured several mirror images on the Diamond Flip Fold Card I made. I varied the ink intensity, the direction the mugs were facing, and even the orientation of the foam on the pilsner glasses, creating more interest on the card front. And I double-embossed all of the glassware to make them really look like glass.

Paper DimensionsScore Long SideShorg Side Tic Mark
4-1/4″ x 11″ cardstock base2-1/8″ x 5-1/2″2-1/8″
2-7/8″ x 2-7/8″ Basic White image front
3-1/4″ x 4-1/8″ patterned paper left front
4-1/8″ x 5-3/8″ patterned paper inside right
4-1/8″ x 3-1/4″ patterned paper inside left
2-3/4″ x 2-3/4″ Basic White sentiment layer
Scoring Guide for Easy Mirror Imaging Card

Diamond Flip Fold Card open to show beer mugs and pilsner glasses on the front and the birthday greeting inside

Check out my YouTube video showing the mirror image technique, as well as how to make the mugs and pilsners look like real glass. And there’s even a demonstration of how to make the Diamond Flip Fold card base.

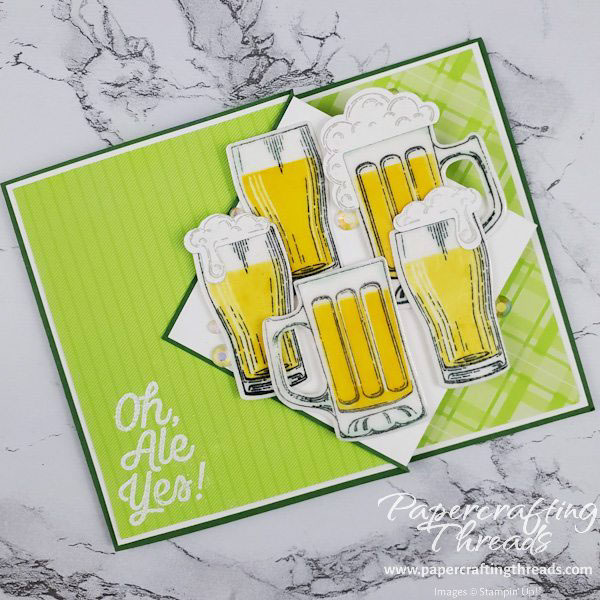
And last but not least, I made a Parakeet Party green version — which is your favorite? Let me know in the comments!

Share:

Leave a Comment
see more related posts: Fun Fold

Previous Post: « Easy Note Card Holder Tutorial
Next Post: Paper Pumpkin Alternatives May 2022 »

Reader Interactions

Leave a Reply Cancel reply

Your email address will not be published. Required fields are marked *

Primary Sidebar

Peri Beal

Cheesehead. Avid reader. Antique hunter.

Shop Online

Shop with me and get a FREE PDF tutorial bundle delivered to your inbox AND a handmade card via snail mail

Search

Papercrafting Threads

Gift Certificates
  • Email
  • Facebook
  • Instagram
  • Pinterest
  • YouTube

Sign up for my Newsletter

Sign up for my newsletter and get a free PDF tutorial as my welcome thank you!

Almost there...

Please check your email to confirm your subscription

Retired Product
Privacy Policy

The Fine Print

Just so you know... This is a personal website and I am responsible for its content. Stampin' Up!® does not endorse the use of or contents of the classes, services, or non-Stampin' Up! products I offer.

Sign up for my Newsletter

Sign up for my newsletter and get a free PDF tutorial as my welcome thank you!

Almost there...

Please check your email to confirm your subscription

Footer

  • Calendar of Events
  • 3D Projects
  • Cardmaking
  • Fun Fold
  • Product Tips & Tricks
  • Projects
  • Techniques
  • Of Interest
  • Catalogs
  • Join the Fun
  • Contact Me
  • Email
  • Facebook
  • Instagram
  • Pinterest
  • YouTube

PAPERCRAFTING THREADS

Copyright © 2025 · Refined theme customized by Catherine Carroll

Privacy Policy · Affiliate Disclosure