
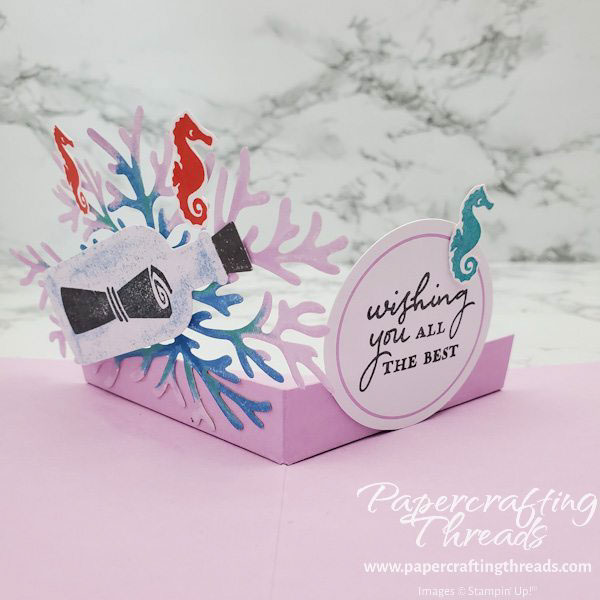
Create this under the sea themed Paper Pumpkin Alternative July 2022 with a surprise pop up inside. All you need besides the Paper Pumpkin kit is a few extra pieces of cardstock, ink and blending brushes.
cutting & scoring
| Paper Dimensions | Score Short Side | Score Long Side | ||
| 5-1/2″ x 8-1/2″ Fresh Freesia cardstock base | 4-1/4″ | |||
| 1″ x 5-1/4″ Fresh Freesia cardstock mechanism | 3/8″ | 2-5/8″ | ||
| 3-1/4″ x 5-1/2″ Basic White cardstock | ||||
| Scrap of Basic White |
Step by step instructions
Add Pacific Point ink to a piece of Basic White cardstock 3-1/4” x 5-1/2” with a blending brush. I blended the ink so the top was lighter than the bottom.
Next, using the splatters 3D embossing folder with the logo side up, insert the inked cardstock with the blue side on top and run it through the Mini Cut & Emboss machine. The splatters will look like an under water scene.
Stamp multiples of the seaweed image and sand image from the kit in Pacific Point ink right over the embossed surface in clumps as shown on my sample. Stamp the ‘sand” image over the starfish diecut from the kit.
I used Basic Gray ink for my message in a bottle using the kit’s stamp and diecut. And again for my sentiment, ‘Wishing you all the best’ on the circle diecut from the kit.
I didn’t want a Poppy Parade seahorse, so I flipped the kit diecut image over and covered it with Fresh Freesia ink using a Blending Brush. I created an ombre effect with the head being lighter and the tail darker. Then I used the tiny seahorse stamp and created some stamped seahorses in Poppy Parade and Bermuda Bay ink on a scrap of Basic White cardstock. Then I fussy cut the little seahorses.
PRO TIP: Move the paper not the paper snips when fussy cutting stamped images.
For the fun surprise inside my card, I cut a pop up mechanism 1” x 5-1/4” from Fresh Freesia cardstock. Score the short edge at 3/8”. Score the long edge at 2-5/8”. Fold in half and snip from the 3/8” score line at an angle.
putting the Paper pumpkin alternative July 2022 together
Add dimensionals to the back of the embossed underwater piece and center it on the front of the Fresh Freesia card base. Add glue dots from the kit to the back of the Poppy Parade coral and adhere on top. Use a drop of Multipurpose glue on the back of the starfish and place it on top of the coral. Cut up dimensionals to fit on the back of the seahorse and adhere the seahorse to the right side of the coral.
Check out this YouTube video for a visual.
Fold all the score lines on the mechanism and add double sided sticky tape to the 3/8” tabs. Open the card base.
Remove the backings and fold the mechanism in half. Line up the angled cut with the score line in the center of the card. Press down to lightly adhere and then close the front flap.
To adhere the Pacific Point/Fresh Freesia coral, position the coral on the left raised edge or lip of the mechanism. Then lay the coral face down and add tiny dots of multipurpose glue to the lower portion. Press the raised edge down gently and close the card. If any glue gets on the inside of the card, rub it away now.
Add glue dots to the back of the bottle and adhere the bottle on top of the coral at an angle. Use glue dots on the bottom section of the greeting and adhere the circle to the right side of the mechanism. Add a glue dot to the back of each fussy cut seahorse and adhere to the sentiment and the coral.
Carefully close the card to make sure the mechanism works and doesn’t catch. Now it should open and close easily.
I also stamped the multiple starfish image and the mini seahorse in Versamark ink on the lower right corner inside the card.

I really adore this sea-themed Paper Pumpkin kit and have a bunch more ideas. If you’d like to subscribe to next month’s kit, click here. I’d love to be your Stampin’ Up! demo.

Leave a Reply