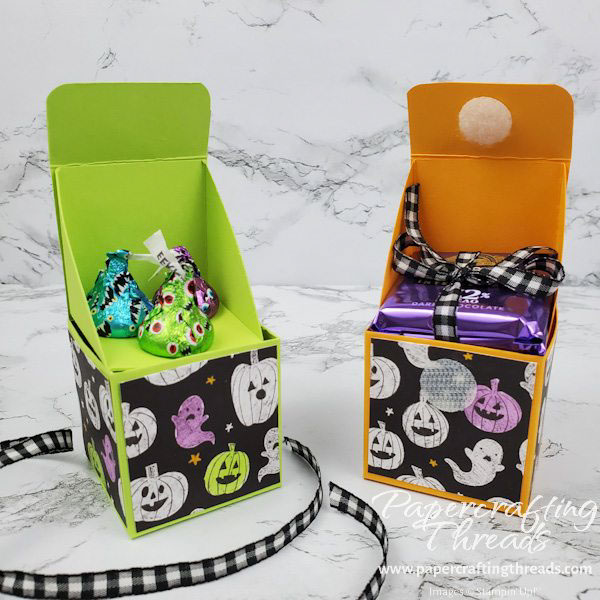
Instead of choosing between a trick or a treat, get both a trick and a treat with my Lift and Reveal Halloween Treat Box! I’ve made two versions with different Halloween candy so choose your favorite and let’s begin!
scoring & cutting guide
| Paper Dimensions | Score Short Side | Score Long Side | ||
| 7″ x 8-1/2″ Parakeet Party cardstock for box | 2″, 4″ and 6″ | 2″, 4″, 6″ and 8″ | ||
| 3-3/4″ x 5-5/8″ Parakeet Party cardstock for shelf | 1-7/8″ | Both ends at 1-7/8″ | ||
| 1-7/8″ x 1-7/8″ patterned paper (5 pieces) | ||||
| 7/8″ x 1-7/8″ patterned paper (landscape) | ||||
| Scrap of Mango Melody cardstock (for sentiment) |
assemble the cube
Starting with the largest piece, fold and burnish all score lines in the same direction. Holding the piece with the half inch score line at the bottom and the one inch score line on the right, cut on the top score line over to the 2nd score line. Fold back the tab just cut, place the piece on a paper trimmer and cut away everything to the right of the 2nd vertical scoreline.
PRO TIP: You can also use your scissors but if you’re making multiples, the trimmer is faster.
Miter cut the right ½” tab and trim away the left ½” tab.
Now working from right to left, cut on the scoreline from the edge to the first horizontal scoreline three times. Then turn the piece 90 degrees so the flaps are all on the right, and fold back the bottom flap and the 2nd from top flap. The piece should look like an “F” with a tail trailing off to the left. Line up the folded edge to the 1” mark and slice the two remaining flaps in half.
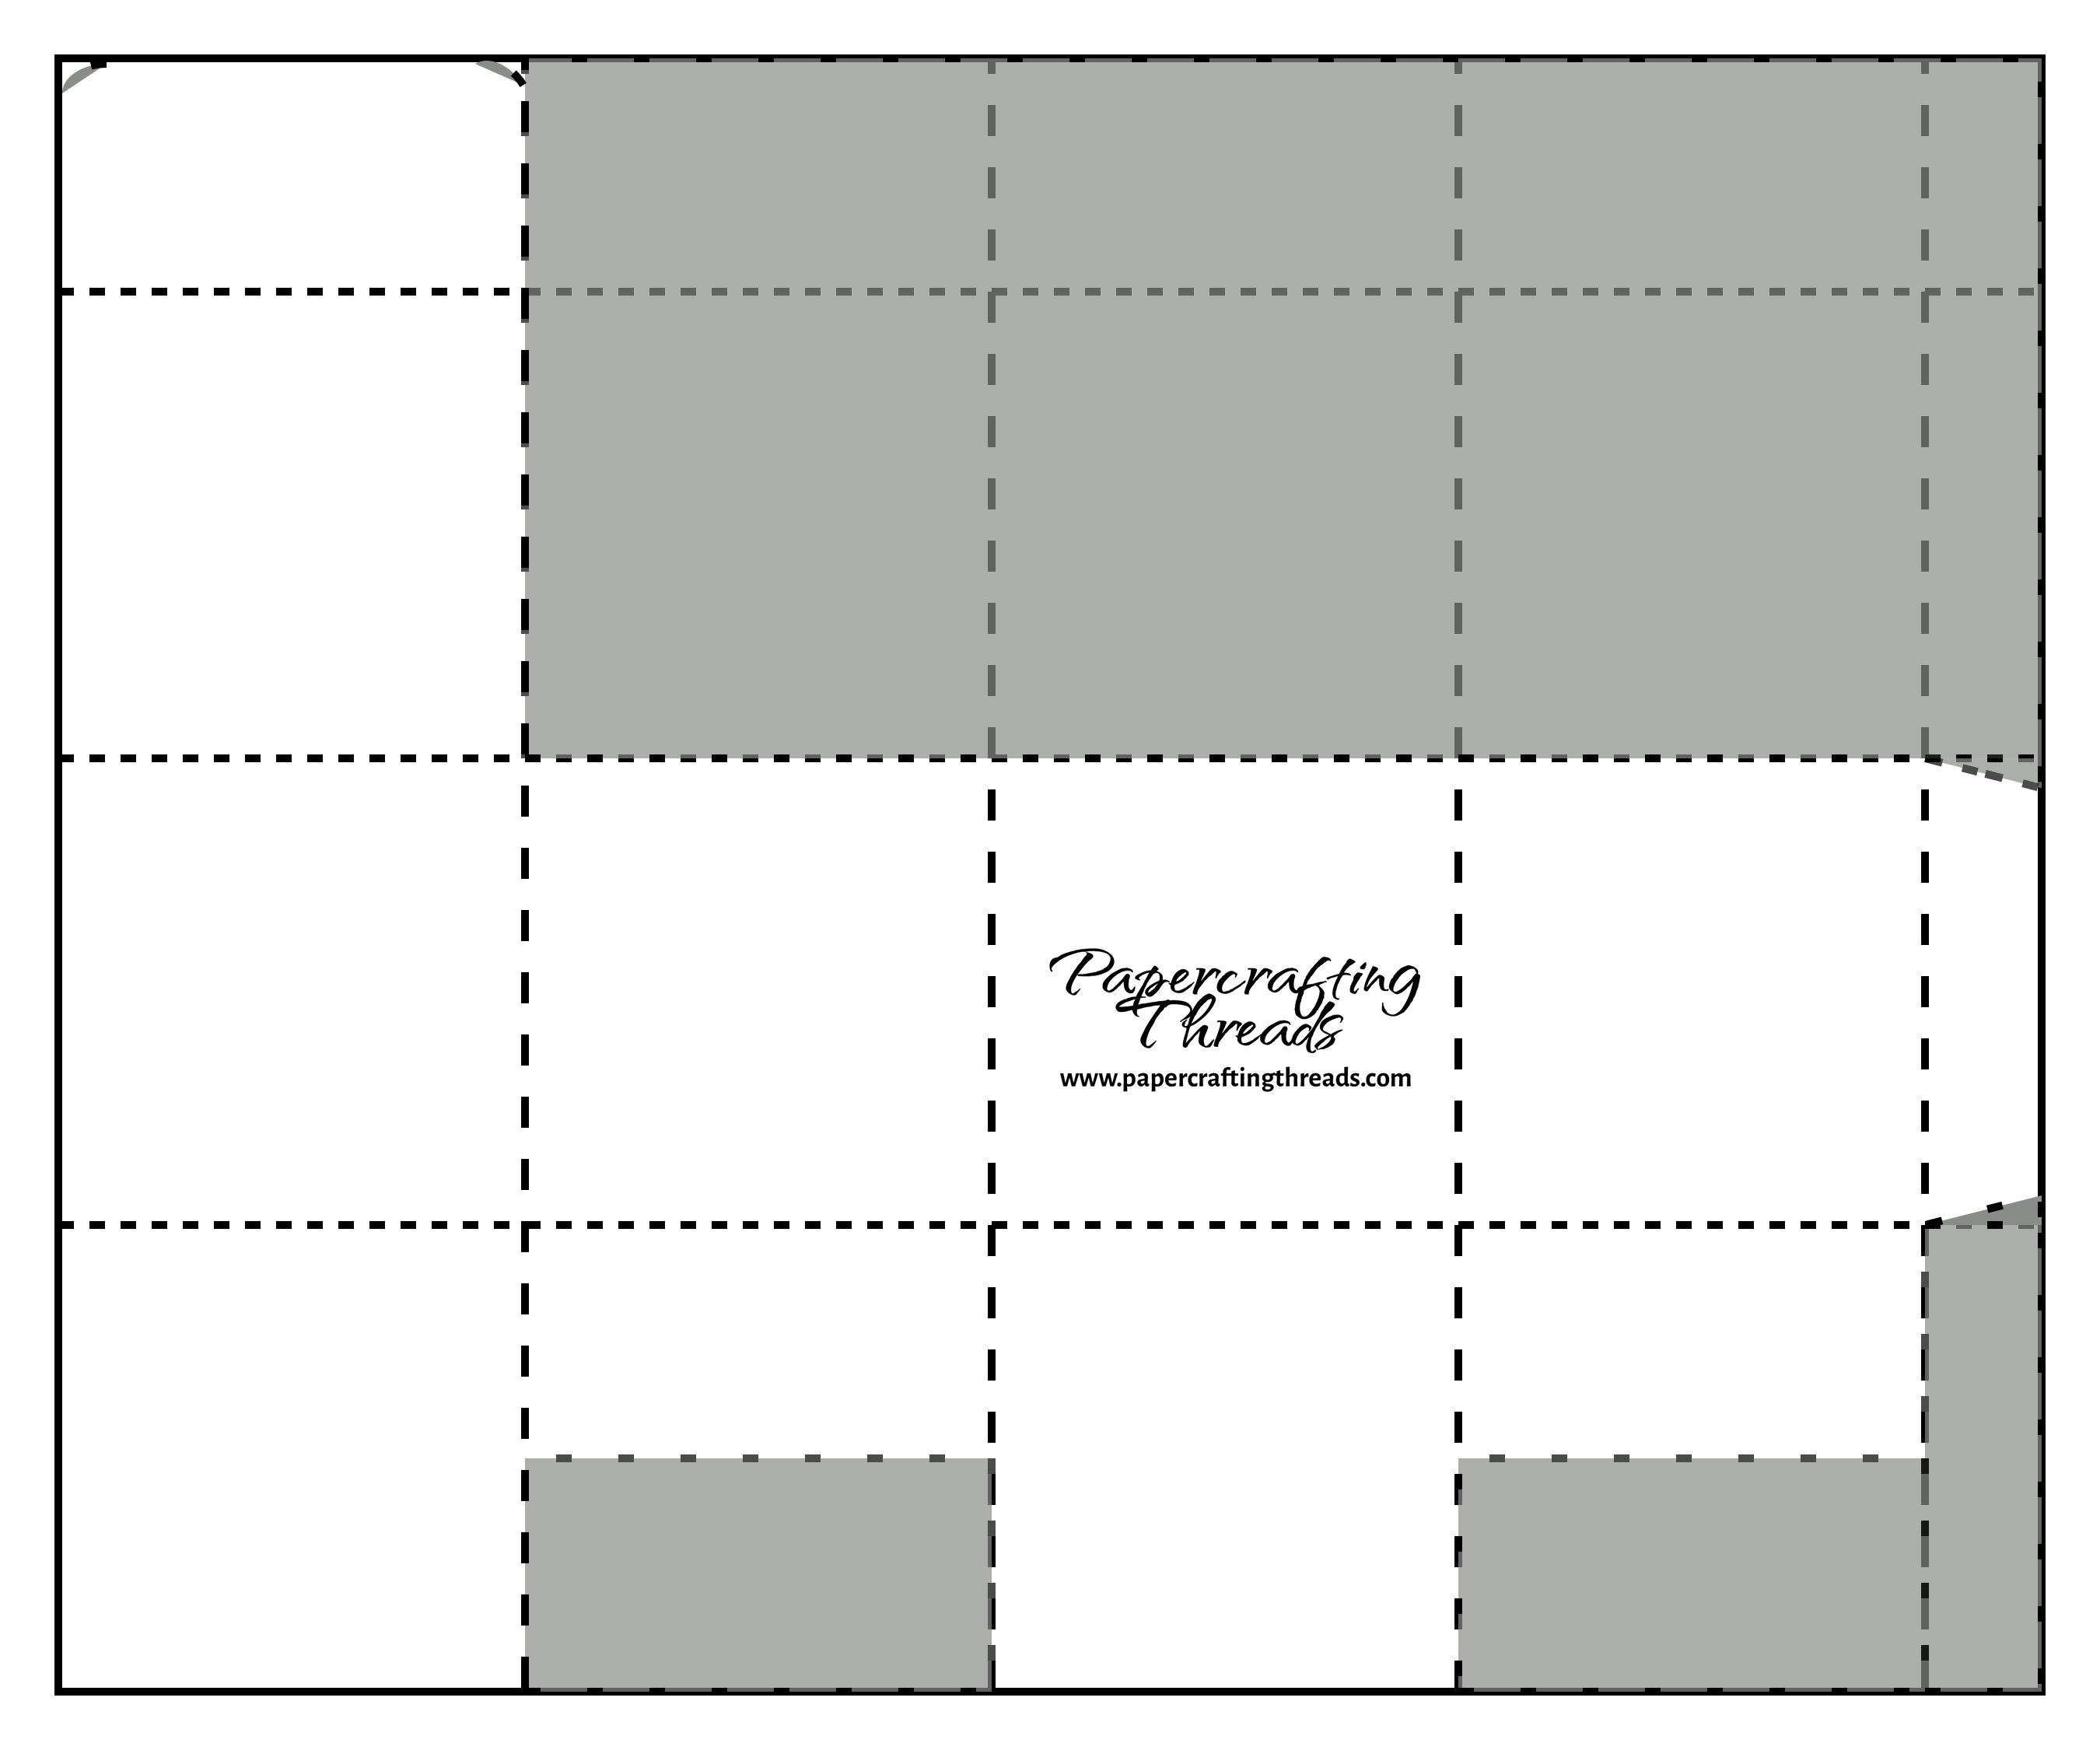
Next, use a corner rounder or your scissors to round the longest flap corners. Lay the piece down so the folds are all valley folds. Fold the 2” section with the half inch flap flat. Apply liquid glue to the flap and fold the long side over to meet the edge. Then press and hold while the glue sets.
Working with the bottom flaps, fold in the two short flaps and add liquid glue. Fold over the back flap. Apply liquid glue to the front flap and fold over, squaring up the box bottom as you go. Press the glue bottle to the inside to firmly adhere the bottom flaps.
Then adhere the five patterned paper pieces to the box sides and top flap. I chose the pumpkin pattern from the Celebrate Everything DSP pack and I used Parakeet Party and Fresh Freesia Blends to color in some of the pumpkins and ghosts. Finish off by rounding the lower corners of the patterned piece for the flap before adhering. Set aside.
assemble the shelf FOR LIFT & REVEAL TREAT BOX
Now fold and burnish all score lines in the same direction on the remaining piece of cardstock. Holding the piece in landscape position, cut just inside the score line. Fold back the center flap, line up the folded edge with the half-inch mark and cut. Align the top right scoreline and pivot the bottom horizontal scoreline along the cutting groove and cut on the diagonal. Repeat on the other side. To reduce bulk, miter the two small flaps.
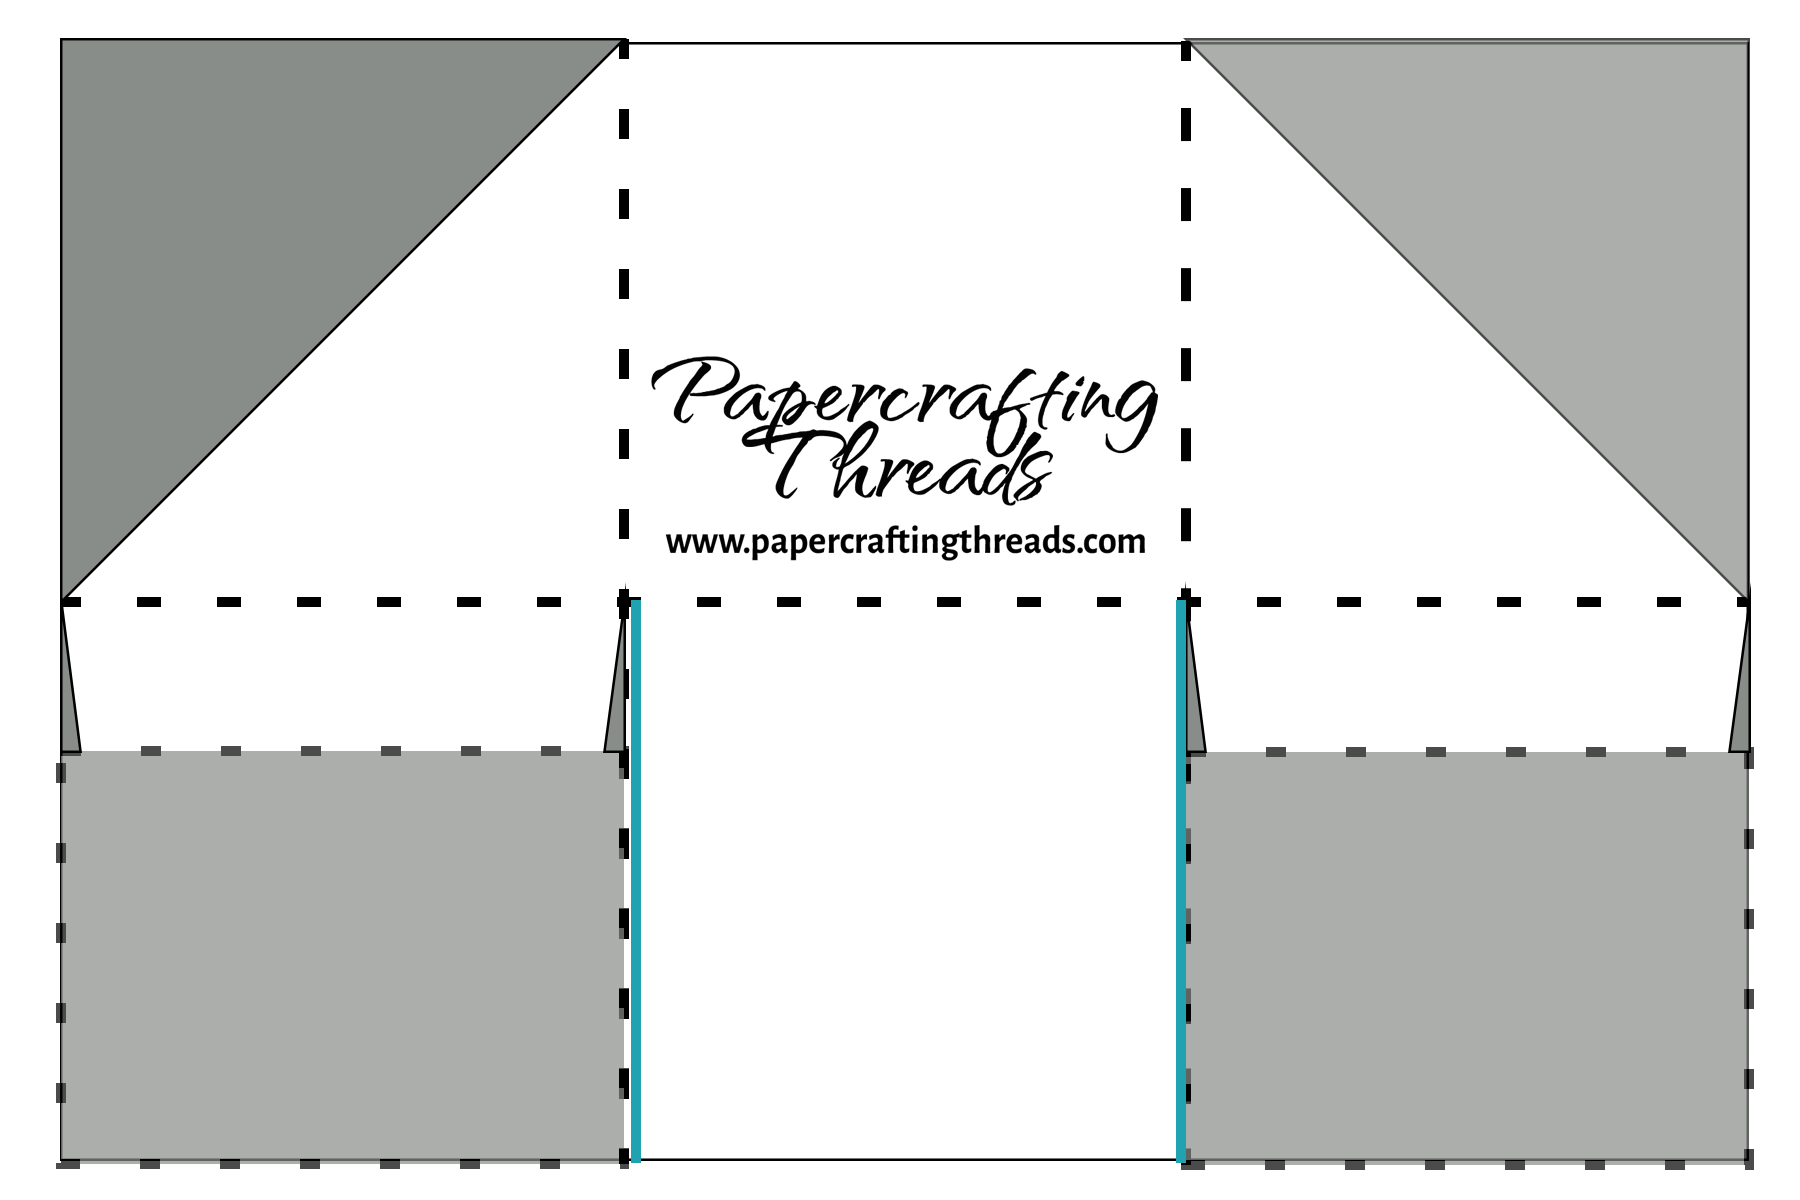
Add glue to one of the flaps, folding and tucking it under the base of the shelf. Repeat on the other side.
Next, apply glue dots to the bottoms of Hershey’s kisses and arrange on the shelf. Place the cube on its back with the top open. Apply glue to the back of the shelf. Position on the back lid of the cube, leaving 1/16th of an inch clearance on the sides.
And lastly, tie a length of ribbon around the top edge of the cube to hold the flap in place. Add narrow strips of Mango Melody cardstock stamped with Happy Halloween to finish decorating the top.
Lift & Reveal Halloween Treat Box version 2
For version two, make the cube and the shelf the same way as version one. To add flat packaged candy, use an 1/8” hole punch and punch two holes in the base of the shelf. Thread ribbon through the two holes, making sure the ribbon is flat on the bottom of the shelf. Stack two Ghiradelli chocolates with the wrapper ends tucked in and tie the ribbon in a bow to secure the treats.
Then glue the mitered flaps to the bottom of the shelf, just as in version one. And just as in the first version, glue the back of the shelf to the back of the lid. Add an adhesive Velcro dot to the flap and front of the cube. Decorate the top.
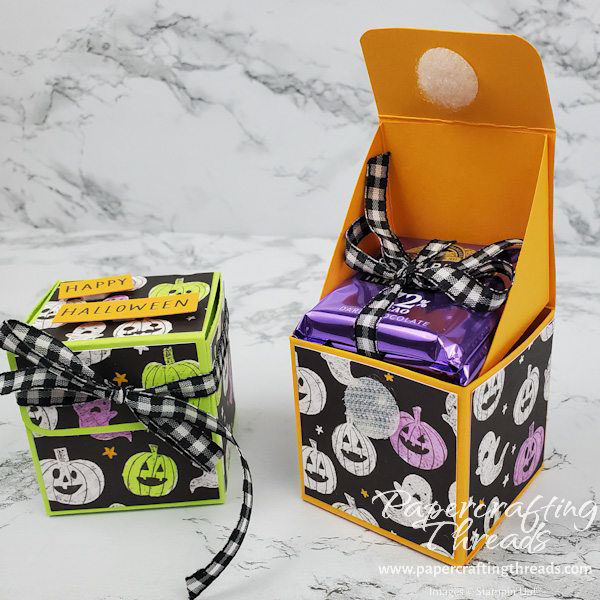
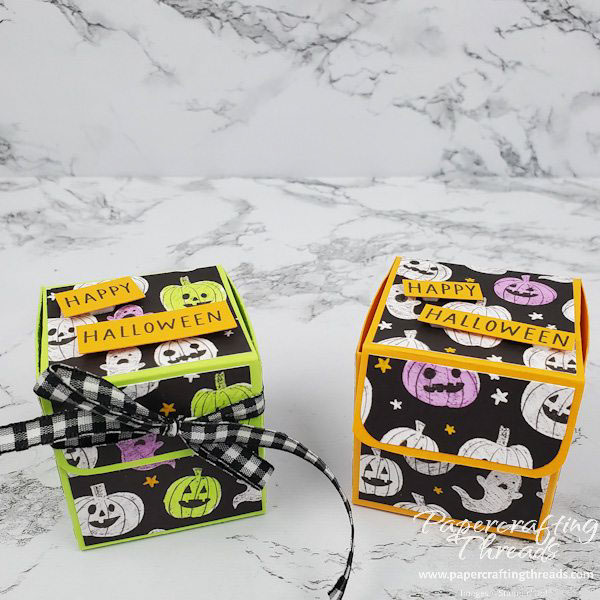
What other treats will you fill your Lift and Reveal Halloween Treat Boxes with? The finished size of the box is 2″ x 2″ 2″. I think miniature Hershey nuggets would work with either version. A silver dollar would fit for a Christmas-themed version.
Check out the YouTube video for a visual tutorial.

Leave a Reply