Papercrafting Threads

  • Tutorials
    • PDF Tutorials
    • 3D Projects
    • Cardmaking
    • Fun Fold
    • Product Tips & Tricks
    • Projects
    • Techniques
  • Catalogs
  • Shop & Specials
    • Shop My Stampin’ Up! Online Store
    • Special Offers
    • Buy Me A Coffee
    • My Favorite Things on Amazon
    • Gift Certificates
  • Contact Me
  • Join the Fun
    • Join the Fun
    • Special Join Offers
  • Calendar of Events
  • Paper Pumpkin
    • Paper Pumpkin Kits
    • Paper Pumpkin Stamp Case Inserts
  • Nav Social Menu

    • Email
    • Facebook
    • Instagram
    • Pinterest
    • YouTube

Faux Watercolor with Baby Wipes

April 27, 2024 2 Comments

27 Apr
Colorful yellow, red, and hot pink zinnia flowers and buds with green foliage rest on an embossed white card front with hint of dark blue border

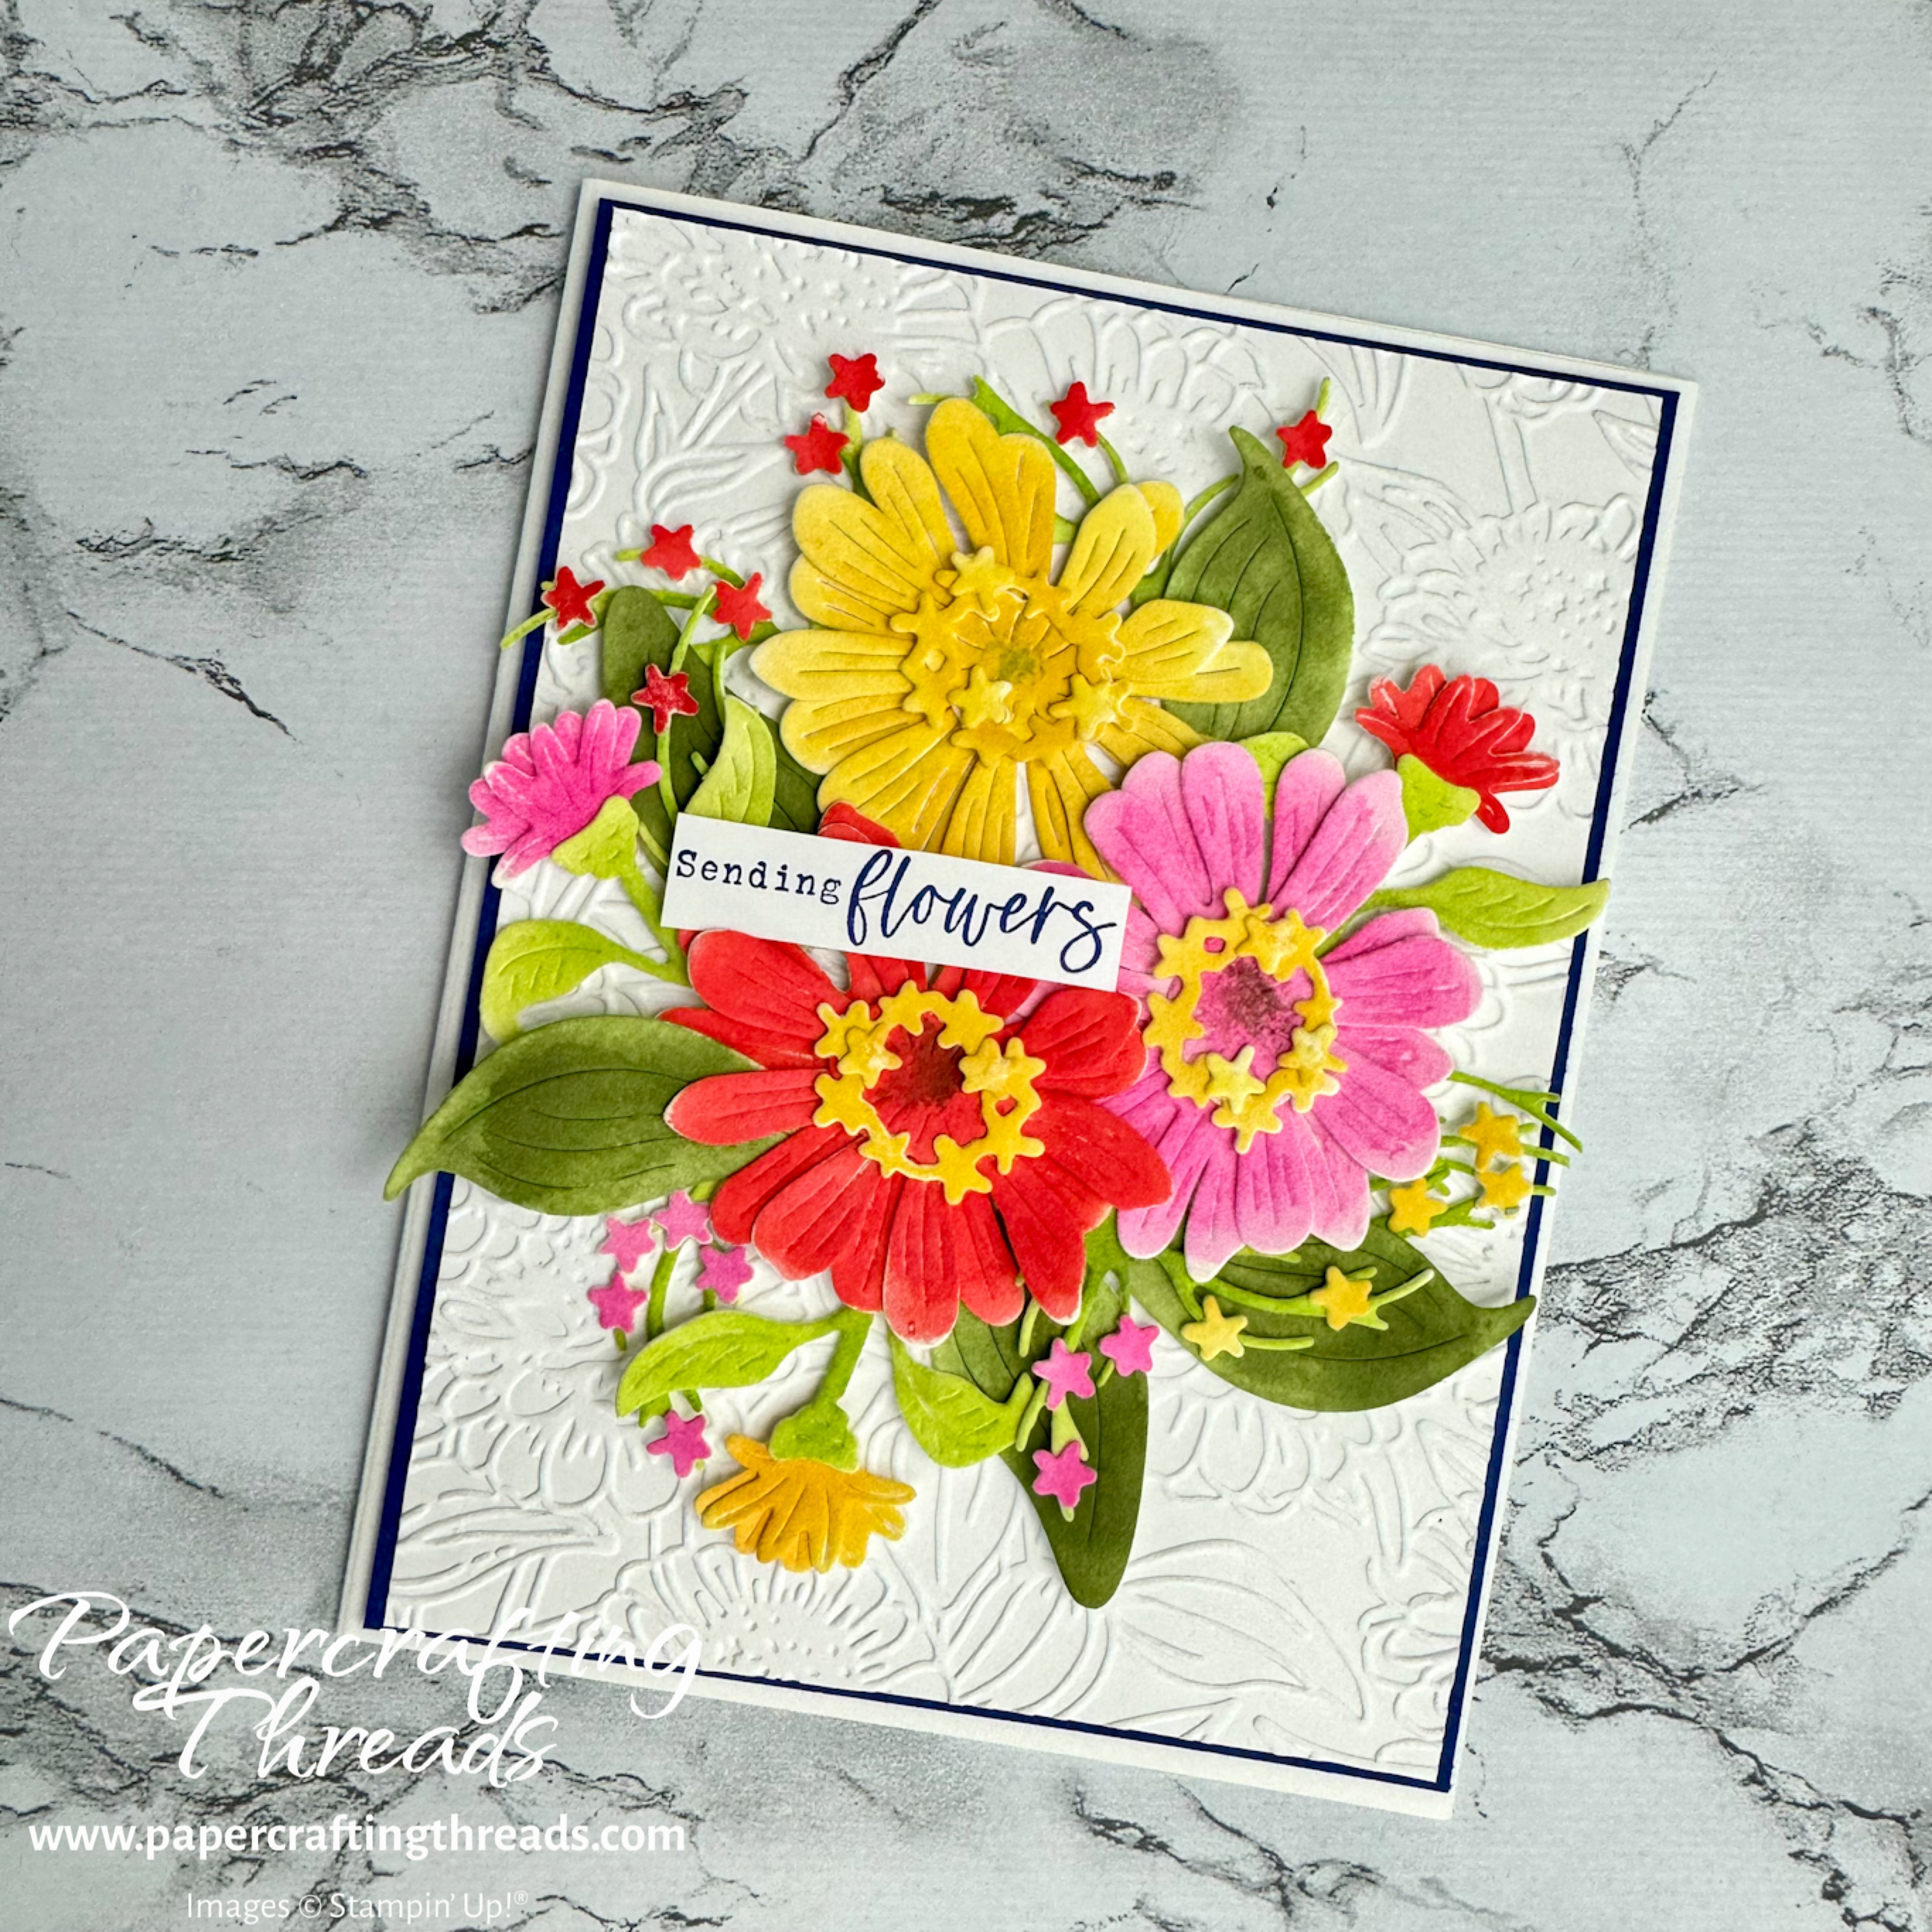
Looking for a quick way to add color? This Faux Watercolor with Baby Wipes is just the ticket. Get out the baby wipes and try this new technique! Colorful zinnia buds and full blossoms bloom on this exquisitely embossed card front. Perfect for Mother’s Day, a birthday, or any day to send flowers. And there’s a bonus tip for placing the flower arrangement on the card front. Let’s get started!

Faux watercolor with baby wipes

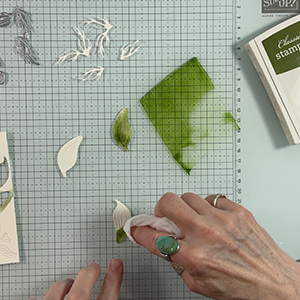
Cut out multiples of the flower parts and foliage using the lovely Simply Zinnia die set and Fluid 100 Watercolor Paper. Choose your ink colors – I used Mossy Meadow and Granny Apple Green for my foliage. Grab a pack of baby wipes (my favorite is Costco’s Kirkland Unscented). Swipe some ink on a glass mat or acrylic block, and using a baby wipe wrapped around your finger, pick up some ink and rub it on a diecut. Vary the shade by using more or less pressure and more or less ink. TIP: Hold the excess baby wipe in your hand so it doesn’t drag across the watercolor paper as you color. When done with the greens, clean your glass mat.

Faux Watercolor with Baby Wipes showing green ink smeared on a glass mat and leaf shaped watercolor paper.

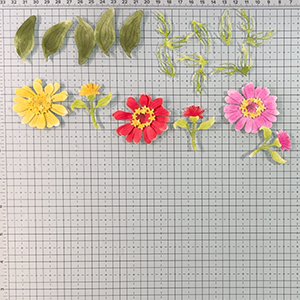
With a new, clean baby wipe, color the flower parts in the same manner as the foliage. I used Melon Mambo, Daffodil Delight and Poppy Parade. I added a touch of green using just the previous wipe (no need to add more ink color) and dabbing at the flower centers. This method takes almost no time to dry!! Assemble the flowers with liquid glue. I added extra stars to the stamens for even more dimension. Prep the Basic White card base by adding a Starry Sky mat and a Basic White Simply Zinnia embossed layer and set aside.

Assembled flowers and buds in yellow, red and pink made with the Faux Watercolor with Baby Wipes technique

arranging the flowers

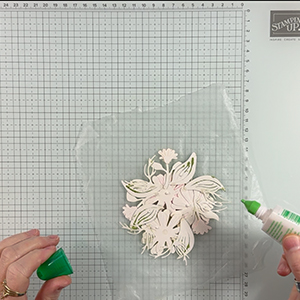
Arrange the flowers in a group that fits on the front of a card base. And now, using a piece of Press ‘N Seal, lay the Press ‘N Seal sticky side down over the floral arrangement, and press until everything is stuck to the layer.

Press 'N Seal over the top of a watercolor paper floral arrangement

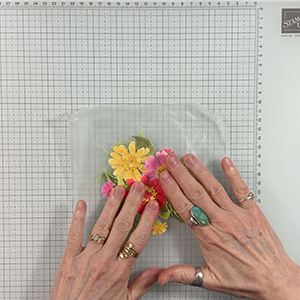
Then add glue dots to hold the bits in place, straddling other bits. Finally, add some dollops of liquid glue in large areas.

Flip the whole thing over on the card front and gently peel up the Press ‘N Seal.

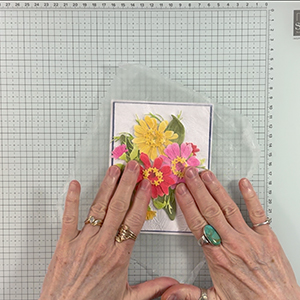
If necessary, adjust any pieces that are hanging over the card edge. Add more stars to the wispy foliage to match the blossom colors.

Closeup view of card front, three large zinnias with buds and foliage and a 'sending flowers' sentiment in blue.

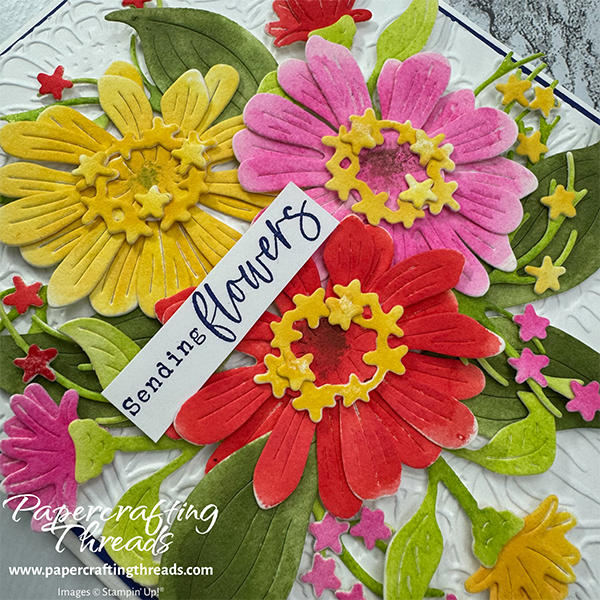
What do you think of the Faux Watercolor with Baby Wipes? I like how fast it is. I adore those bud stems with the little face too.

If you’d like a visual, check out my YouTube video below and see how quick and easy it is to do Faux Watercolor with Baby Wipes.

Share:

2 Comments
see more related posts: Cardmaking· Product Tips & Tricks

Previous Post: « Stadium Wave Pop Up Card
Next Post: 2024-2026 In Color Comparisons »

Reader Interactions

Comments

  1. Judy says

    February 22, 2025 at 4:04 pm

    Wow! Great technique, Peri! Love your gorgeous card!!

    Reply
    • Peri says

      February 23, 2025 at 10:19 am

      Thank you Judy!

      Reply

Leave a Reply Cancel reply

Your email address will not be published. Required fields are marked *

Primary Sidebar

Peri Beal

Cheesehead. Avid reader. Antique hunter.

Shop Online

Shop with me and get a FREE PDF tutorial bundle delivered to your inbox AND a handmade card via snail mail

Search

Papercrafting Threads

Gift Certificates
  • Email
  • Facebook
  • Instagram
  • Pinterest
  • YouTube

Sign up for my Newsletter

Sign up for my newsletter and get a free PDF tutorial as my welcome thank you!

Almost there...

Please check your email to confirm your subscription

Retired Product
Privacy Policy

The Fine Print

Just so you know... This is a personal website and I am responsible for its content. Stampin' Up!® does not endorse the use of or contents of the classes, services, or non-Stampin' Up! products I offer.

Sign up for my Newsletter

Sign up for my newsletter and get a free PDF tutorial as my welcome thank you!

Almost there...

Please check your email to confirm your subscription

Footer

  • Calendar of Events
  • 3D Projects
  • Cardmaking
  • Fun Fold
  • Product Tips & Tricks
  • Projects
  • Techniques
  • Of Interest
  • Catalogs
  • Join the Fun
  • Contact Me
  • Email
  • Facebook
  • Instagram
  • Pinterest
  • YouTube

PAPERCRAFTING THREADS

Copyright © 2025 · Refined theme customized by Catherine Carroll

Privacy Policy · Affiliate Disclosure