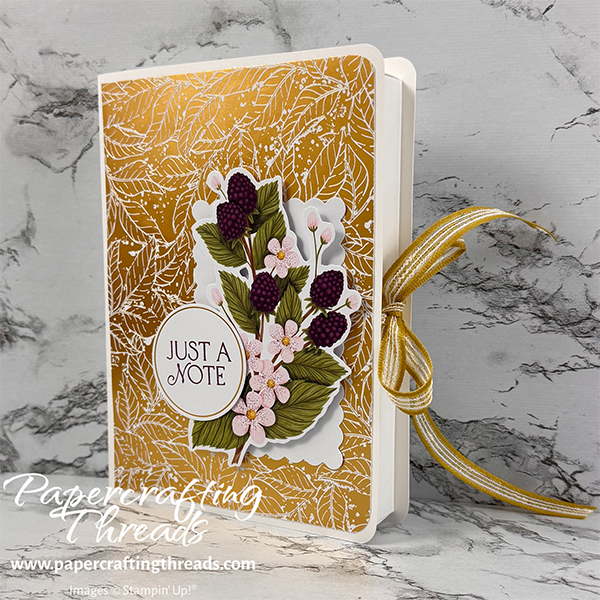
Make a Book Box Card Holder to gift a set of all occasion cards! The box is made with Basic White cardstock and decorated with gold patterned paper and elements from the Notes from the Heart Paper Pumpkin Kit for a great alternative project. And be on the lookout for the cards I made to fit in the box. Let’s get started.
cutting & scoring guide
| Paper Dimensions | Score Short Side | Score Long Side | ||||
| 6½” x 10⅜” Basic White cardstock for cover | 4¾” from each end | |||||
| 7½” x 7½” Basic White cardstock for cover | ¾”, 5¼” & 6″ | ¾” from each end | ||||
| 4½” x 6¼” Nature’s Sweetness patterned paper cover | ||||||
| 1¼” x 5¾” Nature’s Sweetness patterned paper inner strip | ||||||
| 5½” x 10½” Nature’s Sweetness patterned paper pocket | ½” from each end | 6¼” & 9¾” |
step by step instructions
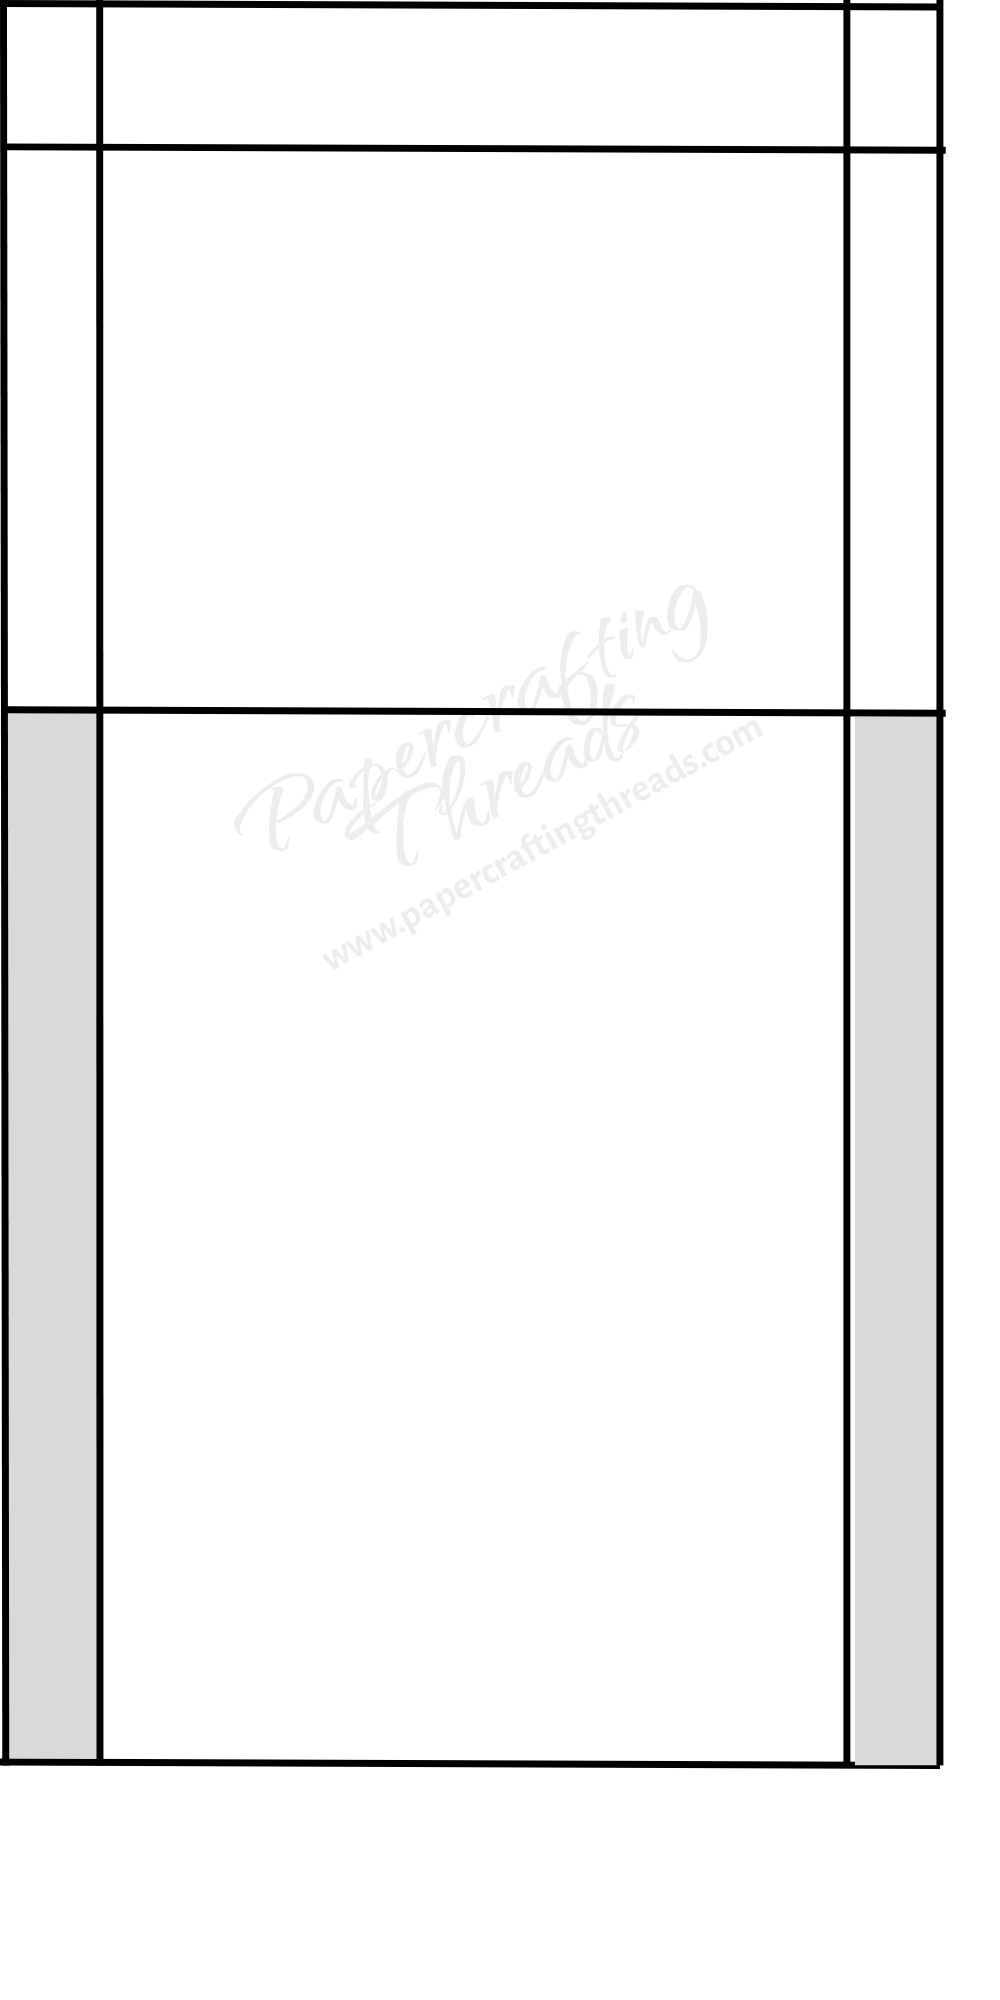
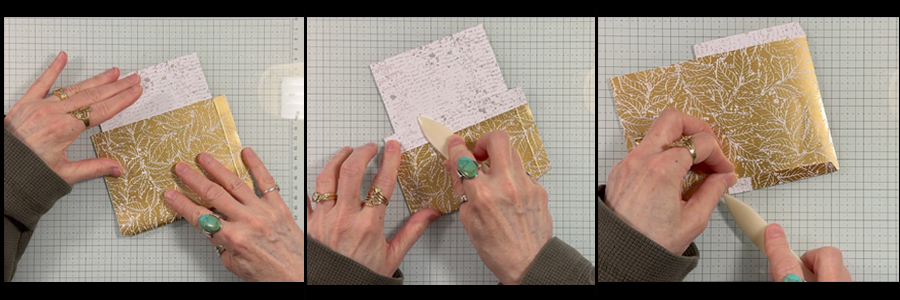
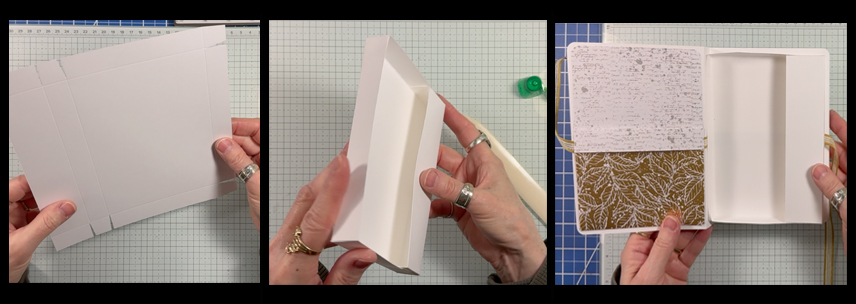
Cut and score all paper as noted in the table above. Starting with the pocket, cut away the two longest sides from the bottom of the paper to the scoreline. Flip the piece so the pattern you want showing for the inside top of the pocket is face up, fold up the shorter bottom half. Fold small lip over to show contrasting pattern. Fold side tabs back and adhere.
inner box portion
Cut tabs as shown in the diagram below. Cut straight along the rectangles, then miter the squares to form tabs.
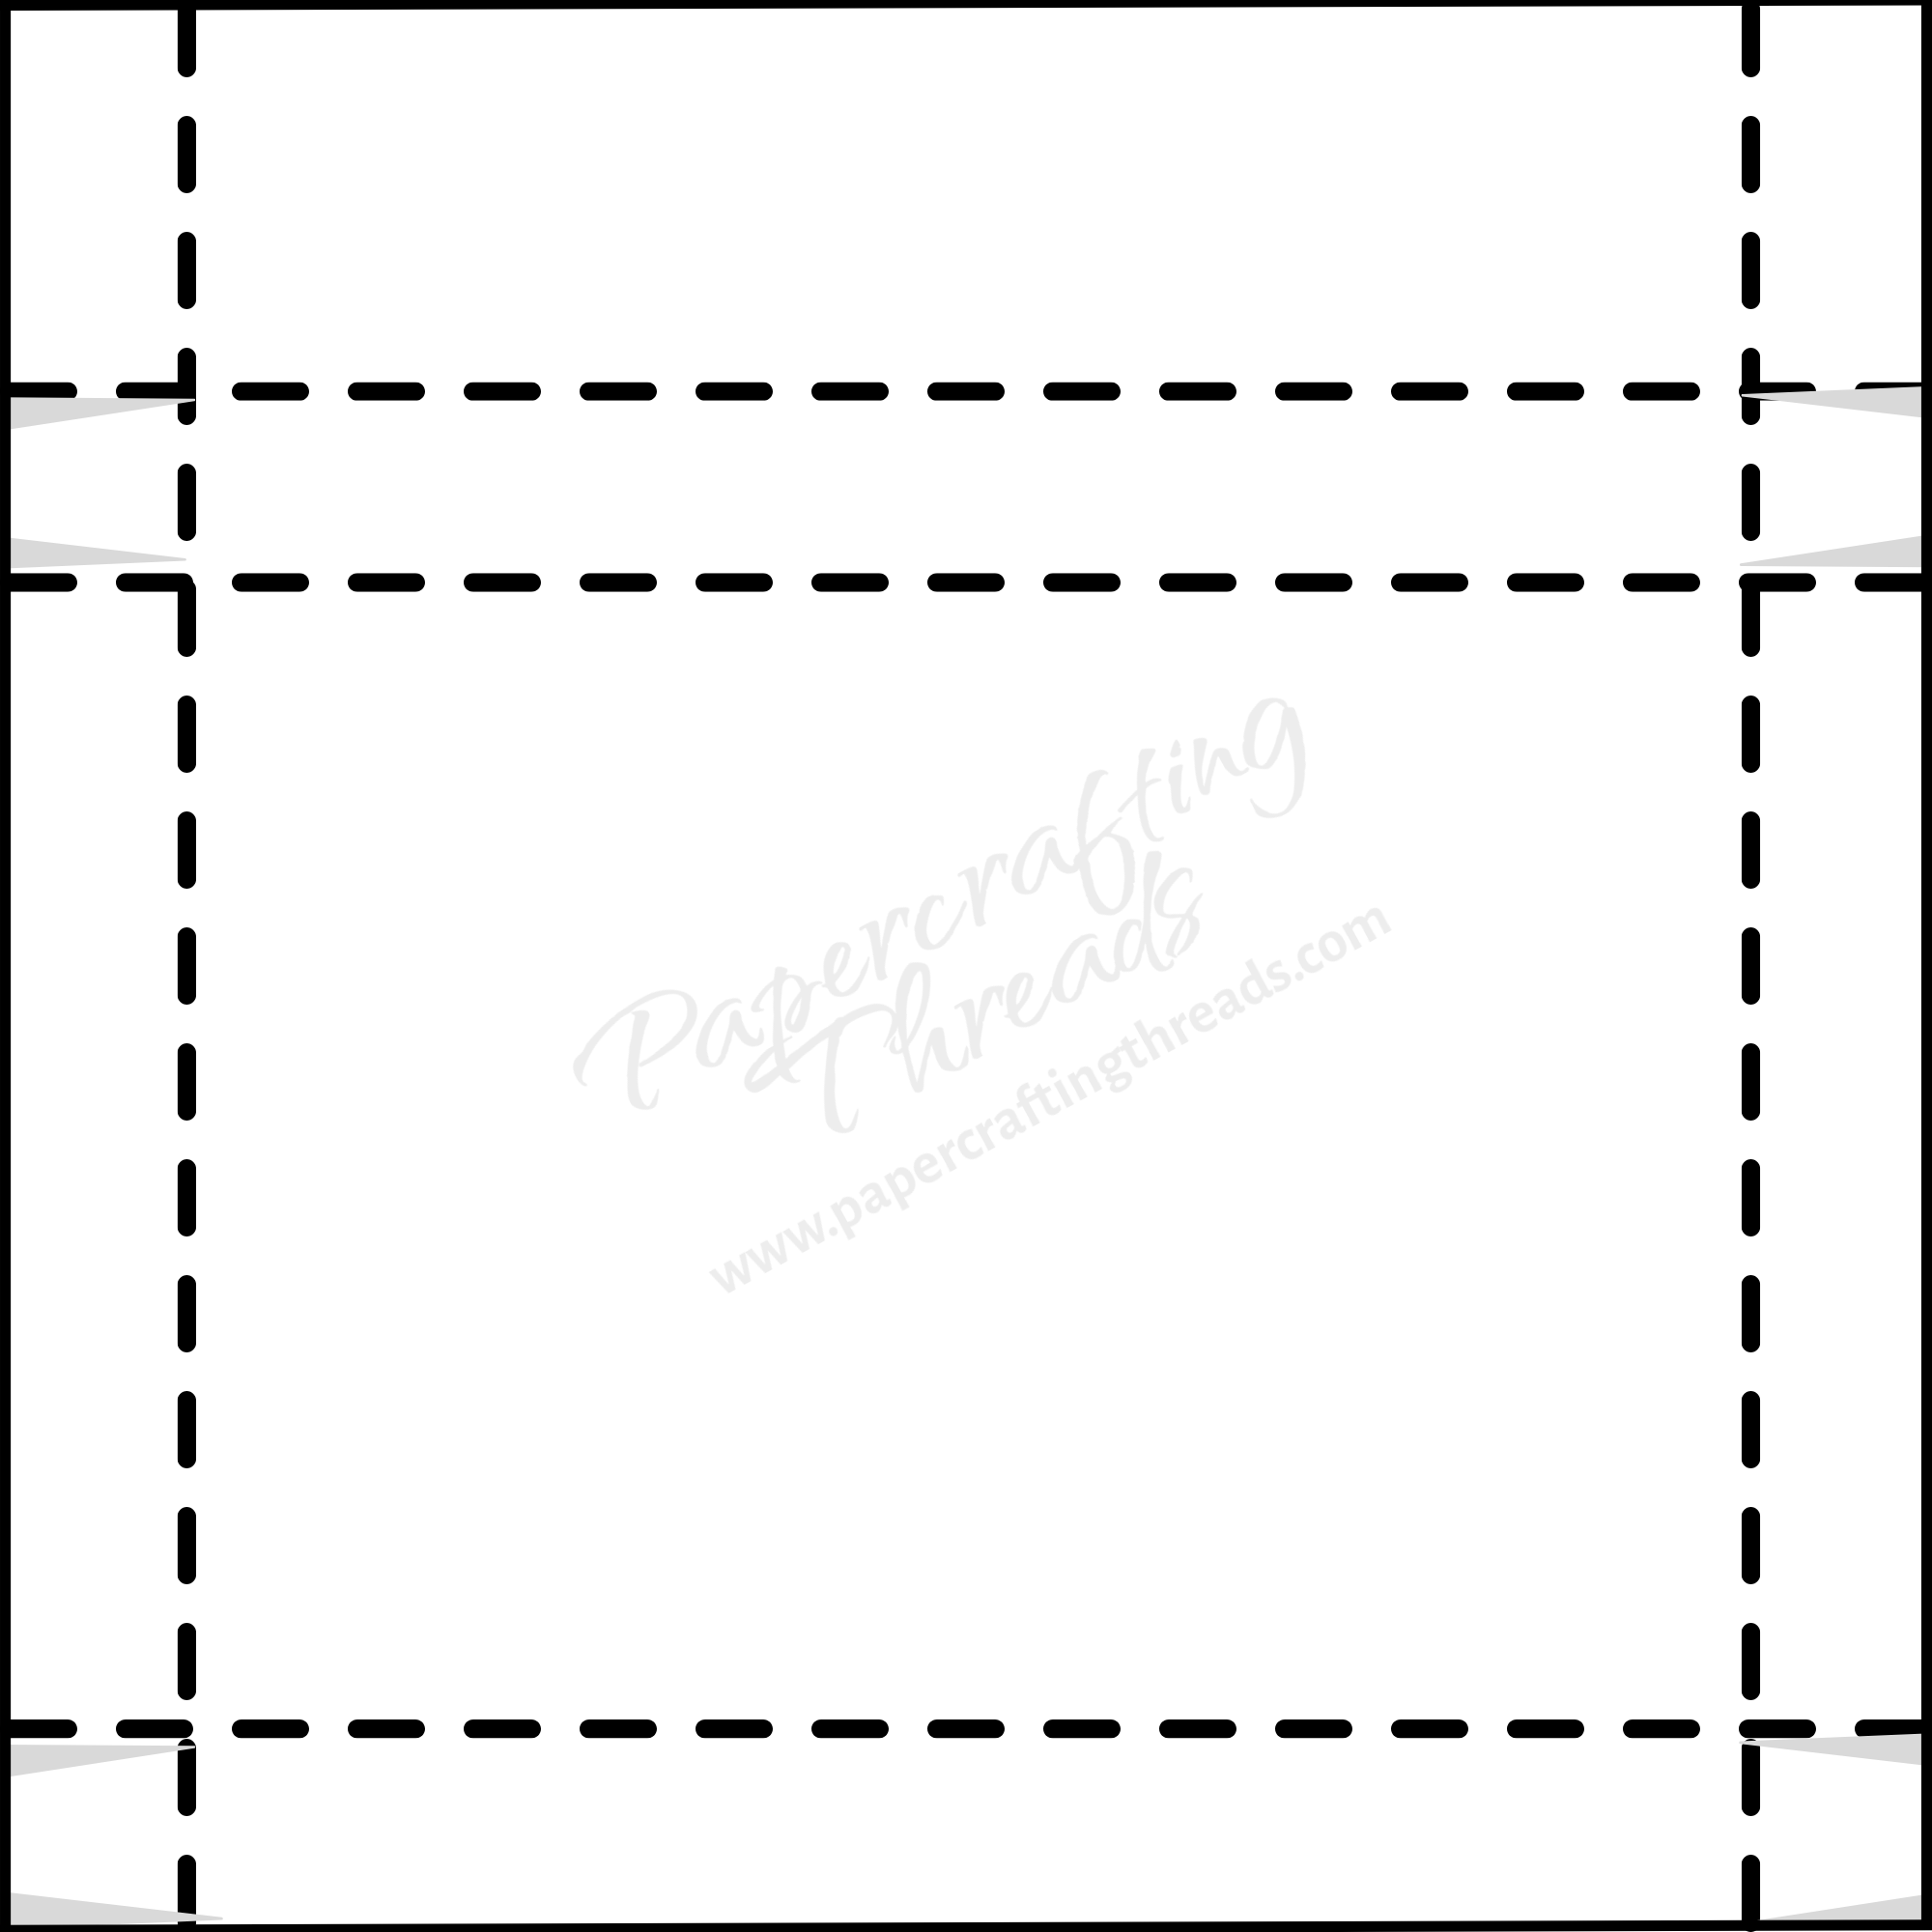
Push the two corner tabs in, add liquid glue and fold up to form the outer corners of the box. Square up before the adhesive sets.
Turn the piece horizontally and cut the two side tabs by cutting inwards on score lines at the rectangle ends. Then miter the squares to form tabs. Fold both sets of square tabs and the smaller rectangles in, apply liquid glue, and fold upward with the rectangle piece forming the corners and the square tabs inside. Square up and press the squares inside the space with a bone folder. If you need a visual, check out my YouTube video below.
Adhere a length of ribbon across the inside middle back to line up with the pocket lip with Tear N Tape. Then adhere the pocket on the left side over the ribbon. Next, adhere the box over the ribbon on the right side. Adhere the narrow strip of patterned paper to the lip of the box. Close the box.
Decorate the book box card holder
After rounding the corners on the top and bottom right, adhere the large piece of patterned paper to the front of the box. Place a white label from the Paper Pumpkin kit on the lower right corner. Add dimensionals to the back of the blackberry spray and place over the label. Stamp the greeting on a gold foil edged circle in Blackberry Bliss ink and adhere over the lower left edge of the spray.
While I intend to fill the Book Box Card Holder with a stack of cards and envelopes, other items do fit. For a crafty friend, load the holder with embellishments, dimensionals, and Tear N Tape. For the beverage connisseur, add tea/hot cocoa/apple cider packets and pre-packaged biscuits. The possibilities are endless! Visit my online store to purchase the patterned paper and ribbon to make your own version of the Book Box Card Holder today.
If you found this tutorial helpful, consider a contribution to my coffee fund ☕️ Coffee → Creativity → Content → More Coffee (help fuel the cycle!)

Leave a Reply