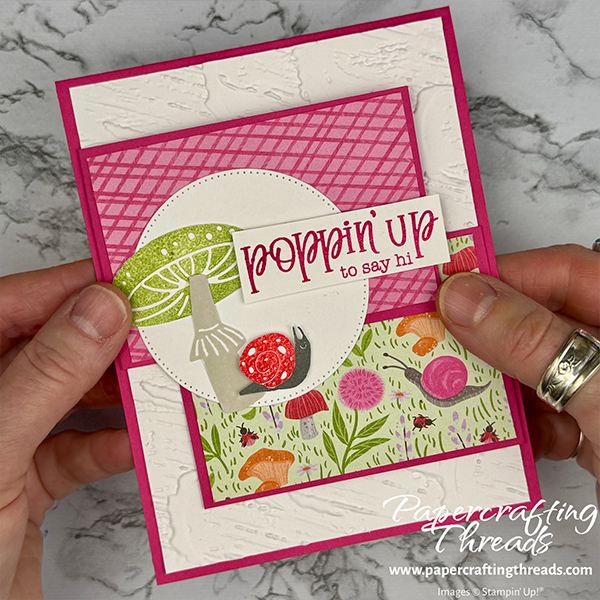
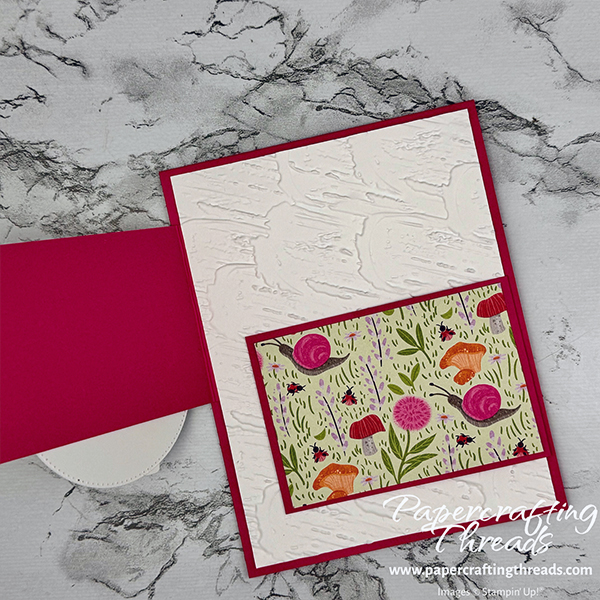
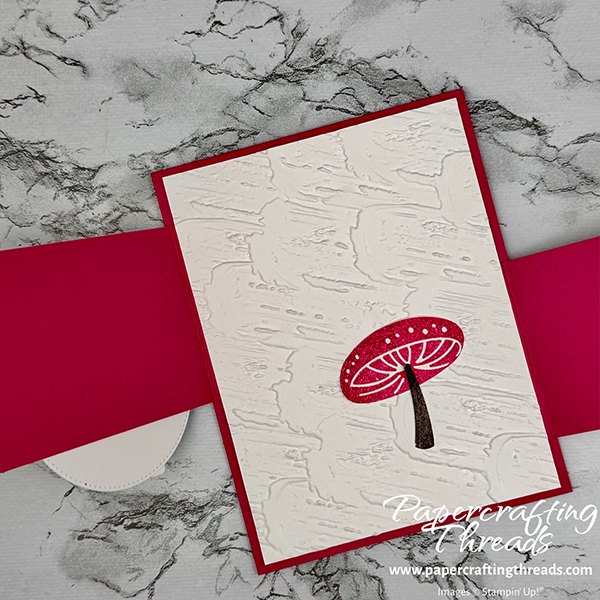
A Flip Flap Card comes to life with colorful toadstools, sweet little ladybugs and whimsical snails. The alternating flaps add to the delight. Open the left flap to reveal more of the right flap. Open the right flap to reveal another fungi. And then open the card to reveal your message. Let’s get started!
cutting & scoring guide
| Paper Dimensions | Score Short Side | Score Long Side | ||||
| 4¼” x 11″ Melon Mambo cardstock base | 5½” | |||||
| 4″ x 5¼” Basic White cardstock for embossing and liner (cut 2) | ||||||
| 2⅜” x 4″ Melon Mambo cardstock flaps (cut 2) | ½” | |||||
| 2¼” x 3⅜” Toadstool Gardens patterned paper (cut 2) | ||||||
| ¾” x 2¼” Basic White cardstock for greeting | ||||||
| Scraps of Basic White cardstock for circle, mushrooms & snails |
step by step instructions
Fold the Melon Mambo card base in half. Emboss one of the large pieces of Basic White with the Plaster Painting 3D Embossing folder.
Fold the two smaller pieces of Melon Mambo cardstock on the 1/2″ score lines. Adhere the two different patterned papers from the FREE with purchase Toadstool Gardens paper pack to the fronts of the flaps in opposite directions. Add adhesive to the back of each flap. Place one flap behind the lower right side of the embossed Basic White piece. Adhere the geometric pattern flap to the upper right, slightly overlapping the right flap. Add liquid glue to the back and adhere to the front of the card.
Diecut the second largest circle from the Stylish Shapes Dies. Adhere to the top flap, leaving the bottom of the circle free and overlapping the lower flap.
decorating the flip flap card
I used the snail stamps from the Autumn Abundance September Paper Pumpkin Kit. Stamp the body of the snail twice in Pebbled Path ink on a scrap of Basic White cardstock. Make two shells by inking the snail shell in Versamark ink and Poppy Parade ink. Stamp on a scrap of Basic White cardstock. Heat emboss both with Clear Embossing powder. Fussy cut the shells and the bodies and assemble the snails.
From the Terrific Toadstools stamp set, ink one of the large toadstool tops with Versamark ink, then Granny Apple Green ink. Stamp and heat emboss with Clear Embossing Powder. Repeat with Melon Mambo ink. Stamp one toadstool stem with Basic Beige ink and fussy cut. Stamp the smaller stem in Early Espresso ink. Punch out the two toadstool tops and the small stem. Then assemble the Granny Apple Green toadstool with the large stem. And assemble the Melon Mambo toadstool with the small stem.
Use liquid glue to add the Granny Apple Green toadstool on the diecut circle. Place a dimensional behind one of the snail’s shells and adhere to circle. Stamp the greeting in Melon Mambo ink on the Basic White strip and adhere with dimensionals.
Open both flaps and adhere the Melon Mambo toadstool behind the right flap.
Adhere the plain Basic White liner to the inside of the card. Glue the remaining snail in the lower right corner.

If you found this tutorial helpful, consider a contribution to my coffee fund ☕️ Coffee → Creativity → Content → More Coffee (help fuel the cycle!)
And if you need a visual for how this Flip Flap card comes together, check out the YouTube short I made.

Leave a Reply