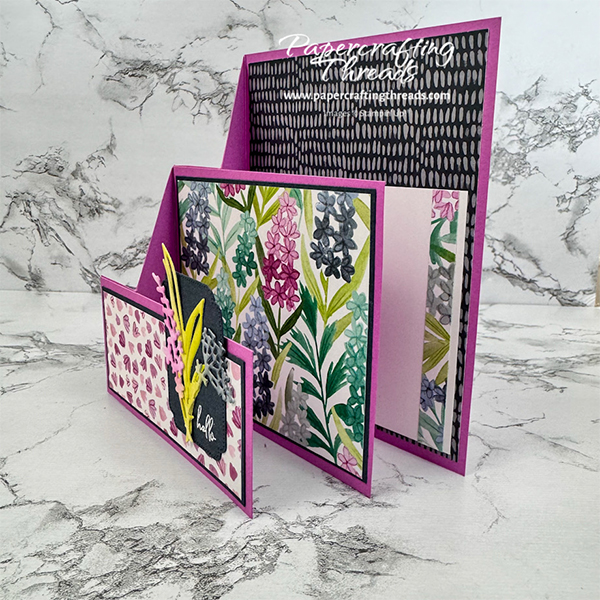
Check out my version of the Cascading Pleats Fun Fold card! This style of card has been around for awhile. I wanted to make a version that’s less bulky and I think I nailed it. The pleats on my card are more prominent and the spacing wider. And of course I let that patterned paper do all the work. Let’s get started!
cutting & scoring guide
| Paper Dimensions | Score Short Side | Score Long Side | ||||
| 5½” x 9¼” Petunia Pop cardstock base | 4¾”, 5½”, 6¾” & 8″ | |||||
| 3¾” x 4¾” Petunia Pop cardstock center panel | ||||||
| 2″ x 4¼” Petunia Pop cardstock front panel | ||||||
| 3½” x 4″ Secret Sea cardstock center panel mat | ||||||
| 1¾” x 4″ Secret Sea cardstock front panel mat | ||||||
| Secret Sea scrap for die cutting | ||||||
| 3⅜” x 3⅞” Florals in Bloom patterned paper center | ||||||
| 1⅝” x 3⅞” Florals in Bloom patterned paper front | ||||||
| 4″ x 5¼” Florals in Bloom patterned paper liner | ||||||
| 3¾” x 3⅜” Basic White cardstock liner | ||||||
| Basic White scrap for die cutting |
step by step instructions
Cut and score all paper as noted above. Accordion fold the card base. Adhere the Petunia Pop center pleat on the second panel from the base, lining up the left edge with the scoreline and the bottom with the base. Then adhere the remaining Petunia Pop panel to the front pleat, lining up the left edge and the bottom with the base.
Open the card completely so it’s ‘flat’. With the left edge position at the bottom, cut straight from the edge to the first scoreline, using the front panel as a guide. Next, cut at an angle to the top of the center panel on the second scoreline. Then cut straight across to the third scoreline using the the center panel as guide. And lastly, cut at an angle to the top of the last panel and fourth scoreline.
decorating the cascading pleats fun fold card
Adhere and layer the Florals in Bloom patterned papers on the corresponding Secret Sea card stock mats. Then adhere those to the appropriate panels.
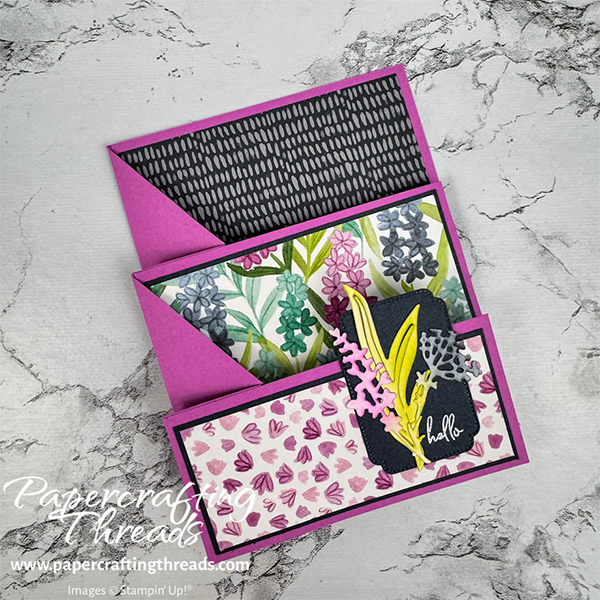
Die cut one of the frames from the Unbounded Love die set in Secret Sea cardstock. Stamp the greeting ‘hello’ from Daisy Daydream March 2025 Paper Pumpkin Kit in Versamark ink. Heat set white WOW embossing powder with a heat tool.
Die cut leaf and floral images from Basic White cardstock with Gallery Blooms die set. Use blending brushes to add Lemon Lime Twist, Petunia Pop and Secret Sea to the florals. Adhere to die cut frame. Then adhere to card front as shown.
Can’t quite picture how to assemble the Cascading Pleats Fun Fold Card? Check out my video over on my YouTube channel.
If you found this tutorial helpful, consider a contribution to my coffee fund ☕️ Coffee → Creativity → Content → More Coffee (help fuel the cycle!)
cascading pleats fun fold card version two
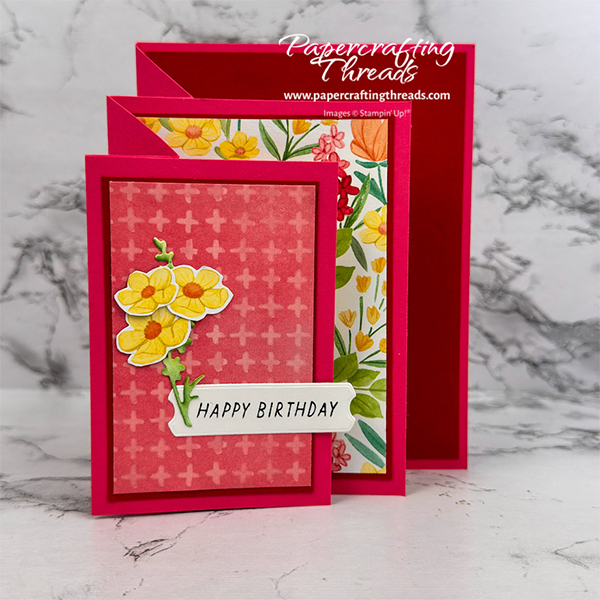
And now for the second version. A Strawberry Slush card base measuring 5½” x 8¼” is scored on the long side at 1″, 2″, 3″ and 4″. The Strawberry Slush center panel measures 3½” x 4¼ and the front panel measures 2¾” x 4″. Accordion fold, adhere the panels and cut the cascading pleats as in the Petunia Pop version.
The Real Red mats are 2⅜” x 3⅝”, 3⅛” x 4⅜” and 4″ x 5¼”. BULK REDUCING TIP: Cut the centers out of the Real Red mats before adding the patterned papers and white cardstock. I used two of the rectangles from the Textured Notes die set for the top and center panels. And I used the largest square from the Stylish Shapes die set for the largest Real Red piece. And bonus!! The resulting die cuts are now ready and waiting for other projects.
And the patterned papers measure 2¼” x 3″ and 3″ x 4¼”. The inner Basic White liner is 3¼” x 4½”. I die cut one of the taller floral images from the Gallery Blooms die set to use as a stem for the fussy cut yellow flowers. And the label came from the Unbounded Love die set.
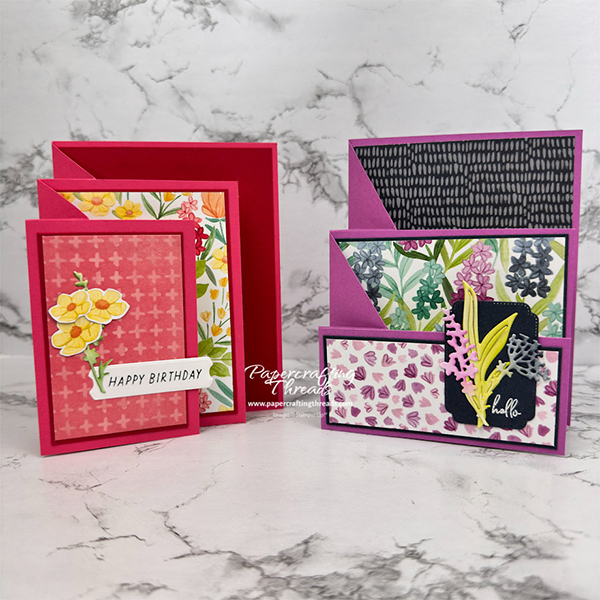
Which one’s your favorite? Shop my store now for the products I used.

Leave a Reply