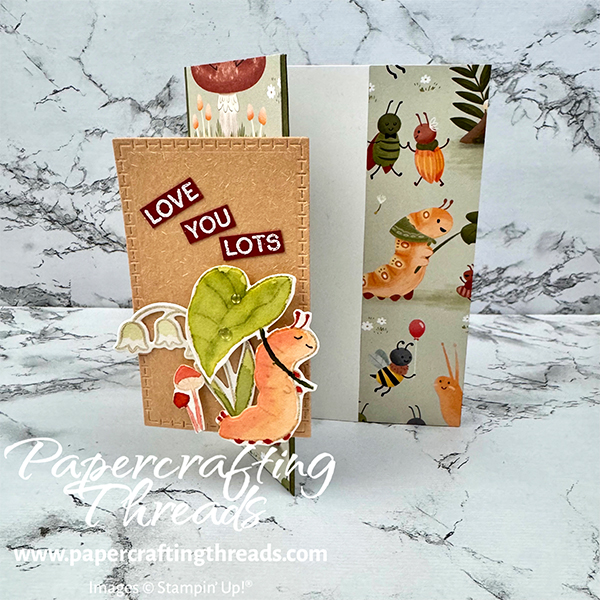
If you’re looking for a card that combines sweet stamped images with an interactive design, this Flip Z Fun Fold is it. I’m using Stampin’ Up!’s Sweet Bug stamp set along with the coordinating dies and patterned paper to create a card that’s equal parts charming and impressive.
In this tutorial, we’ll start with watercolor techniques that’ll bring those little bug characters to life. Even if you’re newer to watercoloring, these tips will help you get soft, beautiful results that look more advanced than they actually are. Then we’ll move into creating the Flip Z Fun Fold itself – it’s like a traditional Z fold but better, with an added interactive element that I love – and it’s easy with just a few cuts. Let’s get started!
cutting & scoring guide
| Paper Dimensions | Score Short Side | Score Long Side | ||||
| 5½” x 8½” Mossy Meadow cardstock base | 4¼” & 1½” | |||||
| 2½” x 5½” Cute aș a Bug patterned paper for front | ||||||
| 1⅝” x 5½” Cute aș a Bug patterned paper for inside right | ||||||
| 2½” x 5½” Basic White cardstock for liner | ||||||
| Scraps of Cajun Craze for sentiment | ||||||
| Scrap of Fluid 100 for stamping & die cutting | ||||||
| Scrap of Natural Hues Specialty Paper for die cutting |
step by step instructions
Begin by prepping all paper as noted in table above.
Stamp caterpillar, tiny mushroom cluster, and three bellflower cluster in Crumb Cake ink on Fluid 100 watercolor paper.
Use a water painter or paintbrush to watercolor the images. These are the ink colors I used, but feel free to choose your own. Caterpillar: Petal Pink, Pumpkin Pie and Calypso Coral (then use a black fine line marker to add the mouth and eye). Mushrooms: Petal Pink. Calypso Coral, and Cajun Craze. Lily of the valley flowers: Soft Sea Foam. Leaves: Old Olive and Mossy Meadow.
Then die cut the shapes with the corresponding dies. Cut off the small mushroom furthest to the right with scissors. Set all aside to dry.
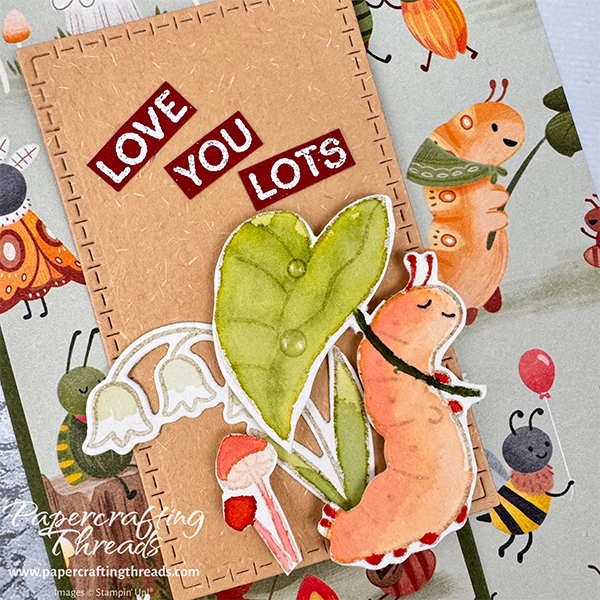
Stamp the greeting “Love You Lots” in Versamark ink on a scrap of Cajun Craze. Sprinkle with white embossing powder and heat set. Cut up the greeting into individual words, trimming as close as possible to the lettering.
Flip Z Fun Fold Card Base Instructions
Open the Mossy Meadow card base with the front panel on the right. Turn ninety degrees so the short edge is at the top. Align the left edge (which is the top of the card front) with the 1″ mark. Pull the cutting blade down to 1½” (the first scoreline). Slide the card front to the left, and using the ruler to the right of the cutting blade, align the right edge (which is the bottom of the card front) with the 1″ mark. Pull the cutting blade down to 1½” (the first scoreline). Remove the card base from the trimmer and cut along the scoreline to remove the corners on the front of the card base.
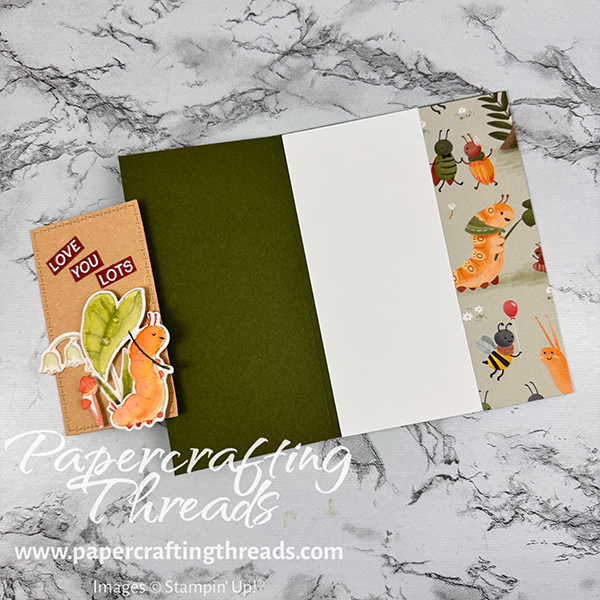
Fold card base in half on the 4½” scoreline like usual. Then fold the 1½” scoreline backwards or valley-fold. This is one of the reasons why I love this fun fold – no sweet bug scenes are hidden!!
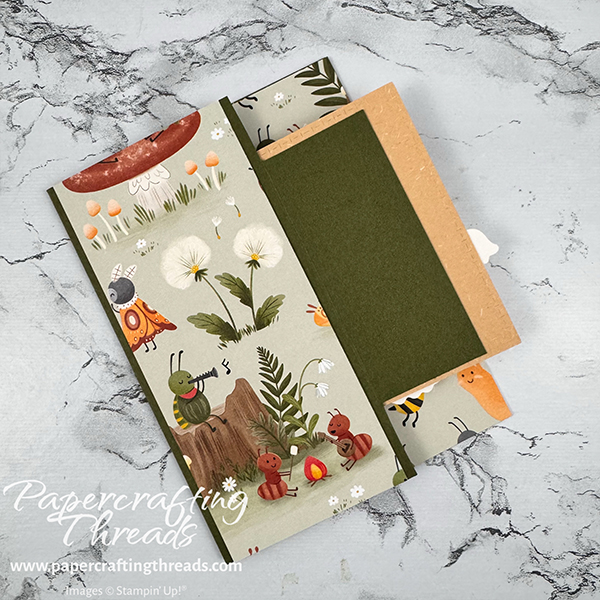
Adhere the widest strip of DSP to the left portion of the card front with flat adhesive. Apply the narrow DSP to the inside right of the card. Adhere the Basic White strip to the inside of the card, butting up the right edge to the DSP.
Die cut the fourth largest Textured Notes rectangle from the scrap of Natural Hues specialty paper and adhere to the front of the flap with liquid glue.
Adhere the floral piece with liquid glue to the Natural paper. Then adhere the caterpillar with dimensionals and allowing a little overhang at the bottom and the right. Next, add the mushrooms with a mini dimensionals. And finally, adhere the individual words with liquid glue.
Scatter clear epoxy drops on the large leaf.
If you found this tutorial helpful, consider a contribution to my coffee fund ☕️ Coffee → Creativity → Content → More Coffee (help fuel the cycle!)

I put together a YouTube video so you can see the watercolor tips IRL – I hope you check it out!

Leave a Reply