The Double Vellum Techniques card shows off printed vellum cardstock to a tee. The vellum is strong enough to stand as a card base on its own, but the added inner white layer not only adds elegance, it also makes the flowers stand out even more. And the surprising texture on the floral bouquet is a simple technique with a big wow factor. So let’s get started!
cutting & scoring guide
| Paper Dimensions | Score Short Side | Score Long Side | ||||
| 5½” x 8½”Berry Botanical printed vellum cardstock base | 4¼” | |||||
| 8-7/16″ x 5-7/16 Basic White cardstock | 4-7/32″ (in half) | |||||
| 3½” x 4¾” Basic White cardstock | ||||||
| 2⅝” x 3⅞” Basic White cardstock | ||||||
| 4″ x 5¼” Two-Tone Golden Glow | ||||||
| Large scrap of Two-Tone Golden Glow for diecuting postage shape |
step by step instructions
Cut cardstock and DSP as described above. PRO TIP: Score the vellum on the back side to hide the white crease.
Place a section of printed vellum face down on a firm foam pad. (I used some of the padding from the original case that Stampin’s Up’s acrylic blocks used to come in. A Stampin’ Pierce Mat works too.) Choose a handful of flowers to add texture to. Use the balltip stylus from the Take Your Pick tool or from the scoreboard to press lightly, following the contours of the chosen petals. Press hard enough to make white marks on the backside of the vellum but not hard enough to crease or tear the paper. This raises the flower petals up on the printed side!
Fussy cut the raised flower images without leaving a white border. Then fussy cut some leaves – perfectly fine to use leaves that are on the edge and partials – just create your own leaf shape. And finally fussy cut two flowers that extend past the edge of the vellum. Set all aside.
Fold the large scored vellum cardstock around the large Basic White card base. Place a tiny bit of Stampin’ Seal behind a flower on the front side and the back side, then press to adhere.
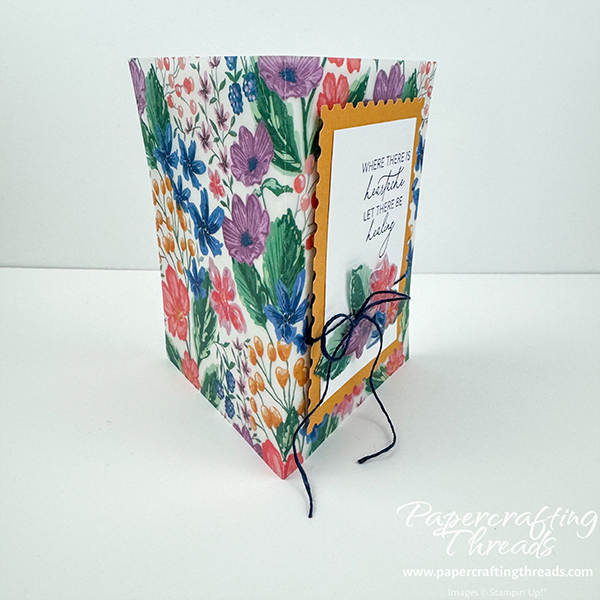
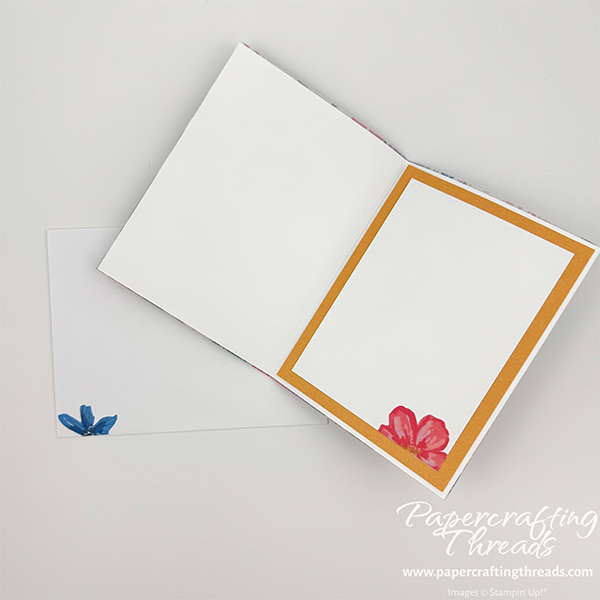
Adhere the partial flower to the lower right corner of the bigger piece of Basic White. Adhere that to the large piece of Golden Glow two-tone. Then adhere to inside of card for liner.
Decorating the Front
Die cut the remaining Golden Glow two-tone piece with the corresponding second-largest Perennial Postage die.
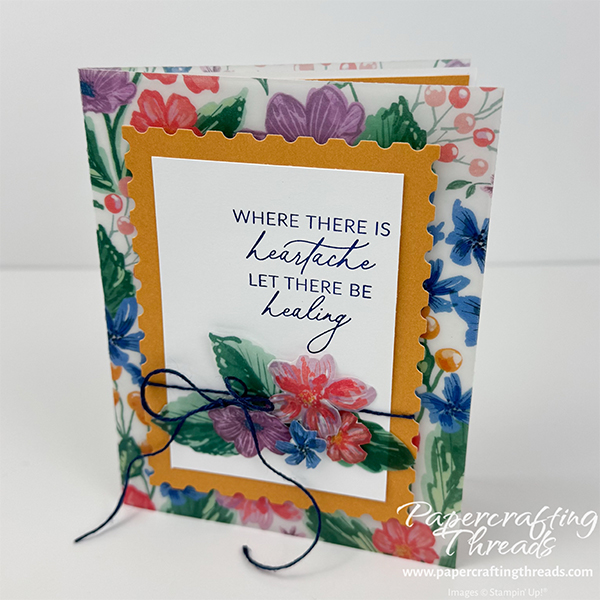
Ink and stamp the sentiment in Blueberry Bushel ink on the upper right corner of the last piece of Basic White. Adhere the white piece to the Golden Glow postage diecut piece. Secure a length of dark blue twine around the lower third of the postage die.
Arrange the leaves and flowers on the lower third of the Basic White, using Stampin’ Seal or glue dots for the leaves and dimensionals for the flowers.
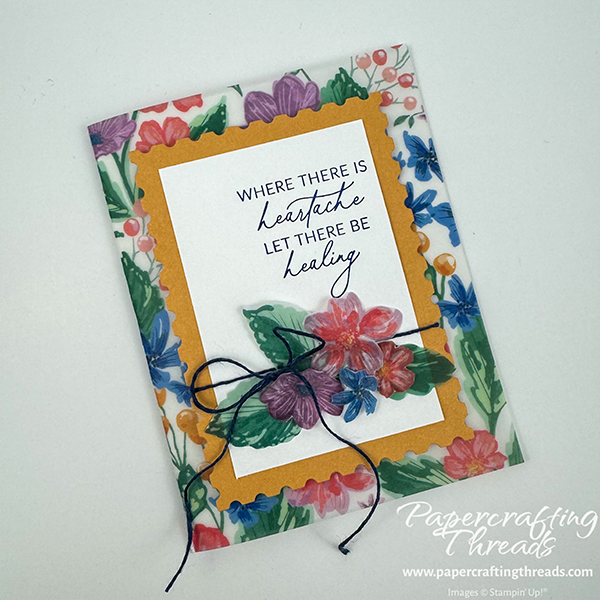
Tie a bow with another length of dark blue twine, roll up a glue dot and place it behind the center ‘knot’ and adhere to card front amongst the flowers and leaves.
Pop up the completed Golden Glow focal point with a section of foam adhesive sheet (or lots of dimensionals) and add to card front.
What do you think? Have you worked with vellum cardstock?
If you found this tutorial helpful, consider a contribution to my coffee fund ☕️ Coffee → Creativity → Content → More Coffee (help fuel the cycle!)

Leave a Reply