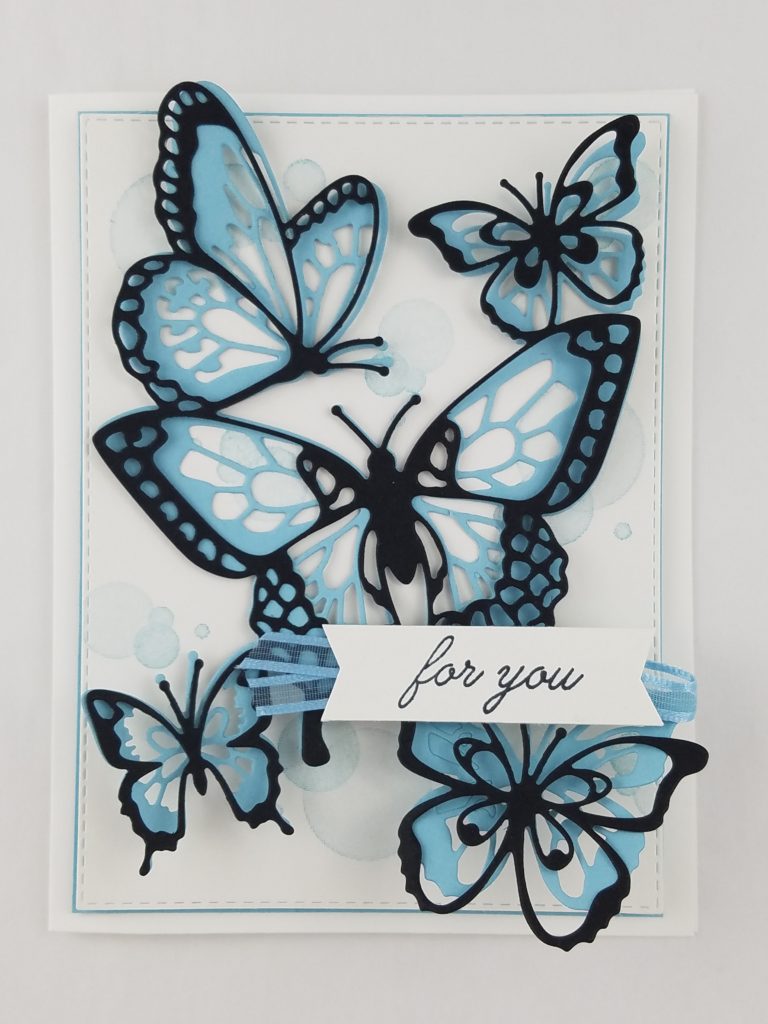
Butterfly bokeh has got to be the easiest card I’ve ever made, but what a wow! for the recipient. One of the reasons why I like Stampin’Up! products so much is precisely because of coordination like this, which translates into easy for me and you.
- Cut Whisper White cardstock to 5 ½” x 8 ½”, and score on the long side at 4 ¼”. Cut Balmy Blue cardstock to 3 7/8” x 5 ¼” for a mat layer.
- Using a scrap of Shimmery White cardstock and the largest rectangle from the Rectangle Stitched Framelits, run it through the Big Shot.
- Stamp the bokeh dots from the Beauty Abounds stamp set in Balmy Blue on the Shimmery White mat.
NOTE: The Butterfly Beauty Thinlits Dies have two large butterfly collages. One is a detailed cut and the other is more of an outline cut. These can then be layered to create beautiful depth and movement with zero effort.
- Diecut the detailed collage from Balmy Blue cardstock. Diecut the outline collage from Basic Black cardstock and gently bend the outer butterflies up. Layer the black butterfly layer over the blue butterflies, adhering with glue dots on the body of the largest butterfly.
- Stamp the sentiment “for you” from the Beauty Abounds stamp set on a ½” strip of Shimmery White cardstock. Banner cut the ends.
- Fold a piece of the Balmy Blue Organdy ribbon from the Sale-A-Bration Combo Pack and adhere it to the back of the word banner with glue dots.
- Glue the butterfly layers together with a few glue dots on the back of the body and the tips of the wings of the largest butterfly.
- Adhere the word banner over the butterflies on the bottom right corner.
Your Butterfly Bokeh card is complete! To mail, cut a piece of Whisper White or Balmy Blue cardstock to 4″ x 5 1/4″ and place over the butterfly bokeh front before putting the card in the envelope. This layer of cardstock will help protect the textured front of the card when it goes through the postal sorting machine, but is light enough that the postage won’t go up.

Leave a Reply