
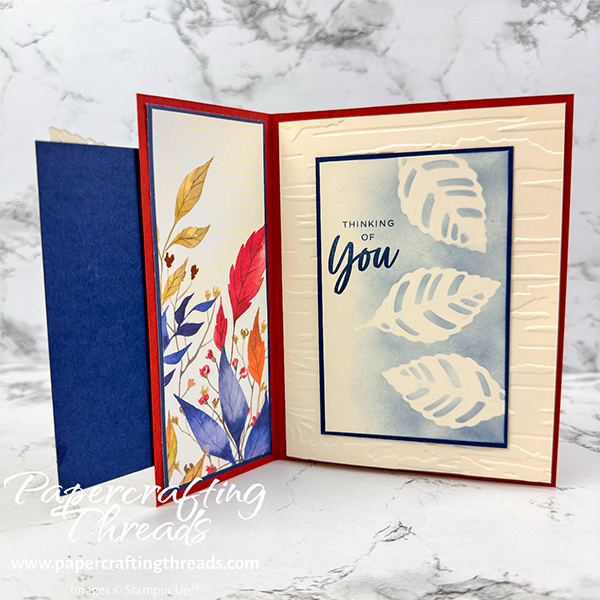
Create a Card Within a Card Fun Fold for layers of prettiness that keep on coming. Embossing and stenciling add lots of texture. The pop of blue is unexpected but is so complementary. And there’s even some copper for a bit of shine. Let’s get started!
cutting & scoring guide
| Paper Dimensions | Score Long Side | ||||
| 5½” x 6½” Cajun Craze cardstock base | 4¼” | ||||
| 2″ x 5¼” Cajun Craze cardstock for embossing | |||||
| 5¼” x 8″ Very Vanilla cardstock inner card | 4″ | ||||
| 2⅝” x 4⅛” Very Vanilla cardstock (cut 2) | |||||
| 2¾” x 4¼” Night of Navy cardstock for mats (cut 2) | |||||
| 2″x 5¼” Night of Navy from envelope ( or Night of Navy cardstock) | |||||
| 1⅞” x 5⅛” leaf pattern cut from Paper Pumpkin card base (or equivalent) | |||||
| 1½” x 2¾” leaf pattern cut from Paper Pumpkin envelope flap (or equivalent) | |||||
| Scraps of Very Vanilla for die cutting |
step by step instructions
Fold the Very Vanilla inner card on the scoreline and emboss the front panel with the Birch Wood 3D Embossing Folder (the bark should run horizontally). Also emboss the narrow Cajun Craze cardstock panel.
Cut three of the leaves from the Add-On Every Celebration Dies from the Very Vanilla cardstock scraps. Put a tiny, tiny bit of Stampin’ Seal on the back of each leaf and place on the right hand side of one of the 2⅝” x 4⅛” Very Vanilla cardstock to use as a stencil. With a Blending Brush, add Night of Navy ink over the leaves and heavier on the right side. Remove the leaves (set aside) and use the pad of your finger to remove the adhesive (or use an adhesive eraser). Stamp sentiment if desired on the left. Layer and adhere this inked panel and the other blank Very Vanilla panel on the Night of Navy cardstock mats.
assembling the card within a card fun fold
Add adhesive to the back of the Very Vanilla inner card and adhere to the inside of the Cajun Craze card base. Adhere the stenciled and matted piece to the center front of the inner card with multipurpose liquid glue. Layer and adhere the large narrow patterned paper on the narrow Night of Navy mat. Adhere to the Cajun Craze inner narrow left panel.
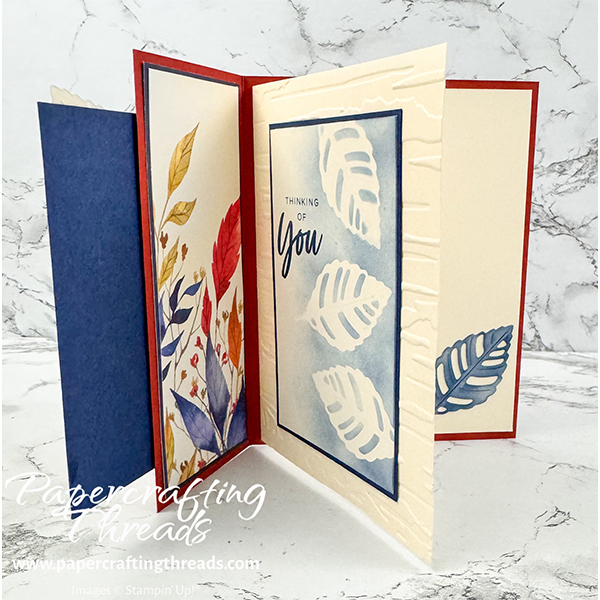
Close the Cajun Craze flap over the inner card. Adhere the embossed Cajun Craze panel on top. Position the blank Very Vanilla piece with Night of Navy mat, lining up the right edge with the layer below. Move to the side, add multipurpose liquid glue on the Cajun Craze panel and adhere the blank piece. Adhere the remaining small leaf pattern towards the bottom left front of card.
Add dots of multipurpose liquid glue to the back of two of the blended leaves. Adhere one inside the inner card and the other on the front of the card. Adhere one of the copper leaves from the kit to the front of the card. Scatter three of the Neutrals Adhesive Backed Sequins on the front panel.
I made a short video and posted it over on my YouTube channel. The Autumn Abundance Paper Pumpkin Kit was outstanding! If you’d like to craft along with me using future kits, purchase a prepaid subscription or code here.
Leave a Reply