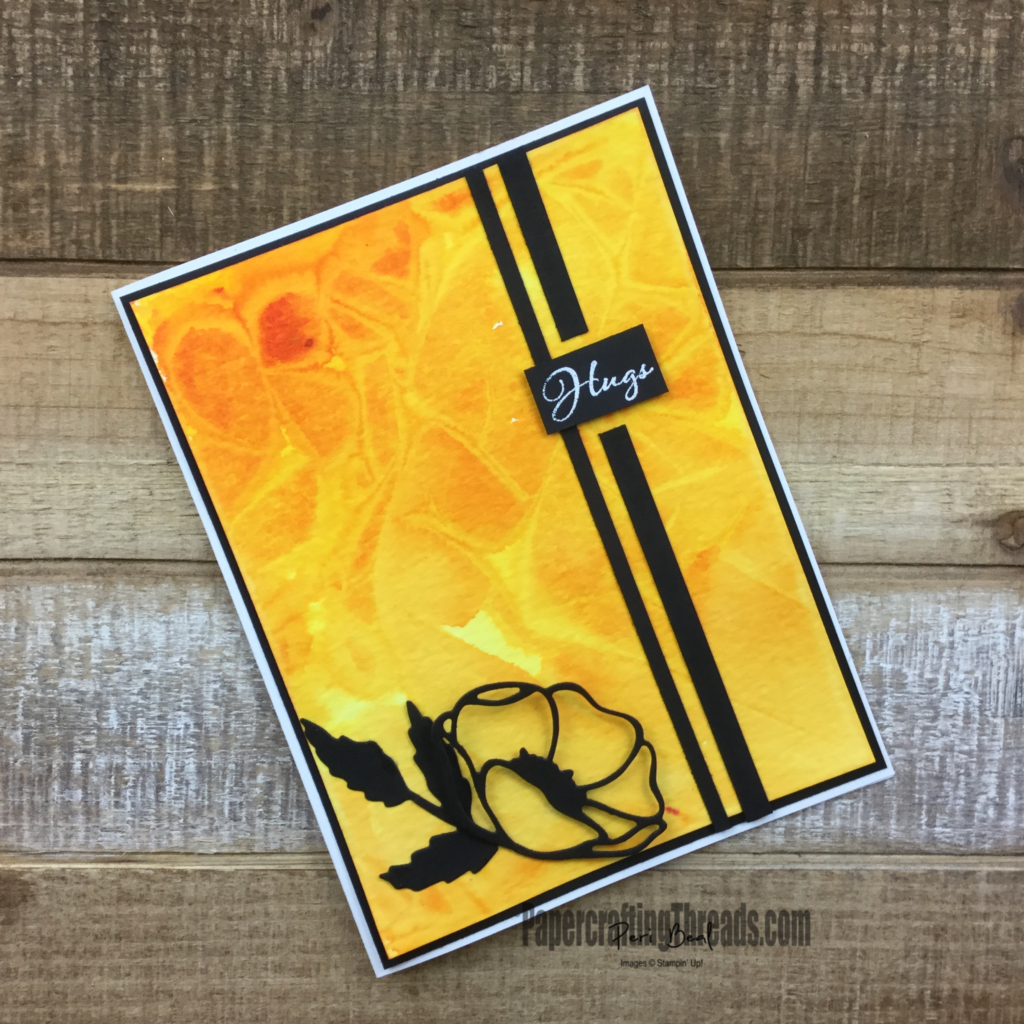
Use the fun and easy Cling Wrap Technique to add lots of dimension without bulk. And the only thing extra you need to make it is already in your kitchen.
Supplies for Cling Wrap Technique
Pigment Sprinkles (reinkers would also work for this technique)
Fluid 100 Watercolor Paper, cut to 5” x 3 ¾”
Stampin’ Spritzer filled with water
Cling Wrap (I used Saran Wrap but any brand will work)
Whisper White cardstock cut to 8 ½” x 5 ½” and scored at 4 ¼”
Basic Black cardstock cut to 5 ¼” x 4”
Basic Black cardstock scraps
Poppy Moments Dies
Positive Thoughts Stamp Set
Versamark Ink
White Embossing Powder
Heat Tool
Diecutting Machine
Tombow Multipurpose Glue
Dimensionals
Directions for Cling Wrap Technique
- Tear off a piece of the cling wrap, a little bit bigger than the watercolor paper.
- Very sparingly, tap the Pigment Sprinkles container over the surface of the cling wrap. (I used Mango Melody.)
- Spritz with water.
- Lay the watercolor paper face down into the liquid color and flip the entire thing over and face up.
- Scrunch the cling wrap with your fingers to make desired angles. Let the piece air dry – no heat tool. Do not remove the cling wrap until entire piece is completely dry.
- Adhere watercolor paper to Basic Black mat with Tombow Multipurpose Glue. Adhere layers to front of card base with liquid glue.
- Diecut poppy and leaves from Basic Black scraps. Trim leaves and adhere to card front lower left corner. Adhere poppy with a Dimensional.
- Cut Basic Black cardstock scraps to 1/8” x 5 ¼” and ¼” x 5 ¼”. Adhere as shown with liquid glue.
- Stamp sentiment on Basic Black cardstock scrap with Versamark Ink. Heat emboss with White Embossing Powder. Trim out the word “Hugs”. Adhere with a Dimensional.

Leave a Reply