Papercrafting Threads

  • Tutorials
    • PDF Tutorials
    • 3D Projects
    • Cardmaking
    • Fun Fold
    • Product Tips & Tricks
    • Projects
    • Techniques
  • Catalogs
  • Shop & Specials
    • Shop My Stampin’ Up! Online Store
    • Special Offers
    • Buy Me A Coffee
    • My Favorite Things on Amazon
    • Gift Certificates
  • Contact Me
  • Join the Fun
    • Join the Fun
    • Special Join Offers
  • Calendar of Events
  • Paper Pumpkin
    • Paper Pumpkin Kits
    • Paper Pumpkin Stamp Case Inserts
  • Nav Social Menu

    • Email
    • Facebook
    • Instagram
    • Pinterest
    • YouTube

How To Custom Color Glitter with Wink of Stella

March 16, 2017 2 Comments

16 Mar

Stampin'Up!, custom color glitter with Wink of Stella, enjoy your day, Inside the Lines, birthday card, handtsamled, #peribeal, #papercraftingthreads
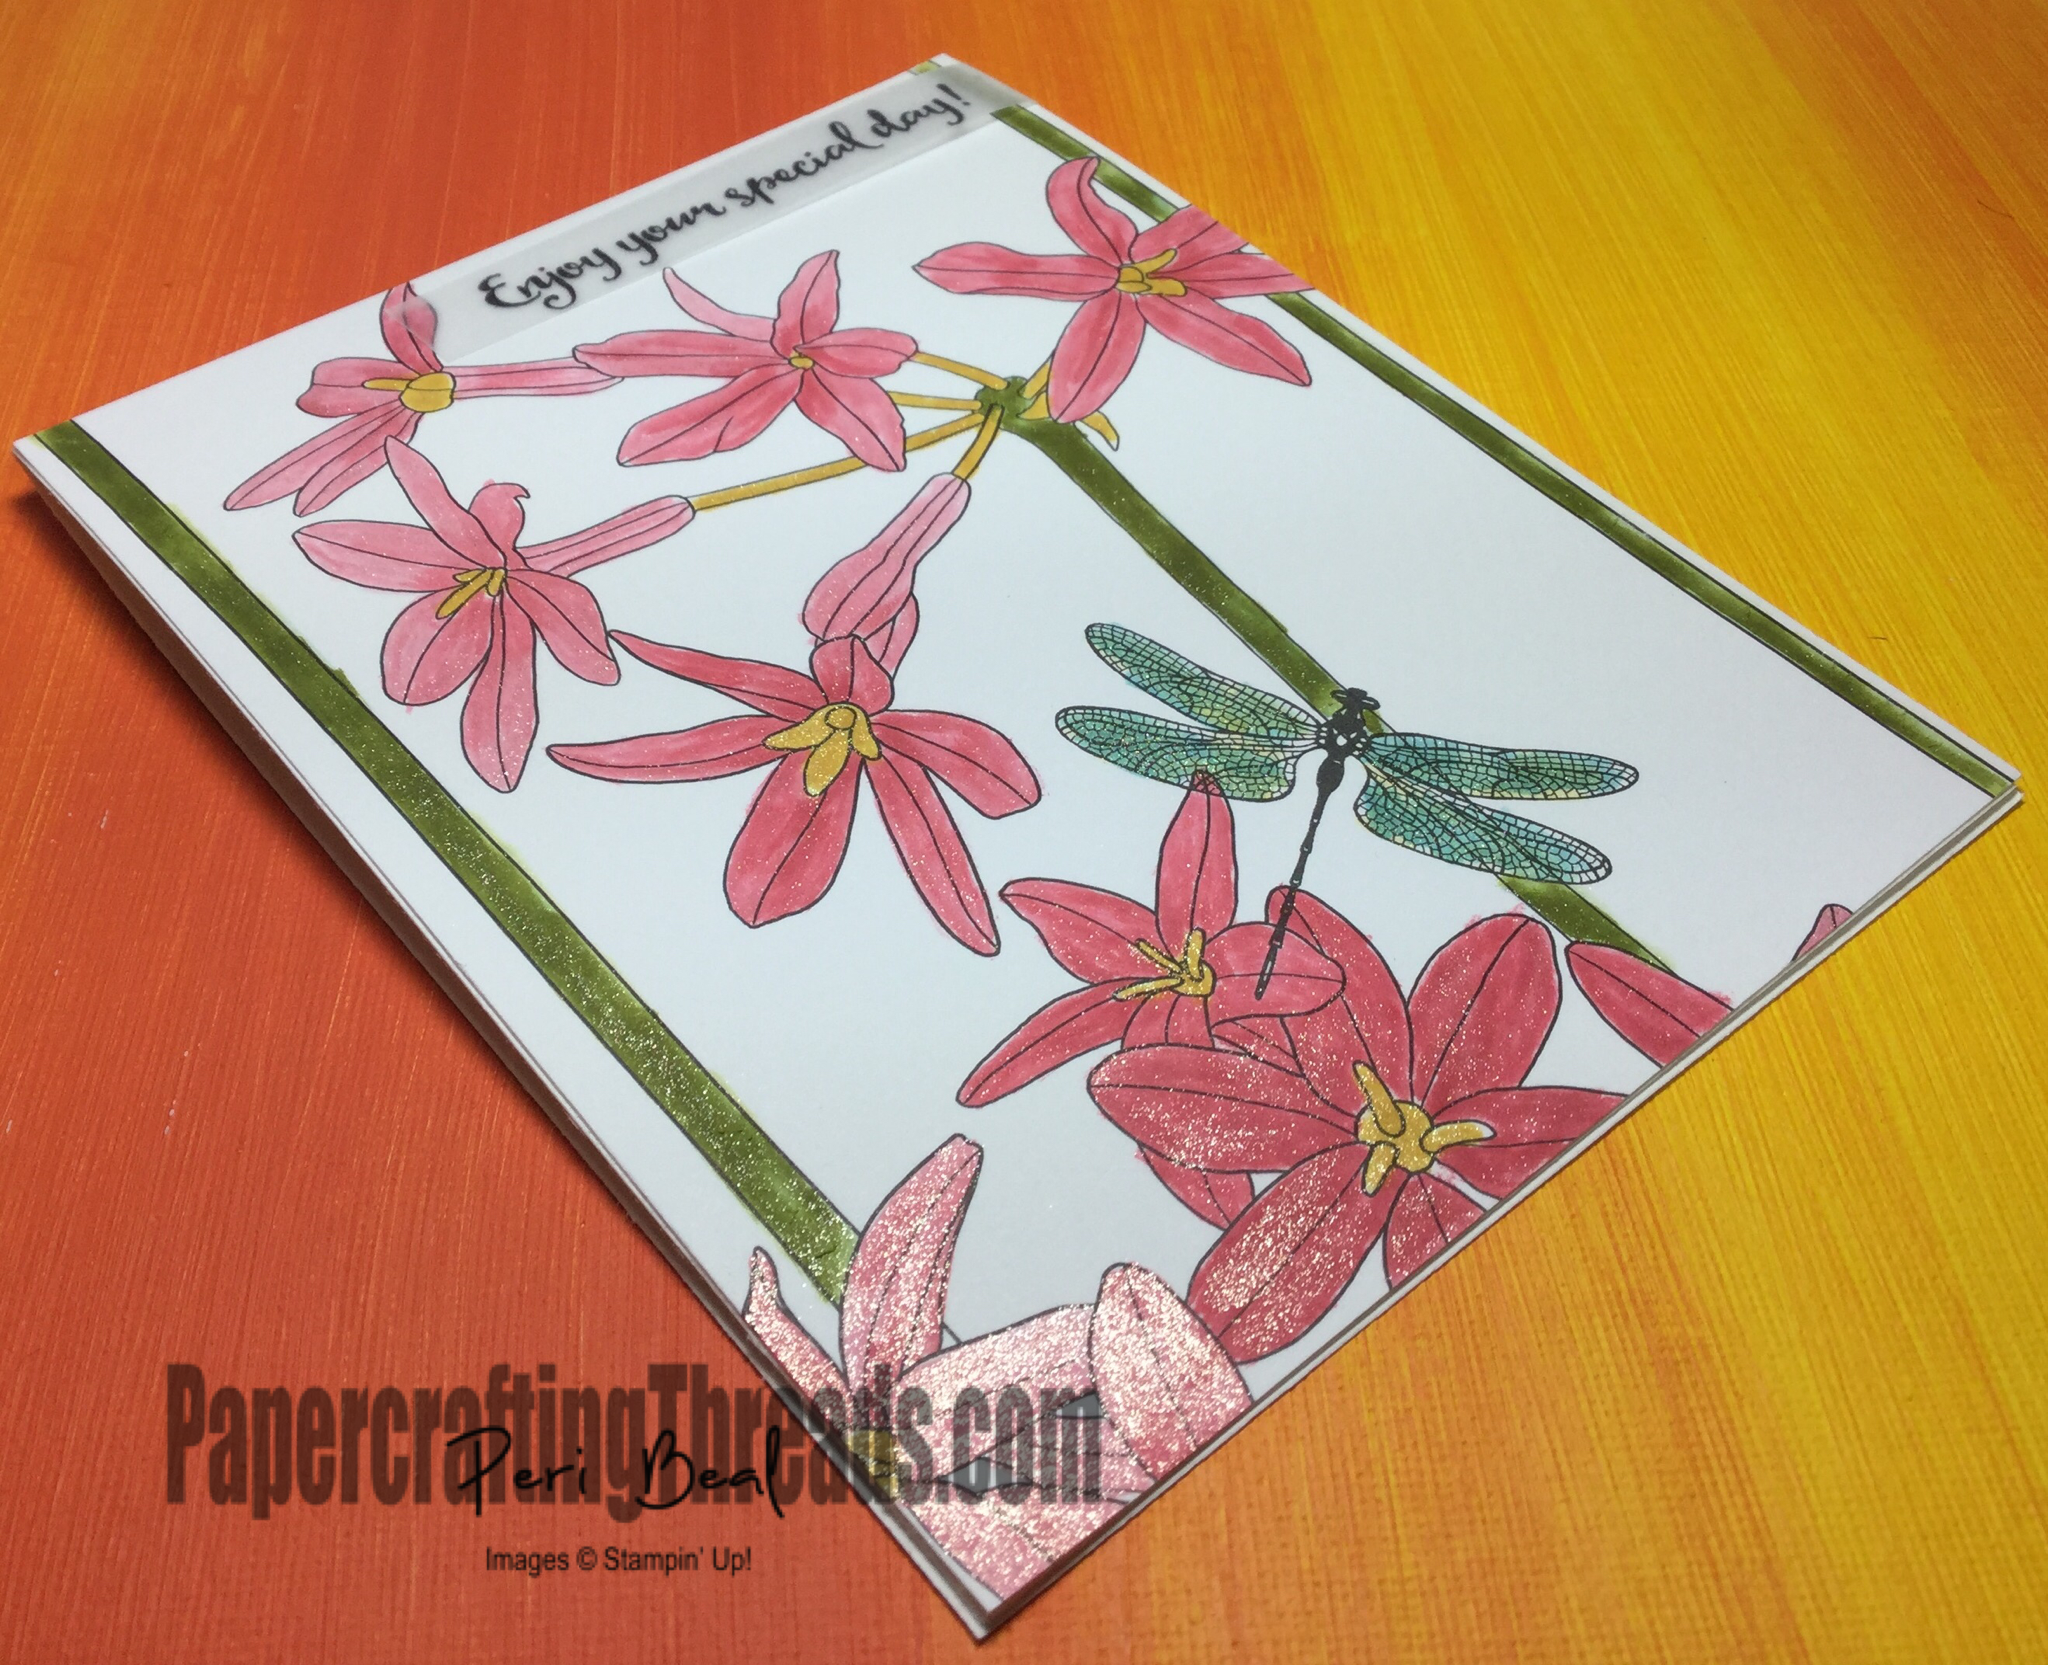
Remember that sneak peek from last week – the custom color glitter with Wink of Stella? Well, I went a little crazy and ended up making a set of four different cards.

The basic technique is super easy. Take a clear acrylic block, scribble on it with the Stampin’Up! Marker of your choice. Then pick up the color with a clear Wink of Stella brush and color away.

Stampin'Up!, custom color glitter with wink of Stella, how to, #peribeal, #papercraftingthreads

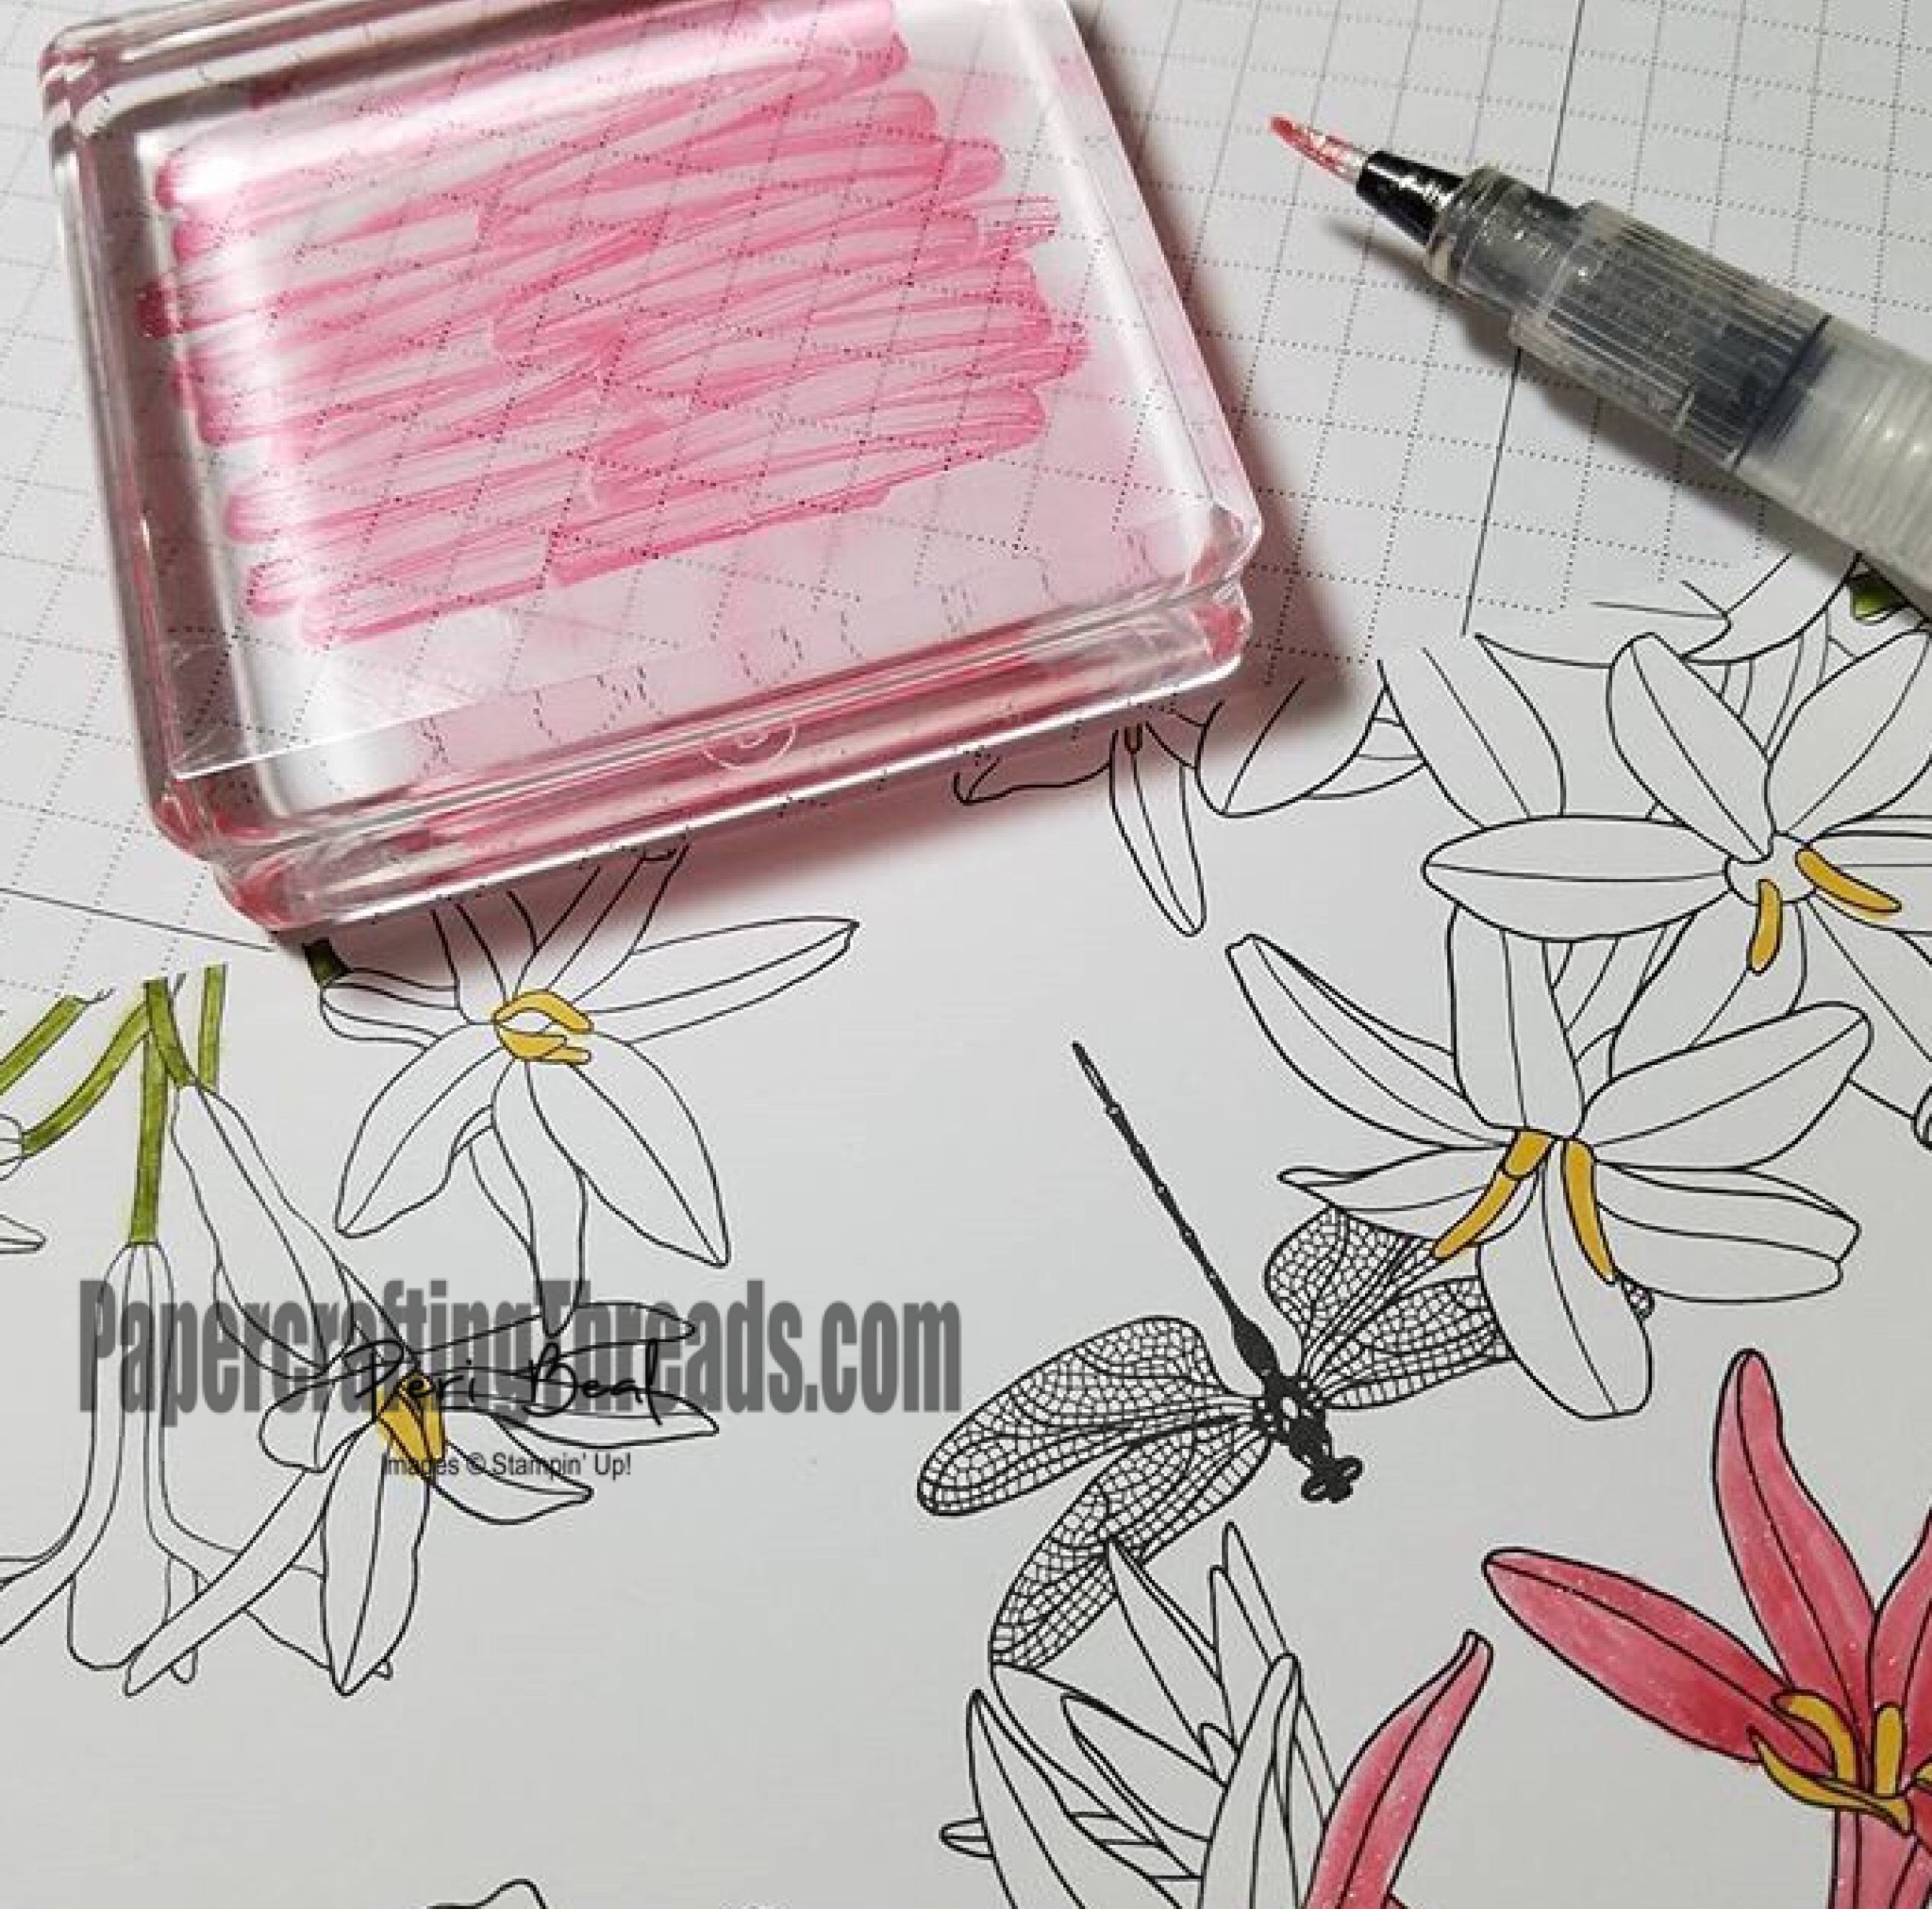
TIP 1: Once you’ve used up the color on the block, wipe off the leftovers with a baby wipe before adding more marker. If you don’t, your marker tip will get all glittery.

TIP 2: If you’re not getting much glitter, gently squeeze the middle of the pen to get the glitter flowing again.

TIP 3: Brush the Wink of Stella tip on a paper towel until the glitter runs clear after each color.

True confession time, after I had my first panel done I decided I didn’t like the light color of my flower stems. So I colored over them with a darker green and now I love them.

It’s a little hard to see in the photo, but all of the Watermelon Wonder flowers are glittery, and so is the dragonfly. Who knew it’s kinda difficult to photograph glitter!

I’ll post the rest of the cards in the set over the next few days as well as the complete supply list.

Share:

2 Comments
see more related posts: Cardmaking· Product Tips & Tricks

Previous Post: « A Piece of Pi, or a Trillion?
Next Post: Five Ways to Add Texture »

Reader Interactions

Comments

  1. Valerie says

    April 2, 2017 at 7:38 am

    Beautiful card…thanks for sharing this great technique.

    Reply
    • Peri says

      May 13, 2017 at 10:04 am

      Glad you like it!

      Reply

Leave a Reply Cancel reply

Your email address will not be published. Required fields are marked *

Primary Sidebar

Peri Beal

Cheesehead. Avid reader. Antique hunter.

Shop Online

Shop with me and get a FREE PDF tutorial bundle delivered to your inbox AND a handmade card via snail mail

Search

Papercrafting Threads

Gift Certificates
  • Email
  • Facebook
  • Instagram
  • Pinterest
  • YouTube

Sign up for my Newsletter

Sign up for my newsletter and get a free PDF tutorial as my welcome thank you!

Almost there...

Please check your email to confirm your subscription

Retired Product
Privacy Policy

The Fine Print

Just so you know... This is a personal website and I am responsible for its content. Stampin' Up!® does not endorse the use of or contents of the classes, services, or non-Stampin' Up! products I offer.

Sign up for my Newsletter

Sign up for my newsletter and get a free PDF tutorial as my welcome thank you!

Almost there...

Please check your email to confirm your subscription

Footer

  • Calendar of Events
  • 3D Projects
  • Cardmaking
  • Fun Fold
  • Product Tips & Tricks
  • Projects
  • Techniques
  • Of Interest
  • Catalogs
  • Join the Fun
  • Contact Me
  • Email
  • Facebook
  • Instagram
  • Pinterest
  • YouTube

PAPERCRAFTING THREADS

Copyright © 2025 · Refined theme customized by Catherine Carroll

Privacy Policy · Affiliate Disclosure