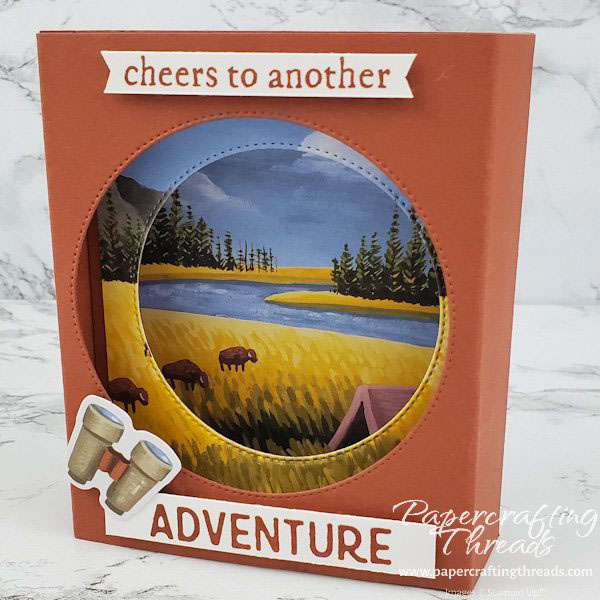
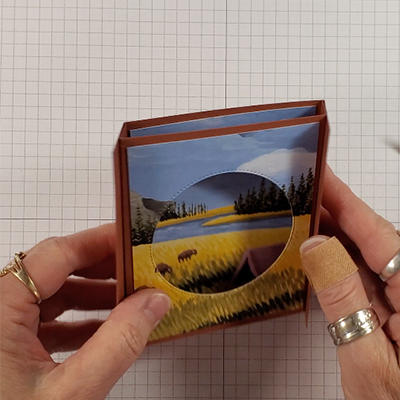
Look through the binoculars with this fun Double Diorama Card made from the scenic card bases included in May’s Exploring In Color Paper Pumpkin Kit! This format can be easily transformed with any coordinating patterned paper (or preprinted card bases). Let’s get started!
cutting & scoring guide
| Paper Dimensions | Score Long Side | |||
| 4-1/4″ x 5-1/2″ Copper Clay cardstock base and top (cut two) | 1″ from each end | |||
| 4-1/4″” x 4-1/2″” Copper Clay cardstock inner diorama | 1/2″ from each end | |||
| 3-1/4″ x 4″ patterned scenic paper for inner diorama | ||||
| 3-1/4″ x 4″ patterned scenicpaper for inside back diorama | ||||
| 3-1/4″ x 4″ Basic White cardstock for back message panel | ||||
| Scrap strips of Basic White cardstock |
step by step instructions for double diorama card
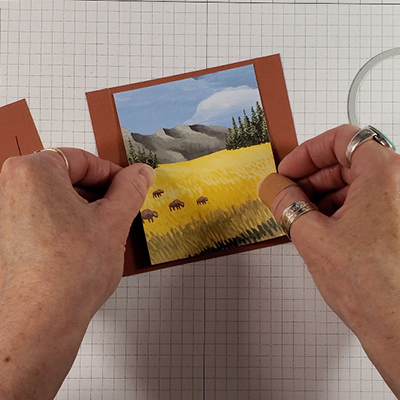
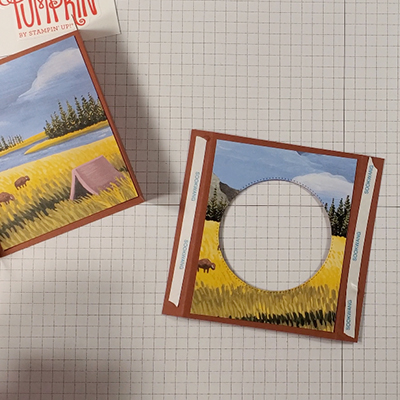
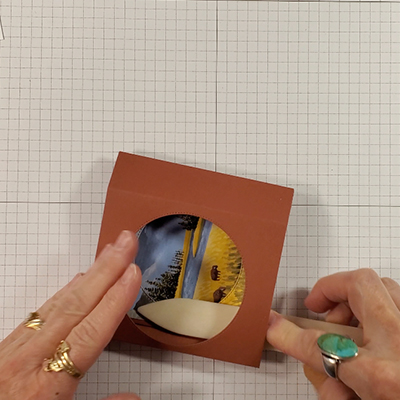
Adhere the inner scene to the smaller cardstock piece, centering the scene between the scorelines.
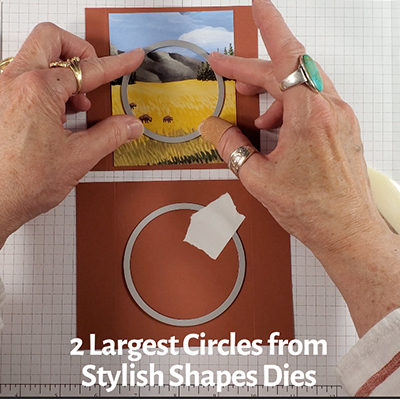
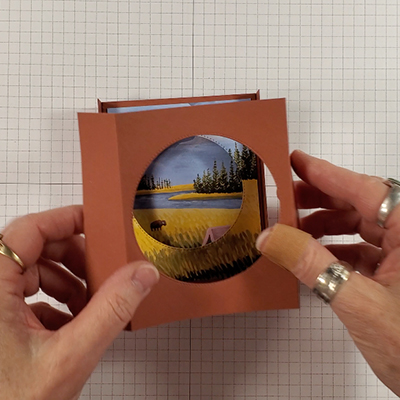
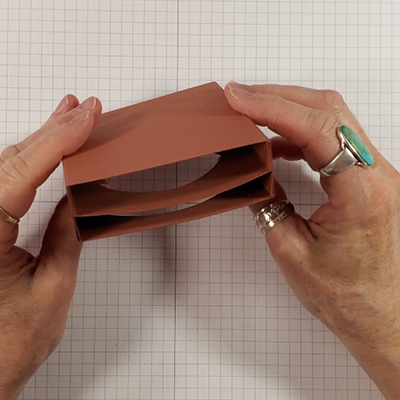
Using the two largest circles from the Stylish Shapes die set, center the smaller circle on the inner scene and diecut. Center the larger circle on one of the cardstock bases and diecut.
Fold on the scorelines on both pieces, creating mountain folds.
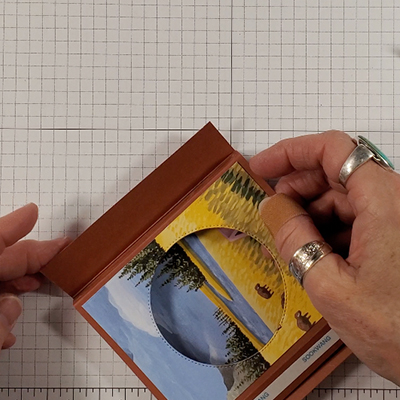
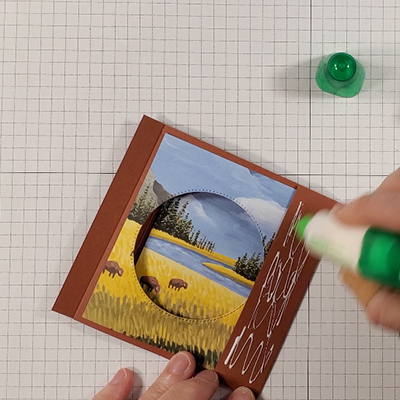
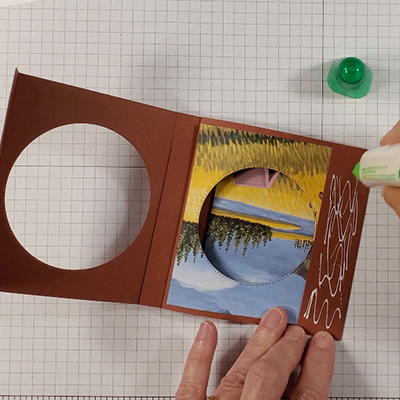
Then adhere the remaining scene between the scorelines of the remaining cardstock bases. Fold on the scorelines to create valley folds.
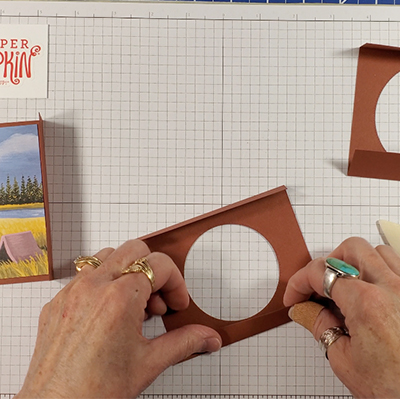
Place the inner scene over the back scene. Add adhesive to the outside of the 1/2″ flaps and press the one inch flaps on top to adhere.
Dry fit the top — add the ‘lid’.
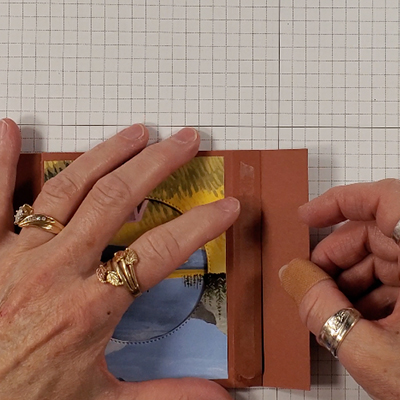
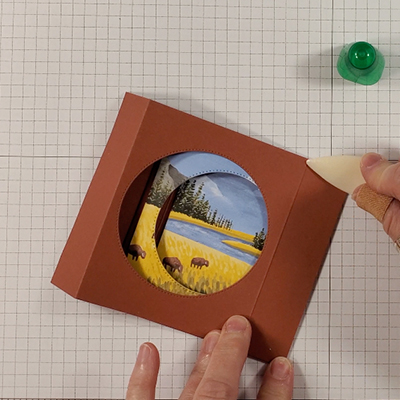
Press one of the 1 inch flaps flat, add liquid glue and line up the cover flap, and burnish to adhere. Repeat on the other end.
Reinforce the folded scorelines on the inner scene by inserting a bone folder and burnishing.
Decorate with sentiment strips — I inked just the top portion ‘cheers to another’ and stamped on a narrow Basic White strip, and then flagged the ends. After cleaning the stamp, I inked the ‘ADVENTURE’ portion and stamped on a little bit wider Basic White strip. Both strips were popped up with dimensionals. I finished off the front with the binoculars hanging just over the sentiment strip and the open circle.
For a place to add a message, I added a Basic White cardstock piece on the back and decorated the bottom right corner with a second generation inked compass image.
Like this alternative? Subscribe to next month’s Paper Pumpkin Kit and see what I come up with!!
Leave a Reply