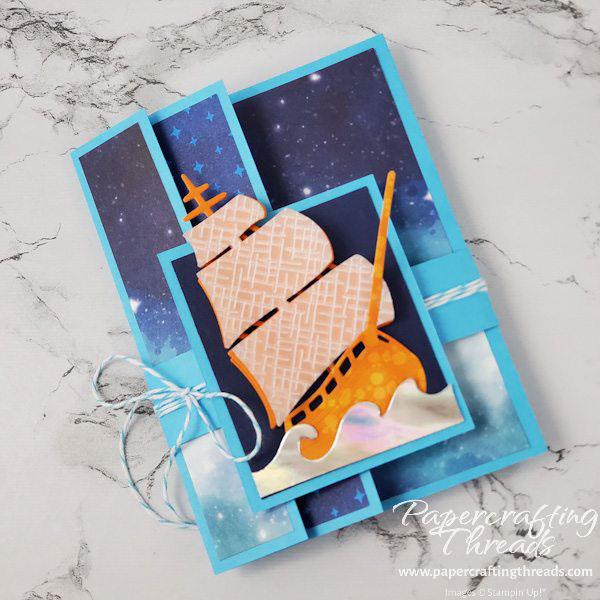
This Dual Fun Fold Card has an old fashioned ship plunging through the ocean under a starlit sky on moonlit waves. Perfect for that dad who has a sense of adventure. Or anyone else who likes the high seas. Let’s get started!
cutting & scoring guide
| Paper Dimensions | Score Short Side | |||
| 5-1/2″ x 11″ Tahitian Tide cardstock base | 1-1/4″, 5-1/2″ & 9-1/4″ | |||
| 3-3/8″ x 5-1/4″ Stargazing DSP for card front | ||||
| 1-1/2″ x 5-1/4″ Stargazing DSP for middle card panel | ||||
| 1″ x 5-1/4″ Stargazing DSP for left front panel & inside (cut 2) | ||||
| 1″ x 9″ Tahitian Tide cardstock belly band | ||||
| 2-3/4″ x 3-1/4″ Tahitian Tide cardstock front focal point | ||||
| 2-1/2″ x 3″ Night of Navy cardstock front mat | ||||
| ” x 5-1/4″ Basic White cardstock for inner message panel | ||||
| Scraps of Stargazing DSP, Pumpkin Pie cardstock, vellum & Holographic specialty paper |
All supplies can be purchased through my online store just click and you’ll go right to the supply list.
step by step instructions for dual fun fold card
I diecut the ship’s hull from the orange printed side of one sheet of the Stargazing DSP. The ship’s mast and one set of sails were diecut from Pumpkin Pie cardstock. I also diecut an extra set of sails out of Vellum Cardstock and embossed it with the crosshatch embossing folder.
Next I assembled the ship by using a toothpick to stabilize the mast. I placed the diecut mast face up, aligned the toothpick with the mast and made sure a generous portion of the toothpick extended past the bottom. Then I adhered the toothpick with two pieces of Tear N Tape. I removed the liner backing and added dimensionals on the sails. Then I adhered the Pumpkin Pie sails in place. I placed two glue dots on the embossed Vellum Cardstock sails where the mast would be and added the vellum on top of the Pumpkin Pie sails. The glue dots are invisible due to the crosshatched embossing! Align the bottom of the toothpick with one of the bars on the hull, flip over and hold it in place with a piece of Tear N Tape.
card assembly
For the Tahitian Tide card base, start with the 1-1/4″ scoreline and fold a valley fold. Fold the center scoreline as a valley fold. And then fold the remaining scoreline as a mountain fold. I used the Stargazing DSP for my starlit sky and moonlit waves. Just strategically cut the panels to give the illusion of sky and ocean and adhere to the card panels. I stamped 2nd generation Tahitian Tide ink waves on the bottom of the Basic White message panel. Then I added a little more depth with a Blending Brush and added more Tahitian Tide ink over the stamped image. I stamped the sentiment “You are a treasure” in Pumpkin Pie ink on the message panel. The message panel is adhered to the left large inside panel.
Fold the Tahitian Tide belly band around the card with the ends meeting in front and adhere with Tear N Tape. Wrap Tahitian Tide baker’s twine three times around the belly band and tie a big floppy bow towards the left side. Layer the Night of Navy cardstock on the matching Tahitian Tide cardstock. Pop the layers pieces up on a strip of dimensionals just below the baker’s twine.
Add the ship to the front by putting another strip of Tear N Tape on the back of the hull and dimensionals on the backs of the sails. This adds more dimension as the mast and hull are now on different planes.
Diecut a wave from the silver Holographic Specialty Paper and adhere in front of the hull, trimming the ends to fit.
Leave a Reply