
Create an easy Angled Card for a modern take on the holidays. I love my color combination with that dark brown foil playing off the lime and apple greens. Kind of reminds me of Whoville and the grinch. And no maths required for all the angles – I do what little there is for you. So let’s get started!
cutting & scoring guide
| Paper Dimensions | Score Short Side | Score Long Side | ||||
| 5½” x 8½” Granny Apple Green cardstock base | 4¼” | |||||
| 2¼” x 4¼” Modern Christmas patterned paper | ||||||
| ½” x 6¼” Lemon Lime Twist cardstock | ||||||
| 2¼” x 5⅜” Earthen Toned Metallic Foil Specialty Paper | ||||||
| 3″ x 4¼” Lemon Lime Twist Focal mat | ||||||
| 4⅛” x 5⅜” Lemon Lime Twist liner mat | ||||||
| 2⅞” x 4⅛” Basic White Focal cardstock | ||||||
| 4″ x 5¼” Basic White liner | ||||||
| Scrap of Basic White cardstock for stamping & fussy cutting one tree |
step by step instructions
This card is a portrait orientation card. Mark bottom center front of the card base at the halfway point of 2⅛”. Place the card base in the paper trimmer with the pencil mark in the center of the cutting track. Swivel the top right corner into the cutting track and slice off this right-angled triangle. Rotate the triangle 90 degrees so the bottom right corner now becomes the top right corner and the point of the triangle hangs off the edge of the left side of the card front. Remove the card base and set aside while we work with the triangle.
Position the rectangle of Modern Christmas patterned paper on top of the triangle, leaving an even border along the top edge and the right edge. Adhere in place with liquid glue. Flip the triangle over to the backside and trim off the excess patterned paper using the long edge of the triangle as a guide.
Place the long edge of the triangle (or hypotenuse) over the narrow strip of Lemon Lime Twist cardstock, with the strip extending past both points of the triangle and creating a narrow border. Adhere the cardstock in place. Trim off the excess Lemon Lime Twist. Do not worry about the weird looking point for right now. Set aside.
finish the angles
Returning to the card base, adhere the Earthen Toned Metallic foil paper to the left front of the card, leaving an even border at the top, bottom and left side. Open the flap and trim the excess corner off using the slanted edge of the card base as a guide.
Adhere the decorated triangle into place — position the piece so the right angle is aligned with the right angle of the card front. Place a bone folder or other long object along the lower edge. Remove the triangle and add glue above the bone folder. Remove the bone folder and press the triangle in place. Flip the card over and trim off the excess point along the fold line.
If you found this tutorial helpful, consider a contribution to my coffee fund ☕️ Coffee → Creativity → Content → More Coffee (help fuel the cycle!)
decorating the angle card
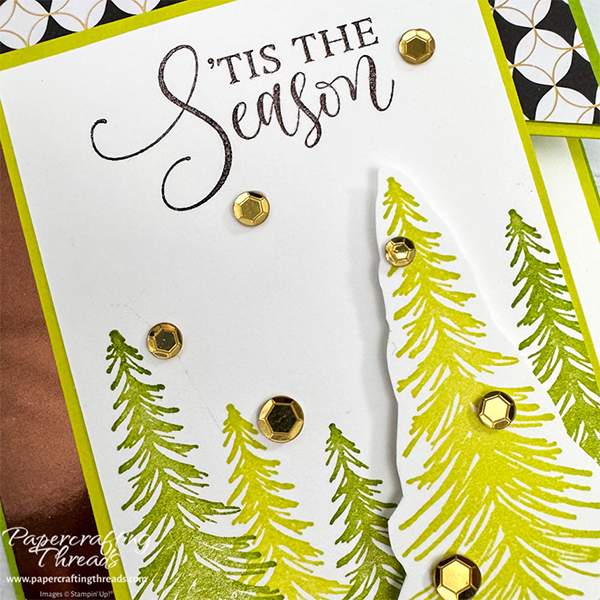
Stamp the greeting ’tis the Season in Early Espresso ink at the top of the Basic White focal piece. Sprinkle with clear embossing powder and heat set. Stamp three trees from the Modern Christmas stamp set in Granny Apple Green ink along the bottom. Then stamp two trees in Lemon Lime Twist ink. And lastly, stamp a third tree in Lemon Lime Twist ink on the scrap of Basic White cardstock and fussy cut.
Adhere the Basic White stamped piece to the Lemon Lime Twist mat. Add dimensionals strategically to the back of this piece, avoiding the left side from the middle down, and adhere to the center card front.
Pop the fussy cut tree up on dimensionals and adhere to card front. Add Loose Gold Sequins to the sky above the trees and to the popped up tree. TIP: Apply drops of multipurpose liquid glue, let set for 20-30 seconds, then use the Take Your Pick tool to pick up individual sequins and place on top of the glue drops.
Next, open the card base, and layer the Lemon Lime Twist liner and Basic White liner to the inside of the card. Stamp a tree in Granny Apple Green ink on the left side of the Basic White liner.
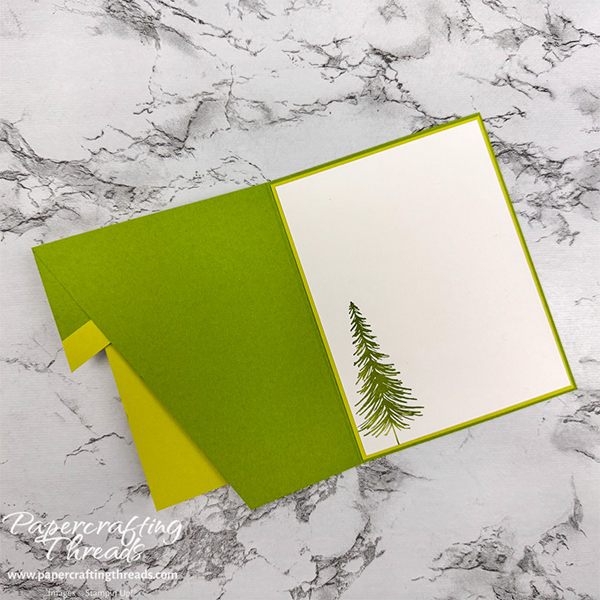
I just love how the angles play up the tree shapes. And it’s even cooler when the card is opened. Love, love, love that angled left side.
Need a visual for how to play with all the angles and what to trim? I’ve got you covered with a YouTube video below.
Leave a Reply