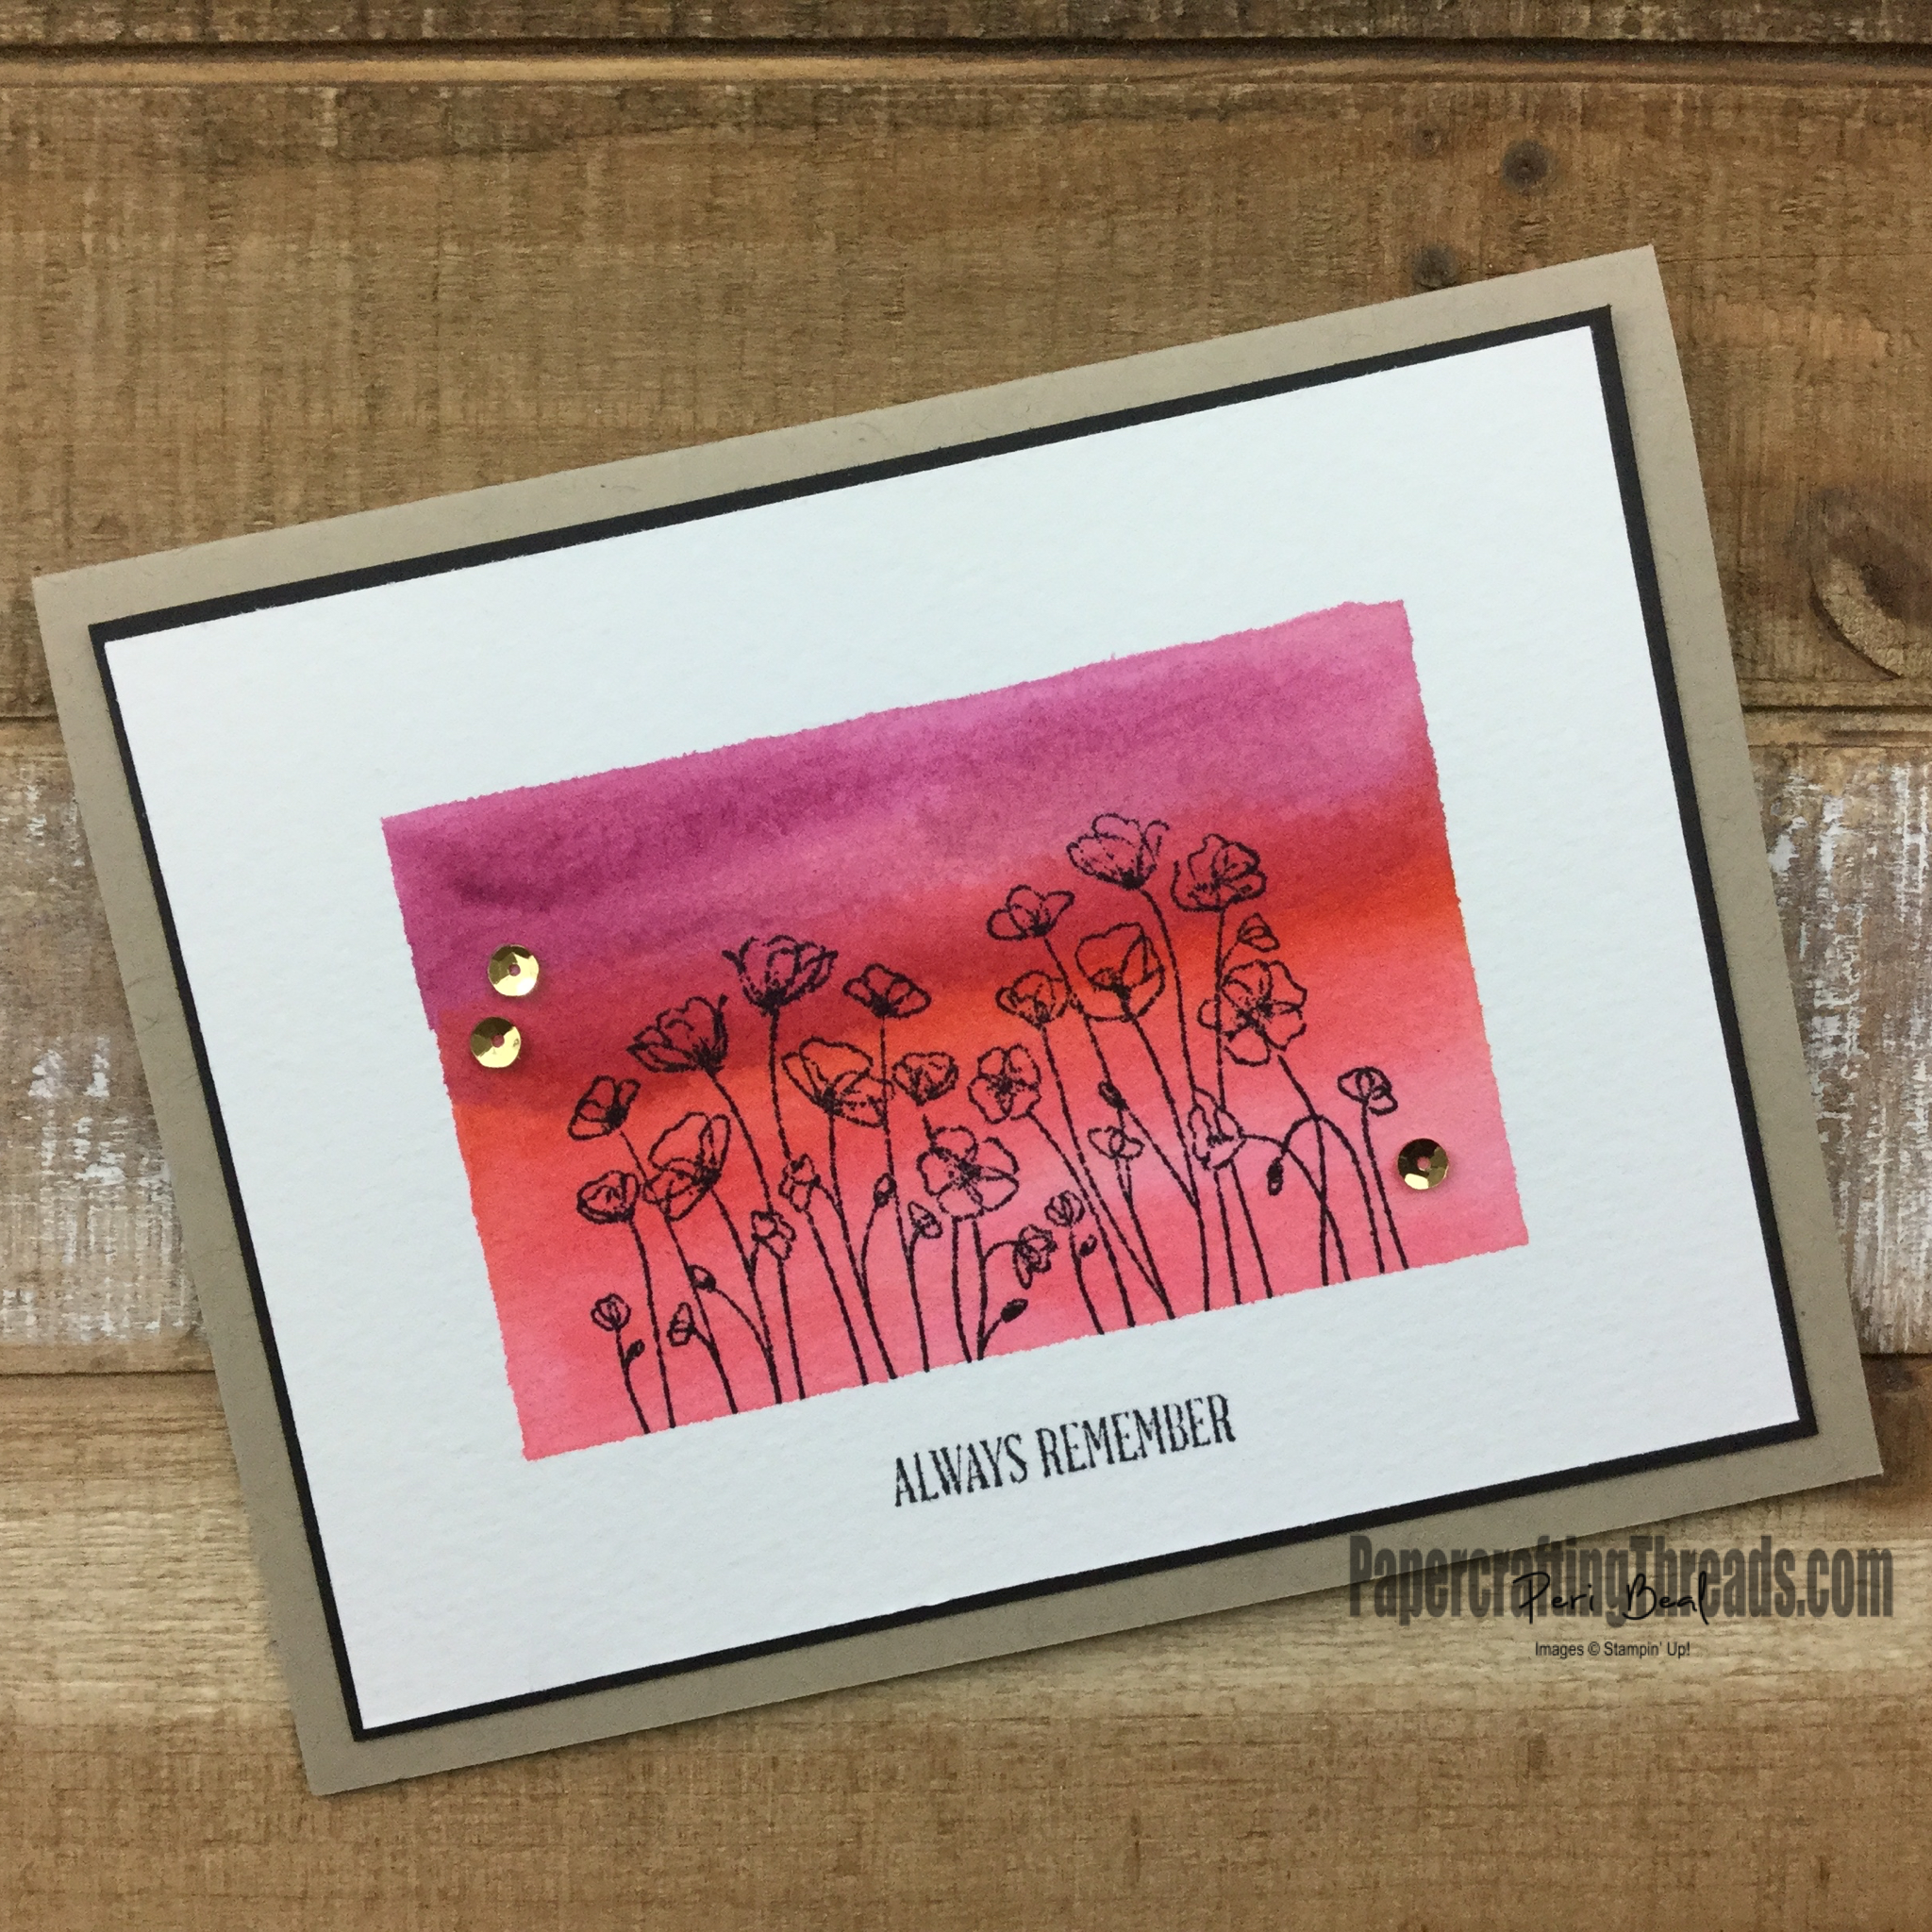
Always Remember is the most appropriate sentiment for this Memorial Day. And the Faux Frame perfectly highlights that sentiment. The Faux Frame technique is very easy to do – the hardest part is waiting for the watercolor paper to dry! But I promise it is worth it. Use this same technique with bright colors, such as Daffodil Delight, Melon Mambo and Gorgeous Grape and a playful sentiment for a completely different mood.
Supplies:
Grid Paper
Fluid 100 Watercolor Paper cut to 5” x 3 ¾”
Painter’s Tape
Waterpainters
Flirty Flamingo Classic Stampin’ Pad
Poppy Parade Classic Stampin’ Pad
Rich Razzleberry Classic Stampin’ Pad
Whisper White cardstock cut to 5” x 3 ¾”
Additional Supplies for this particular card project:
Crumb Cake cardstock, cut to 8 ½” x 5 ½” and scored at 4 ¼”
Basic Black cardstock, cut to 5 1/8” x 3 7/8”
Black Memento Ink
Painted Poppies stamp set
Peaceful Moments stamp set
Tombow Multipurpose Glue
Gold sequins
Stamparatus
Heat Tool (optional)
Instructions:
- Cover work surface with Grid Paper. Place watercolor paper in center of grid paper. Cover all four sides of the watercolor paper the width of three of the squares with painter’s tape. Press the edge of the painter’s tape firmly on the watercolor paper on the inside edges.
- Load up the wide brush of the Waterpainter with water, and horizontally sweep the water in broad strokes across the watercolor paper.
- Smoosh the lid of each ink pad to transfer pools of ink to the inside of the lids, and open all three pads.
- Dip the medium sized tip of a Waterpainter into the Flirty Flamingo ink pool and dab onto the bottom third of the watercolor paper. Swipe the brush tip on a piece of paper towel until the brush is clear of ink.
- Now dip the medium sized tip of a Waterpainter into the Poppy Parade ink pool and dab onto the middle of the watercolor paper and slightly overlap the top of the Flirty Flamingo ink. Swipe the brush tip on a piece of paper towel until the brush is clear of ink.
- Finally, dip the medium sized tip of a Waterpainter into the Rich Razzleberry ink pool and dab onto the top third of the watercolor paper. Slightly overlap the Poppy Parade stripe. Swipe the brush tip on a piece of paper towel until the brush is clear of ink.
- Let dry thoroughly. (You may speed up the process with a Heat Tool after the majority of the water has been absorbed by the paper. If you use a Heat Tool too soon, it can push the colors around where you don’t want them.)
- Place the watercolor panel into the Stamparatus, line up the image and sentiment stamps, and press the lid down to pick them up. Ink the stamps with Black Memento ink and stamp. Repeat inking until the images are appropriately dark enough.
- Adhere the watercolor panel onto the Basic Black cardstock mat with Tombow Multipurpose Glue.
- Then adhere the layered pieces onto the Crumb Cake card base with Tombow Multipurpose Glue and add three gold sequins as shown.
This same technique can be used with reinkers and waterpainters, sponge brayers and inkpads, or sponges and inkpads. (use a circular motion and start with sponging off the watercolor paper and working inwards).
Leave a Reply