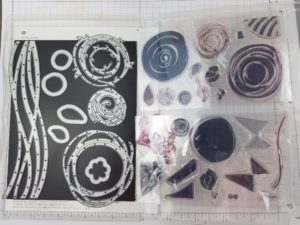
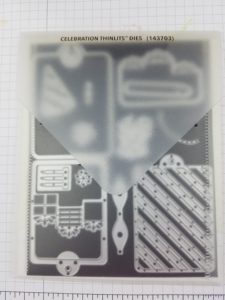
Ever get in the middle of making a card, and can’t find the diecut you want to use? I have five diecuts storage solutions for you!
1) Many of the Stampin’Up! diecuts coordinate with stamp sets. Cut a piece of magnetic vent cover (purchase it at hardware stores—much cheaper than the magnetic sheets sold at craft stores), cut it to fit inside the front cover of the stamp case, add Fast Fuse or Tear N Tape to the back and adhere it to the case. Place diecuts flat side down on the magnetic sheet.
2) Another option is to store diecuts in a clear-mount stamp case, item #119105. In this case J you can store two sets of diecuts, one on each side. Just adhere the magnetic sheets to both inside covers. I do this with similar diecuts, like the circles and ovals, so it takes up less space.
3) A third option is to use the original sleeve the diecuts come in. With this option, I adhere the magnetic sheet to the piece of cardstock the diecuts come on. Then place diecuts flat side down on the magnetic sheet. No more trying to pull the diecuts off of the sticky tape!
4) Photo albums with sheet protectors work also. Again, adhere a magnetic sheet to a piece of cardstock, add the diecuts, and slide into the sheet protector.
5) The last option is to use Avery Elle Stamp and Die Storage Pockets. These are available on Amazon. Add a magnetic sheet and you’re all set.
Once you have decided on your method of storage, you will need someplace to put the organized diecuts. You can now file the diecuts on a bookshelf or in a drawer. And to add another layer of organization, you can sort the diecuts and place them in various sized bins.
And a bonus tip: ever misplace a diecut on your work surface? Keep a magnetic bowl out and place the working diecuts in it, OR, adhere a piece of magnetic sheet to a plastic angled photoframe. Pop the diecuts you are working with on it and you’ll never lose sight of the diecut!


Leave a Reply