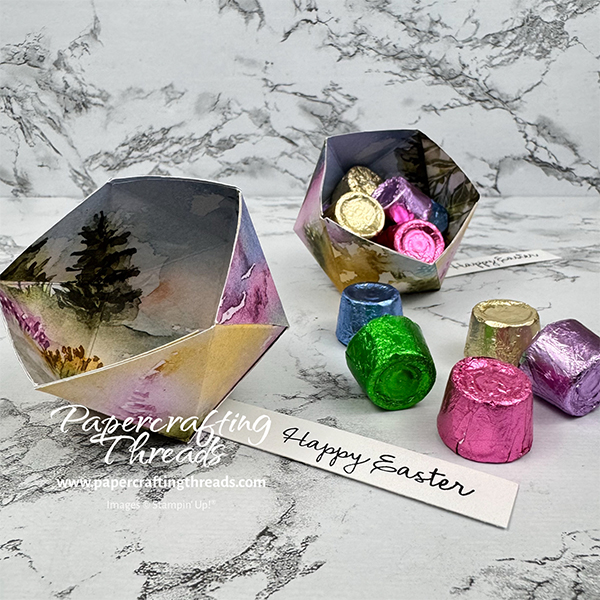
Brighten your Easter table with a charming Geodesic Bowl Table Favor! Made from just a single 6″ x 6″ sheet of patterned paper, these sweet geometric containers are perfect for holding colorful foil-wrapped Easter candies. What makes these bowls special is their striking structure—formed entirely from equilateral triangles that create a modern yet festive look. The best part? You only need basic crafting supplies to make them: a paper trimmer/scorer, scissors, glue — and of course, patterned paper. I’ll walk you through the simple folding process that transforms flat paper into these dimensional bowls that your guests will love taking home as favors. Ready to add some geometric flair to your Easter celebration? Let’s get started!
cutting & scoring guide
| Paper Dimensions | Score Short Side | Score Long Side | ||||
| 5¼” x 6″ patterned paper (Thoughtful Journey DSP) | 1 5/16“, 2⅝” & 3 15/16“ | |||||
| Strip of Basic White cardstock for sentiment |
step by step instructions
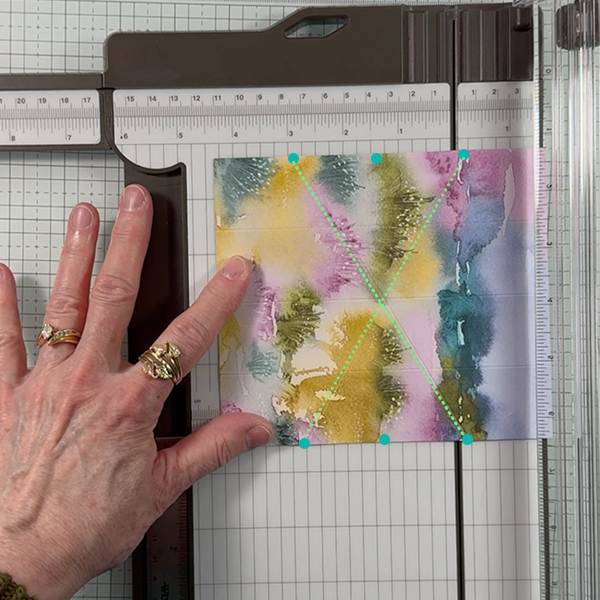
I used the stunning Thoughtful Journey Designer Series Paper for my bowls. These sheets of DSP feature gorgeous landscapes with a bit of abstract. With the side facing up that I wanted to be the outside, and oriented in landscape position, I trimmed ¾” off the right side, making the sheet measure 5¼” x 6″. Along the short side ( leaving the 5¼” edge at the top), score at 1 5/16“, 2⅝” & 3 15/16“. Rotate the paper to the 6″ side and with a pencil, make tick marks along both the top and bottom edges at 1½’, 3″ and 4½”.
scoring the geodesic bowl table favor
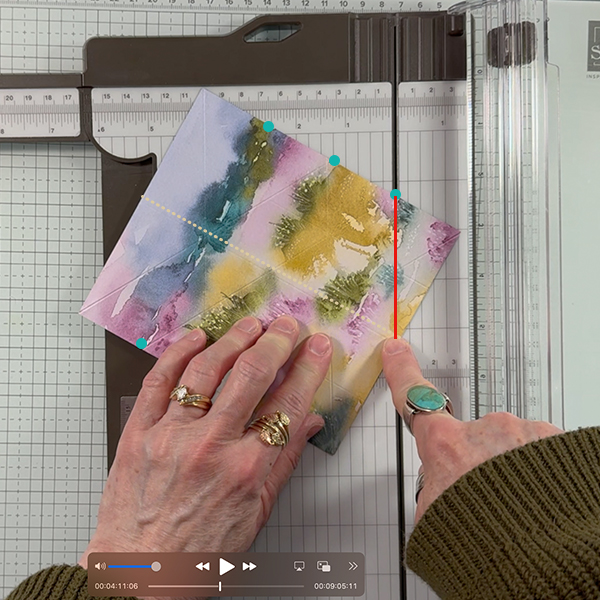
The Stampin’ Up! paper trimmer makes this project a breeze. Place the 4½” tick mark at the top of the paper into the groove of the paper trimmer/scorer. Rotate the bottom of the paper, so that the bottom 1½” tick mark is also lined up in the groove. Score.
Place the 1½” tick mark at the top of the paper into the groove of the paper trimmer/scorer. Rotate the bottom of the paper, so that the bottom 4½” tick mark is lined up in the groove. Score. The two scorelines should form an ‘X’ in the center of the paper.
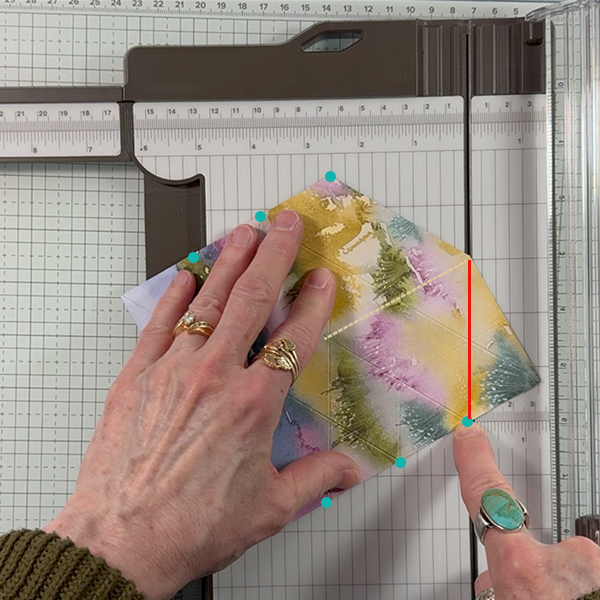
Place the 3″ tick mark at the top of the paper into the groove of the paper trimmer/scorer. Rotate the paper so that one of the bottom corners is also lined up in the groove. Score, creating a parallel line to one side of the ‘X’ already scored. Repeat with the opposite bottom corner.
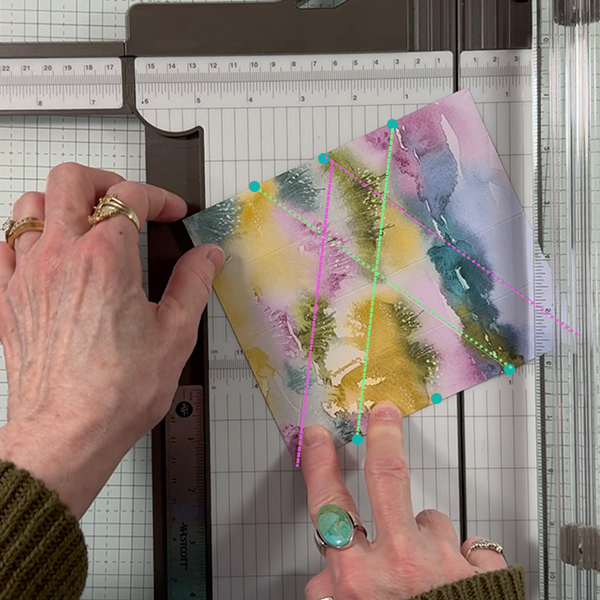
Rotate the paper 180 degrees to the opposite side and repeat the above step using the 3″ center tick mark, scoring to each opposite side corners.
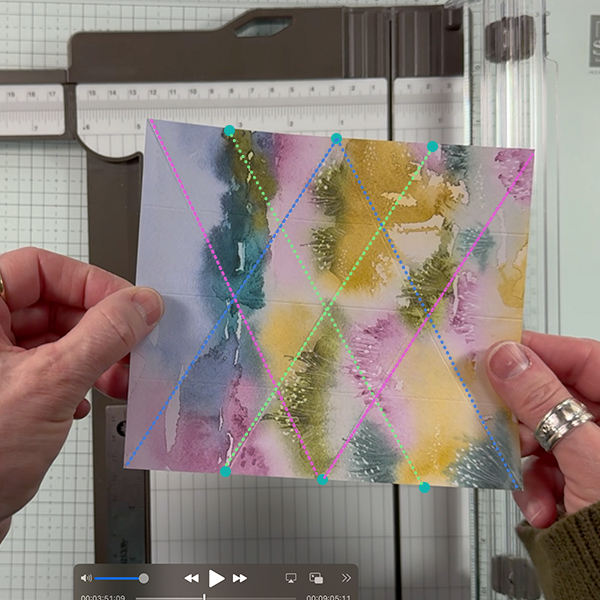
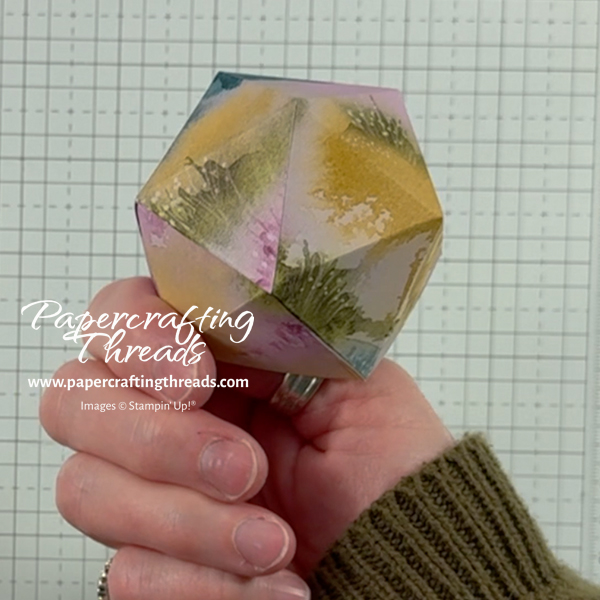
The sheet is now filled with scored equilateral triangles!
cutting
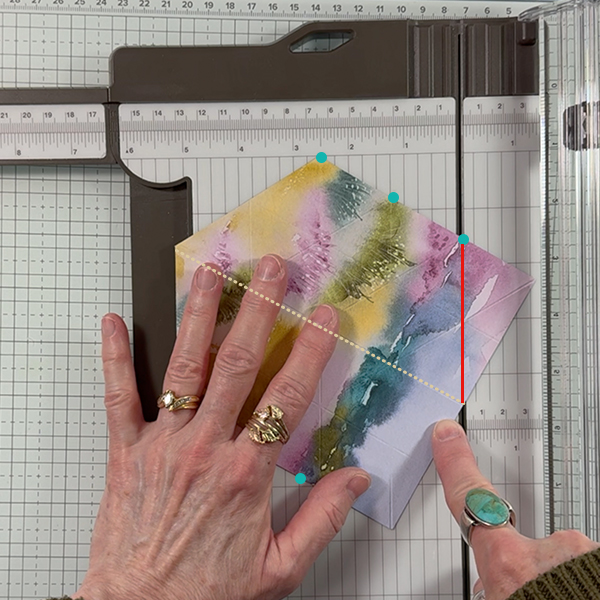
Next, remove the four corners. I’ll start with the top right corner. Locate the 4½” tick mark immediately to the left of this corner. Place the tick mark along the groove of the trimmer. Locate the horizontal center scored line and place it in the groove. Cut.
Place the horizontal center scored line in the groove. Locate the bottom right corner. Locate the 4½” tick mark to the left, place it in the groove and cut. Only two more to go!!
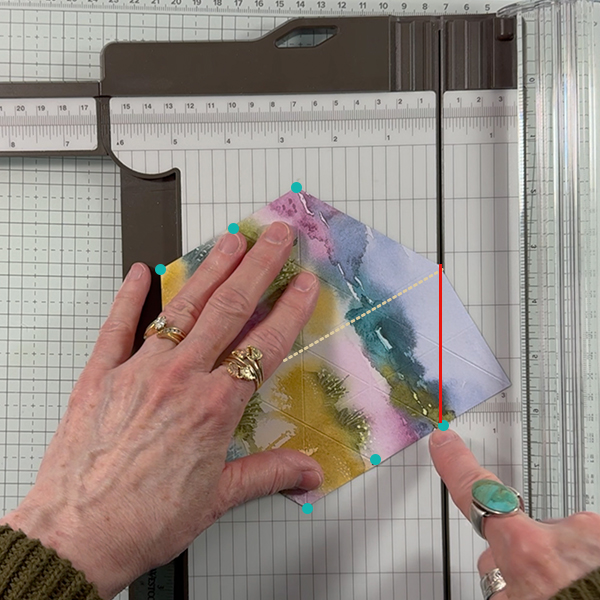
Rotate the piece so that what was the bottom 1½” tick mark is now at the top and place it in the groove. Locate the horizontal center scored line, place it in the groove and cut.
Place the horizontal center scored line in the groove. Locate the last corner. Locate the 4½” tick mark to the left, place it in the groove and cut. Tada! A gorgeous hexagon!!
assembly of the geodesic bowl table favor
Erase any visible tick marks. Fold and burnish all the score lines. Choose one side of the hexagon and cut away three adjacent triangles. In my case, with the scenic patterned paper, I chose to remove the three adjacent triangles on the right side of the scene. The hexagon should now look like a cat’s head 😻
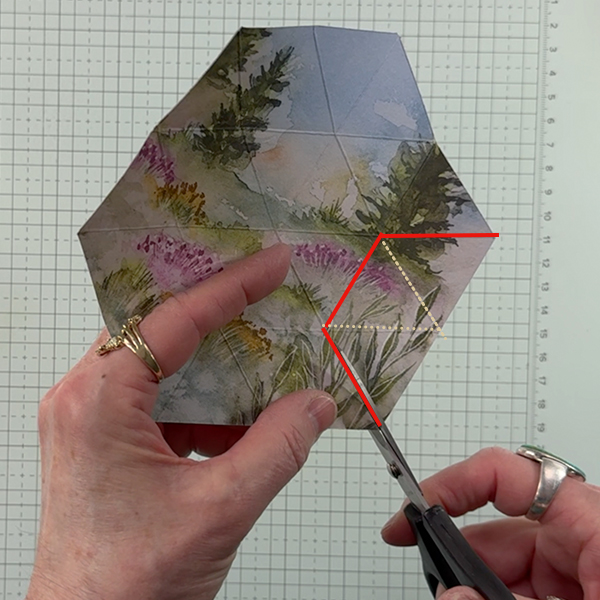
Turn the ‘head’ so the ears are facing the hand you have the scissors in. Follow the cut edge of the right ear and cut along the score line until reaching the center of the hexagon.
Then cut from each of the four remaining corner points of the hexagon until reaching an intersection of score lines.
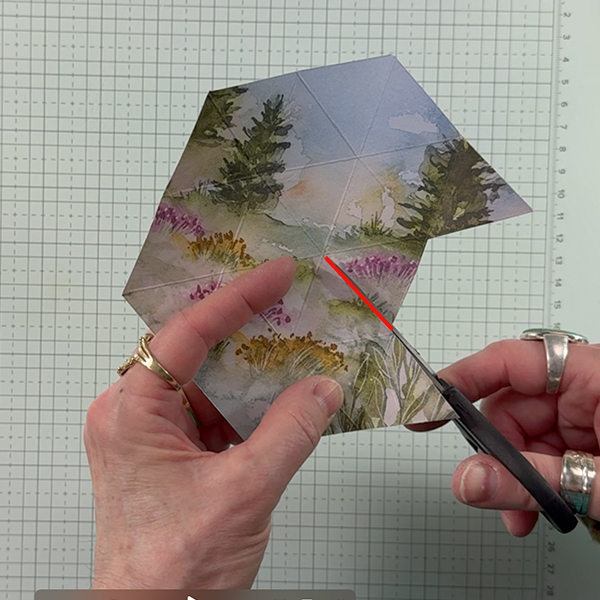
Holding the piece with the cat ears at the top, add liquid glue to the upside down center triangle at the cut line. Pull the right side up triangle to the right over the top of the left triangle and press to adhere, forming a peaked dome. Move up to the outside edge and the next upside down triangle. Add glue and pull the triangle on the opposite side over, aligning the edges and press to adhere. Repeat all the way around the hexagon.
finishing up
Since I’m using my Geodesic bowls as table favors for Easter, I stamped ‘Happy Easter’ from an old retired stamp set on a scrap strip of Basic White cardstock. Then I positioned the bowl on the strip to the right of the sentiment, placed a bit of glue where the bottom triangle met the strip and pressed to adhere. Next, I flipped the bowl upside down and used my snips to cut the strip off at an angle to match the bottom triangle.
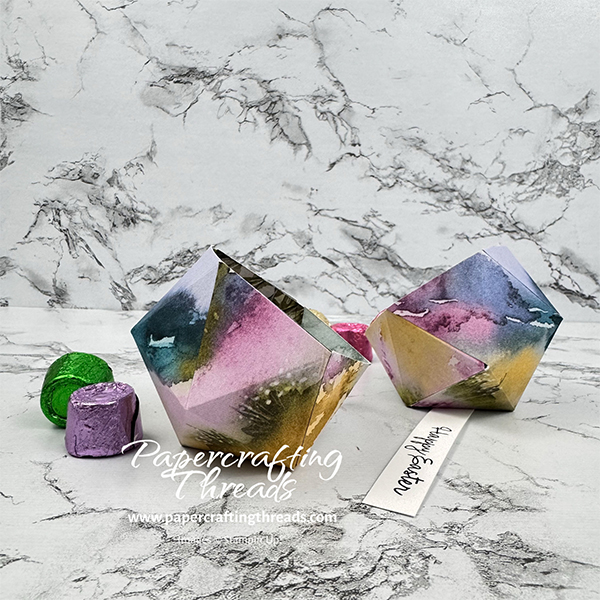
I filled my Geodesic Bowl Table Favors with pastel foil-wrapped Rolos. The bowls hold a generous amount. And once my guests eat all the candy, they’ll have a pretty paper bowl to use for decoration any time. Just cut off the Easter greeting!
I’ve also made a video if you need a visual. Check it out on my YouTube channel. And please like, share with your friends and subscribe.
If you found this tutorial helpful, consider a contribution to my coffee fund ☕️ Coffee → Creativity → Content → More Coffee (help fuel the cycle!)
Leave a Reply