Papercrafting Threads

  • Tutorials
    • PDF Tutorials
    • 3D Projects
    • Cardmaking
    • Fun Fold
    • Product Tips & Tricks
    • Projects
    • Techniques
  • Catalogs
  • Shop & Specials
    • Shop My Stampin’ Up! Online Store
    • Special Offers
    • Buy Me A Coffee
    • My Favorite Things on Amazon
    • Gift Certificates
  • Contact Me
  • Join the Fun
    • Join the Fun
    • Special Join Offers
  • Calendar of Events
  • Paper Pumpkin
    • Paper Pumpkin Kits
    • Paper Pumpkin Stamp Case Inserts
  • Nav Social Menu

    • Email
    • Facebook
    • Instagram
    • Pinterest
    • YouTube

Halloween 3D Treat Box

August 21, 2020 Leave a Comment

21 Aug

A fun little Halloween 3D Treat Box!

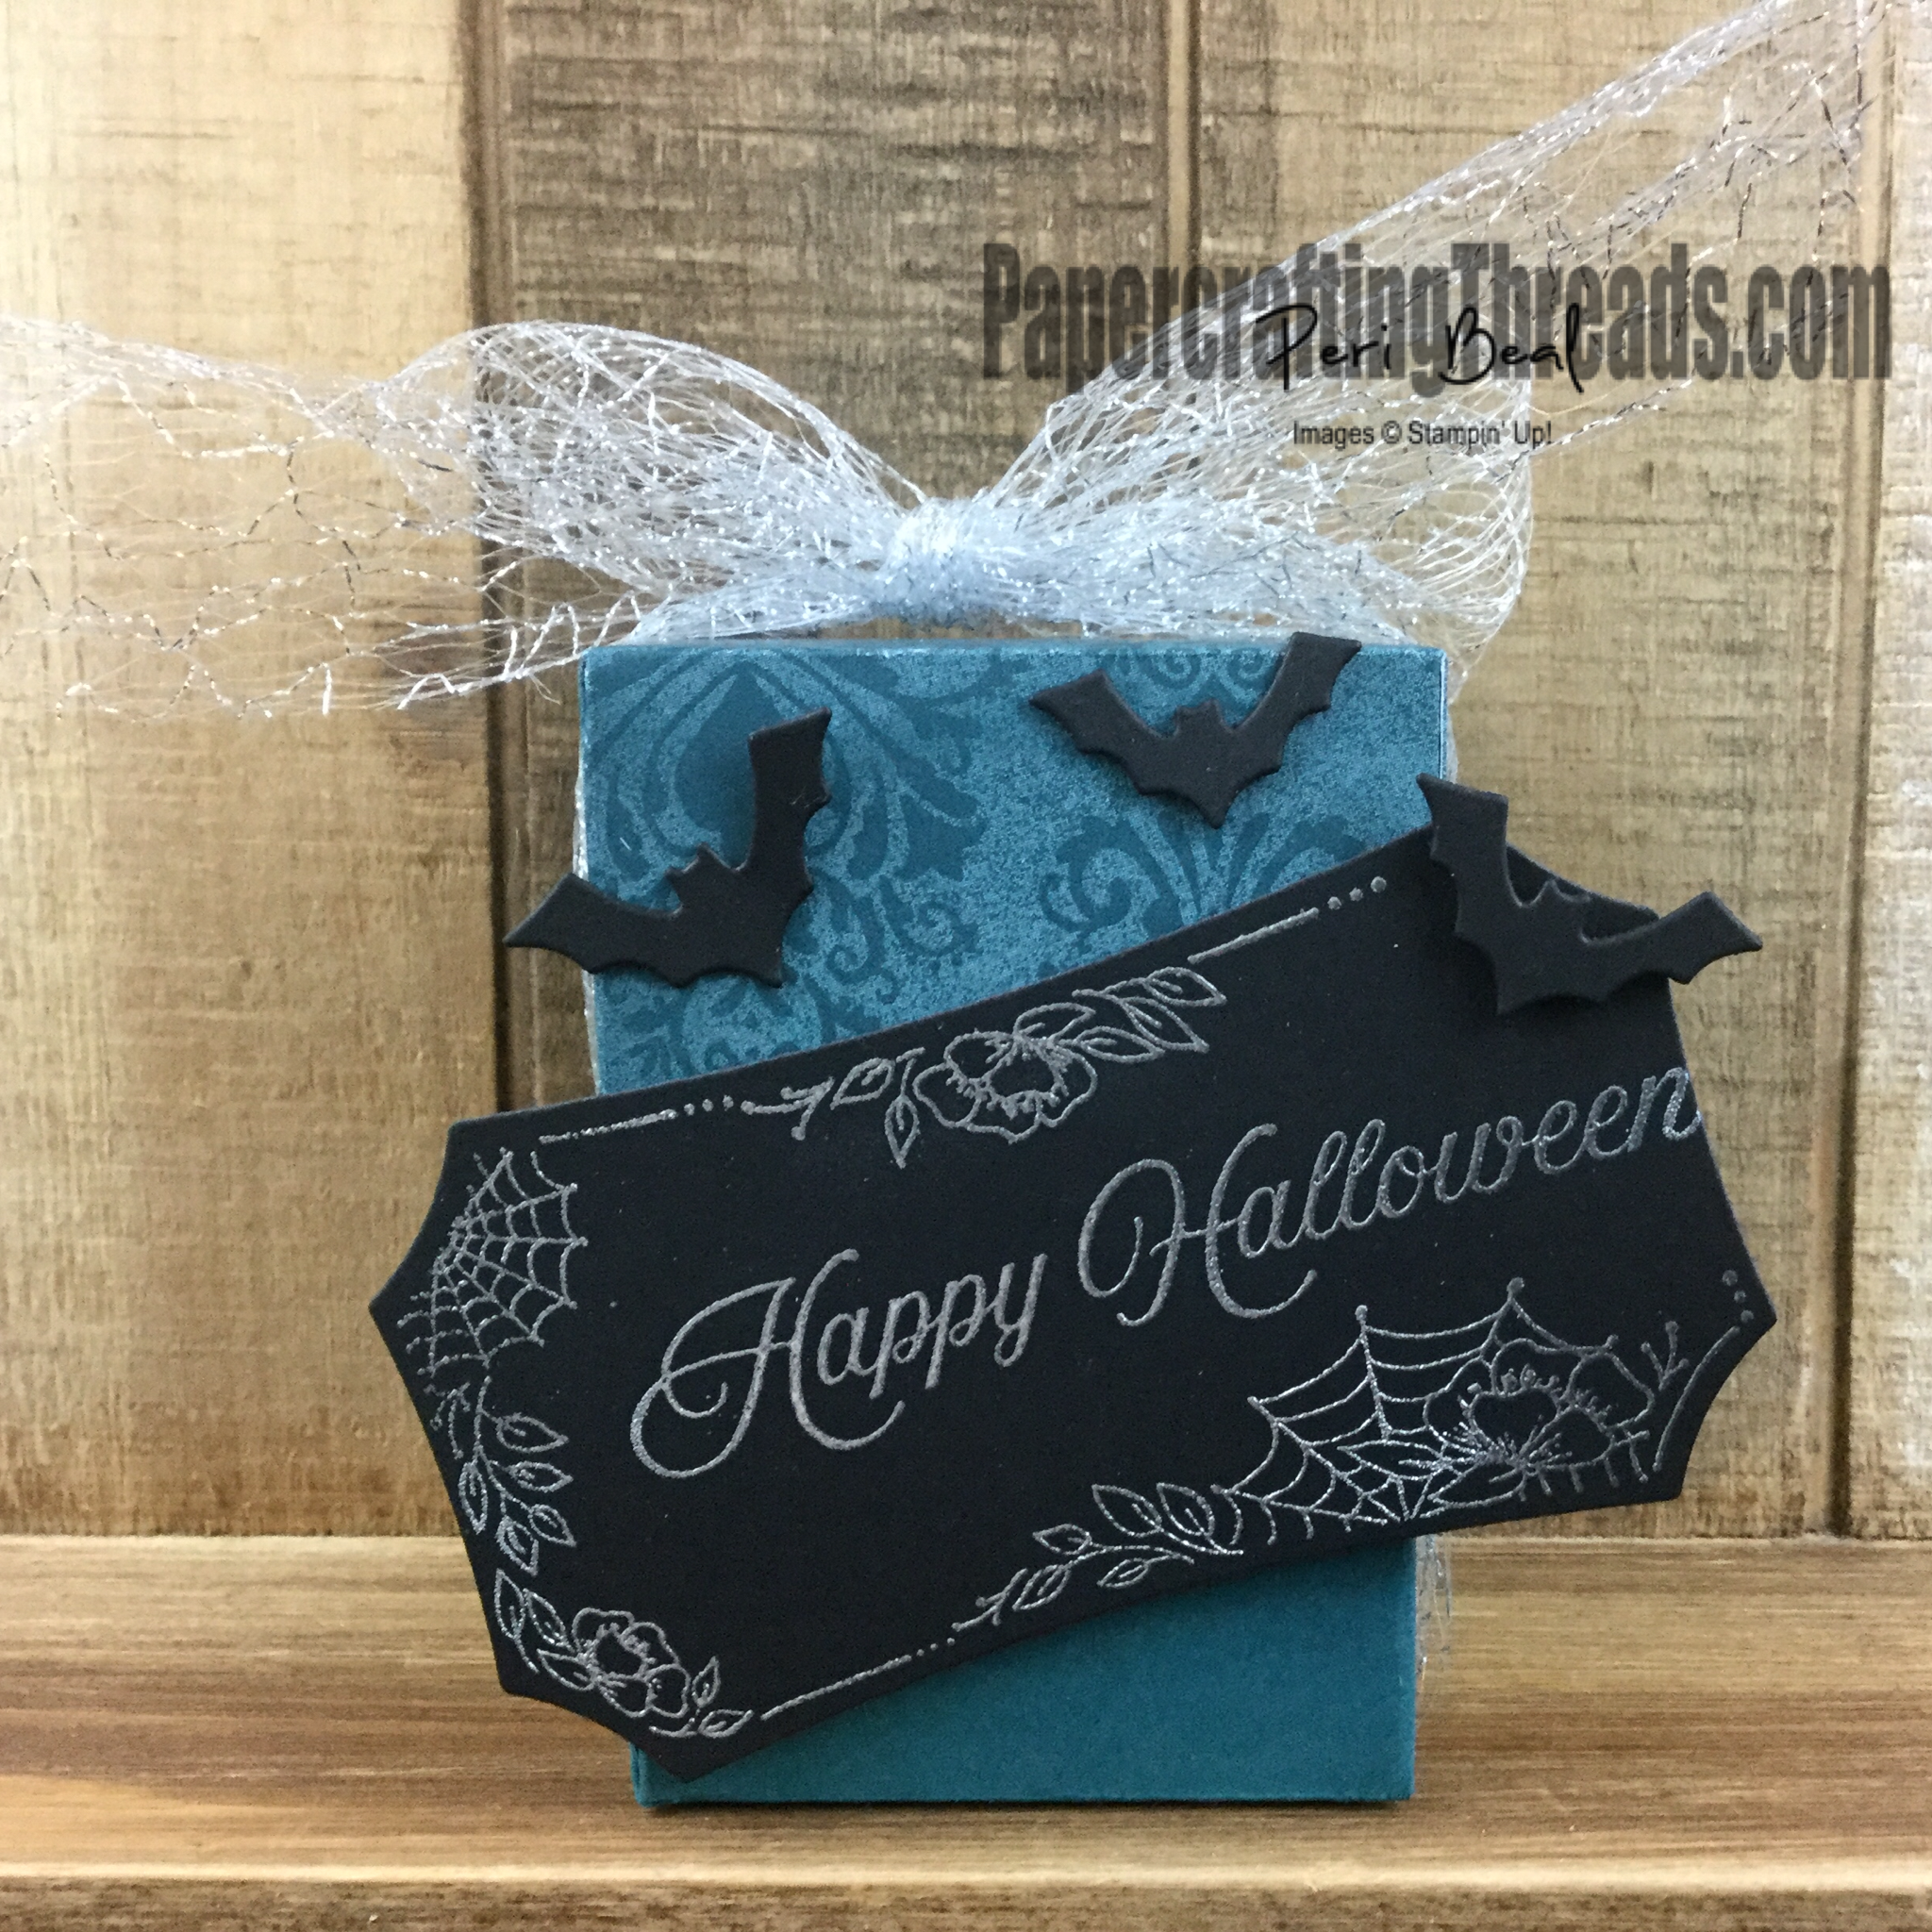
It’s only 71 days until the happiest time of year…31 October…Halloween! And this year’s Magic in this Night Suite Collection is so elegant. I had to get all of it: the Magic in the Night paper, Hallows Night Magic Bundle stamp set and dies, the mesh ribbon… The only pieces I did not use on my first project were the Cobwebs 3D embossing folder, black glitter paper and the iridescent pearls. Look for those to crop up in future 🎃 projects. And of course I’m partial to the Pretty Peacock color. Love the non-traditional color to mix things up. Enough chatter, let’s get on to how to make your own Halloween 3D Treat Box.

Supplies for Halloween 3D Treat Box:

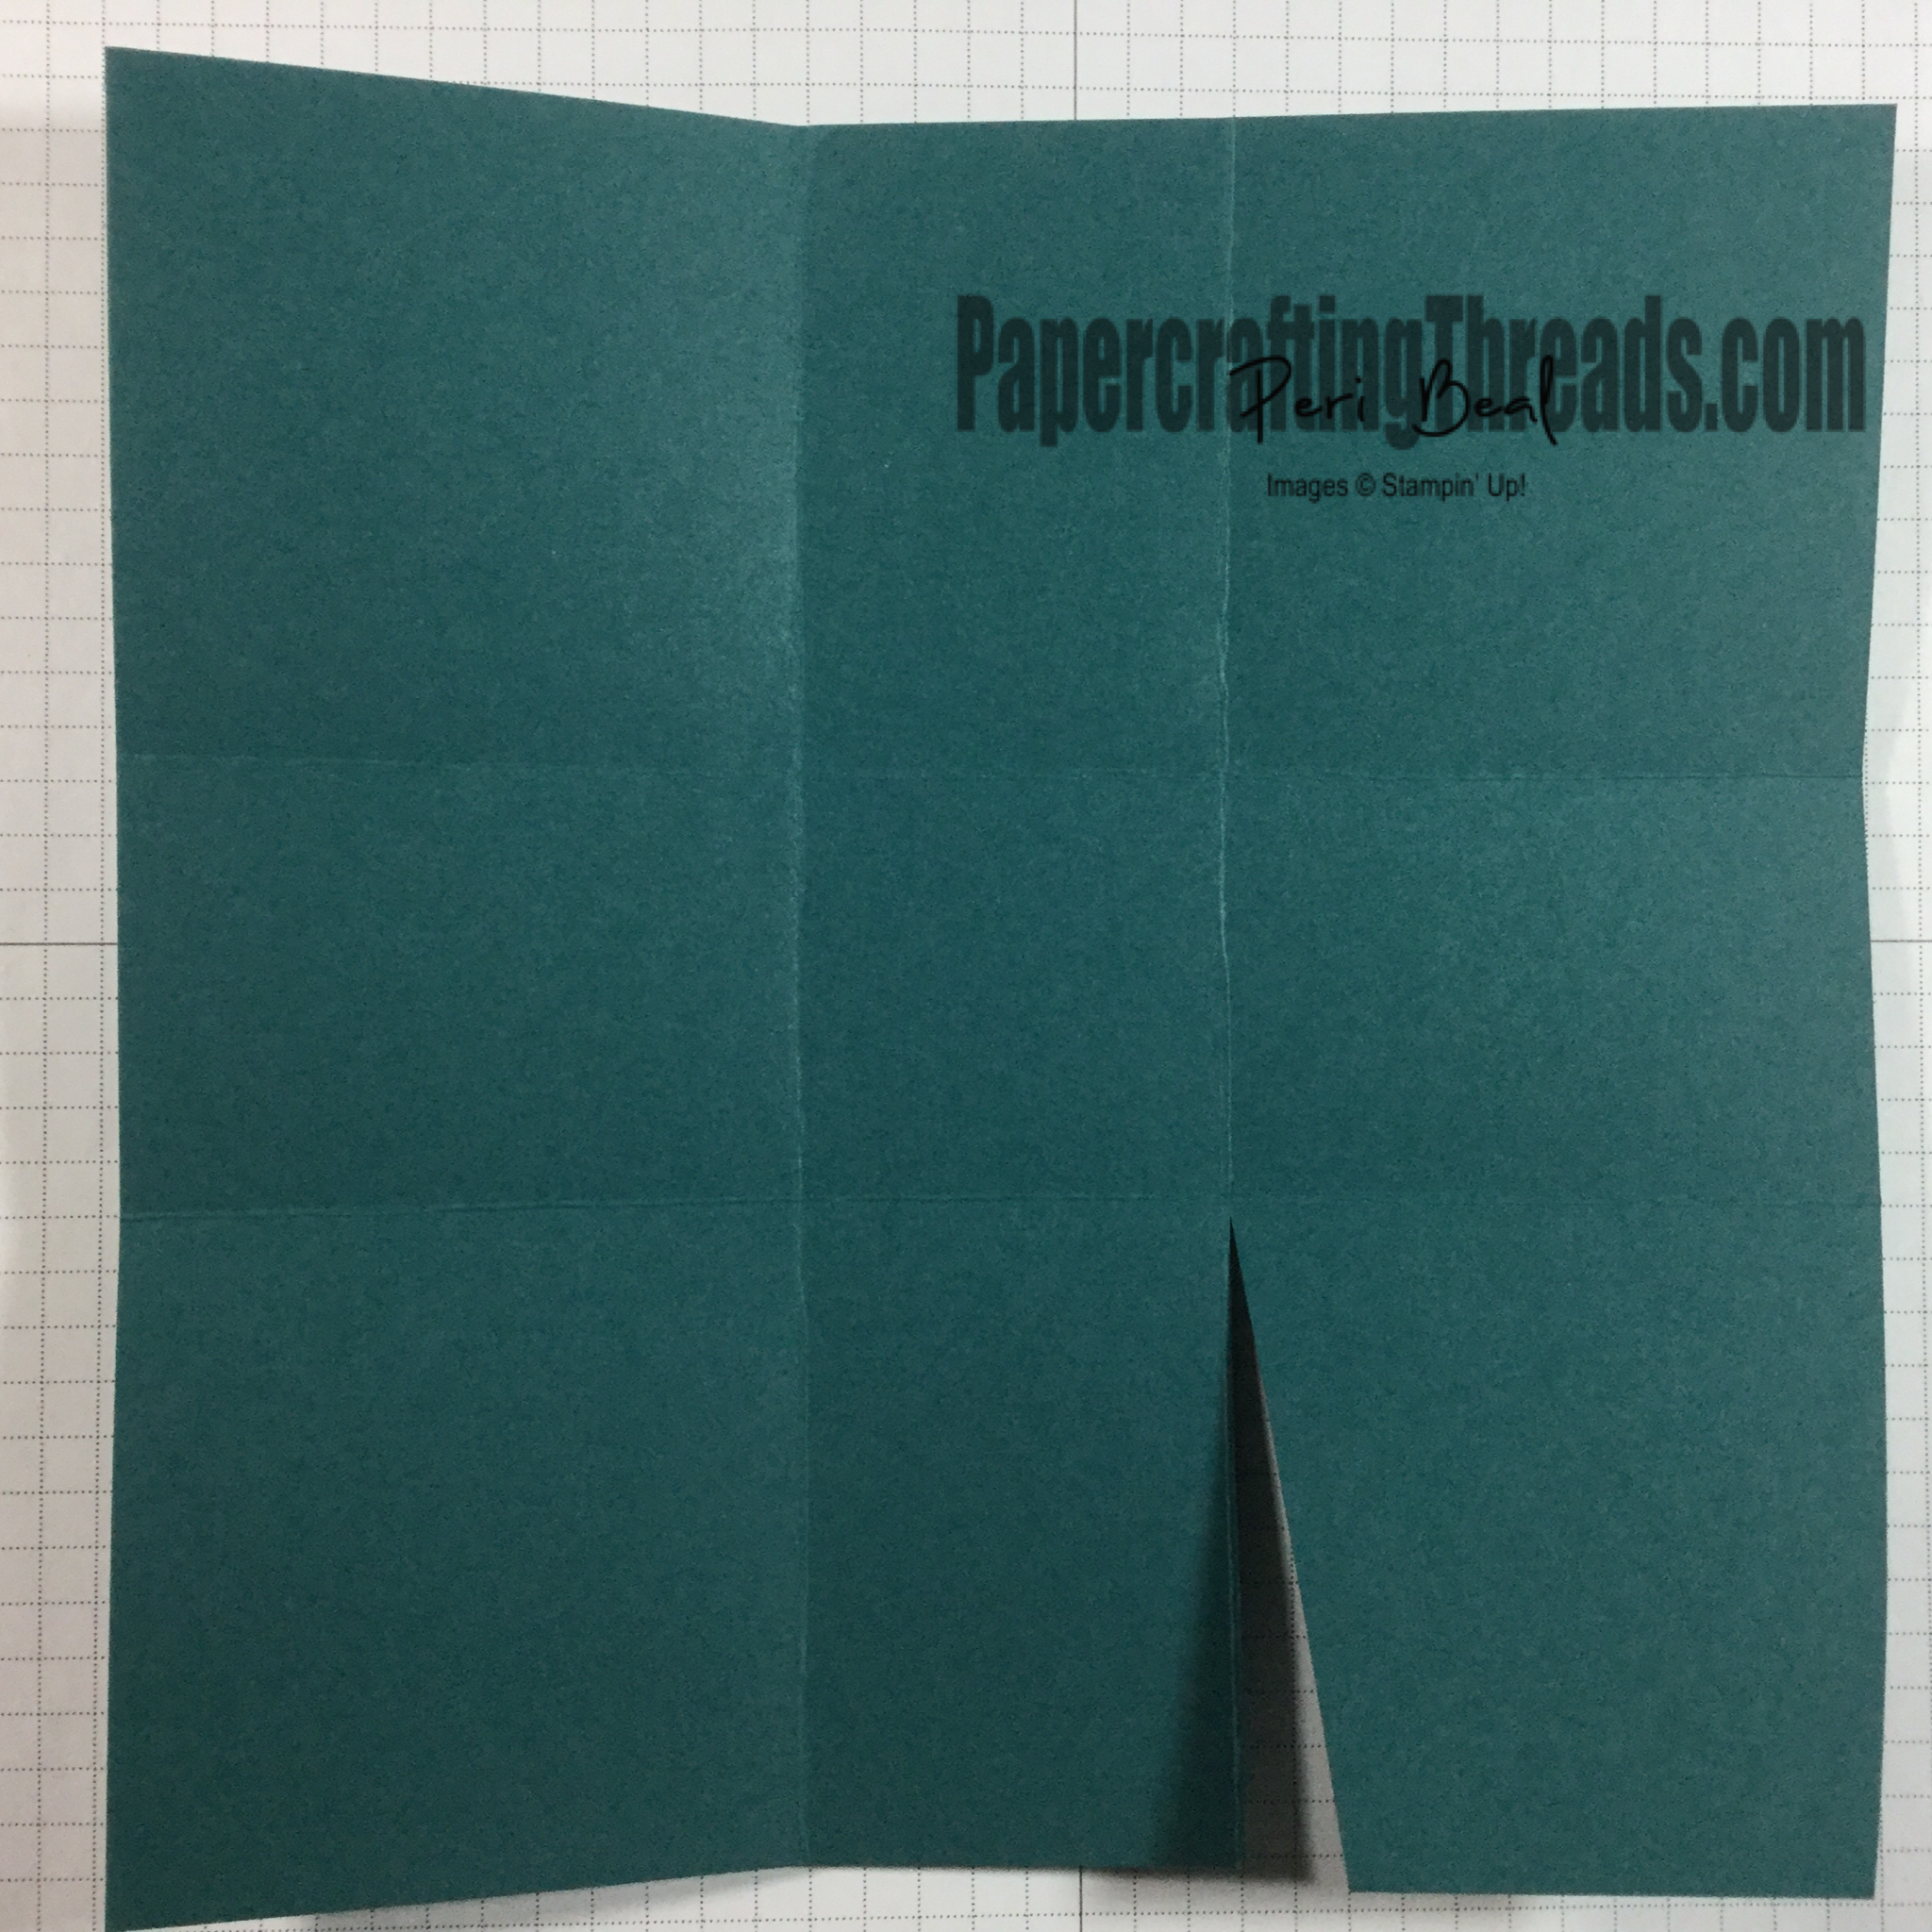
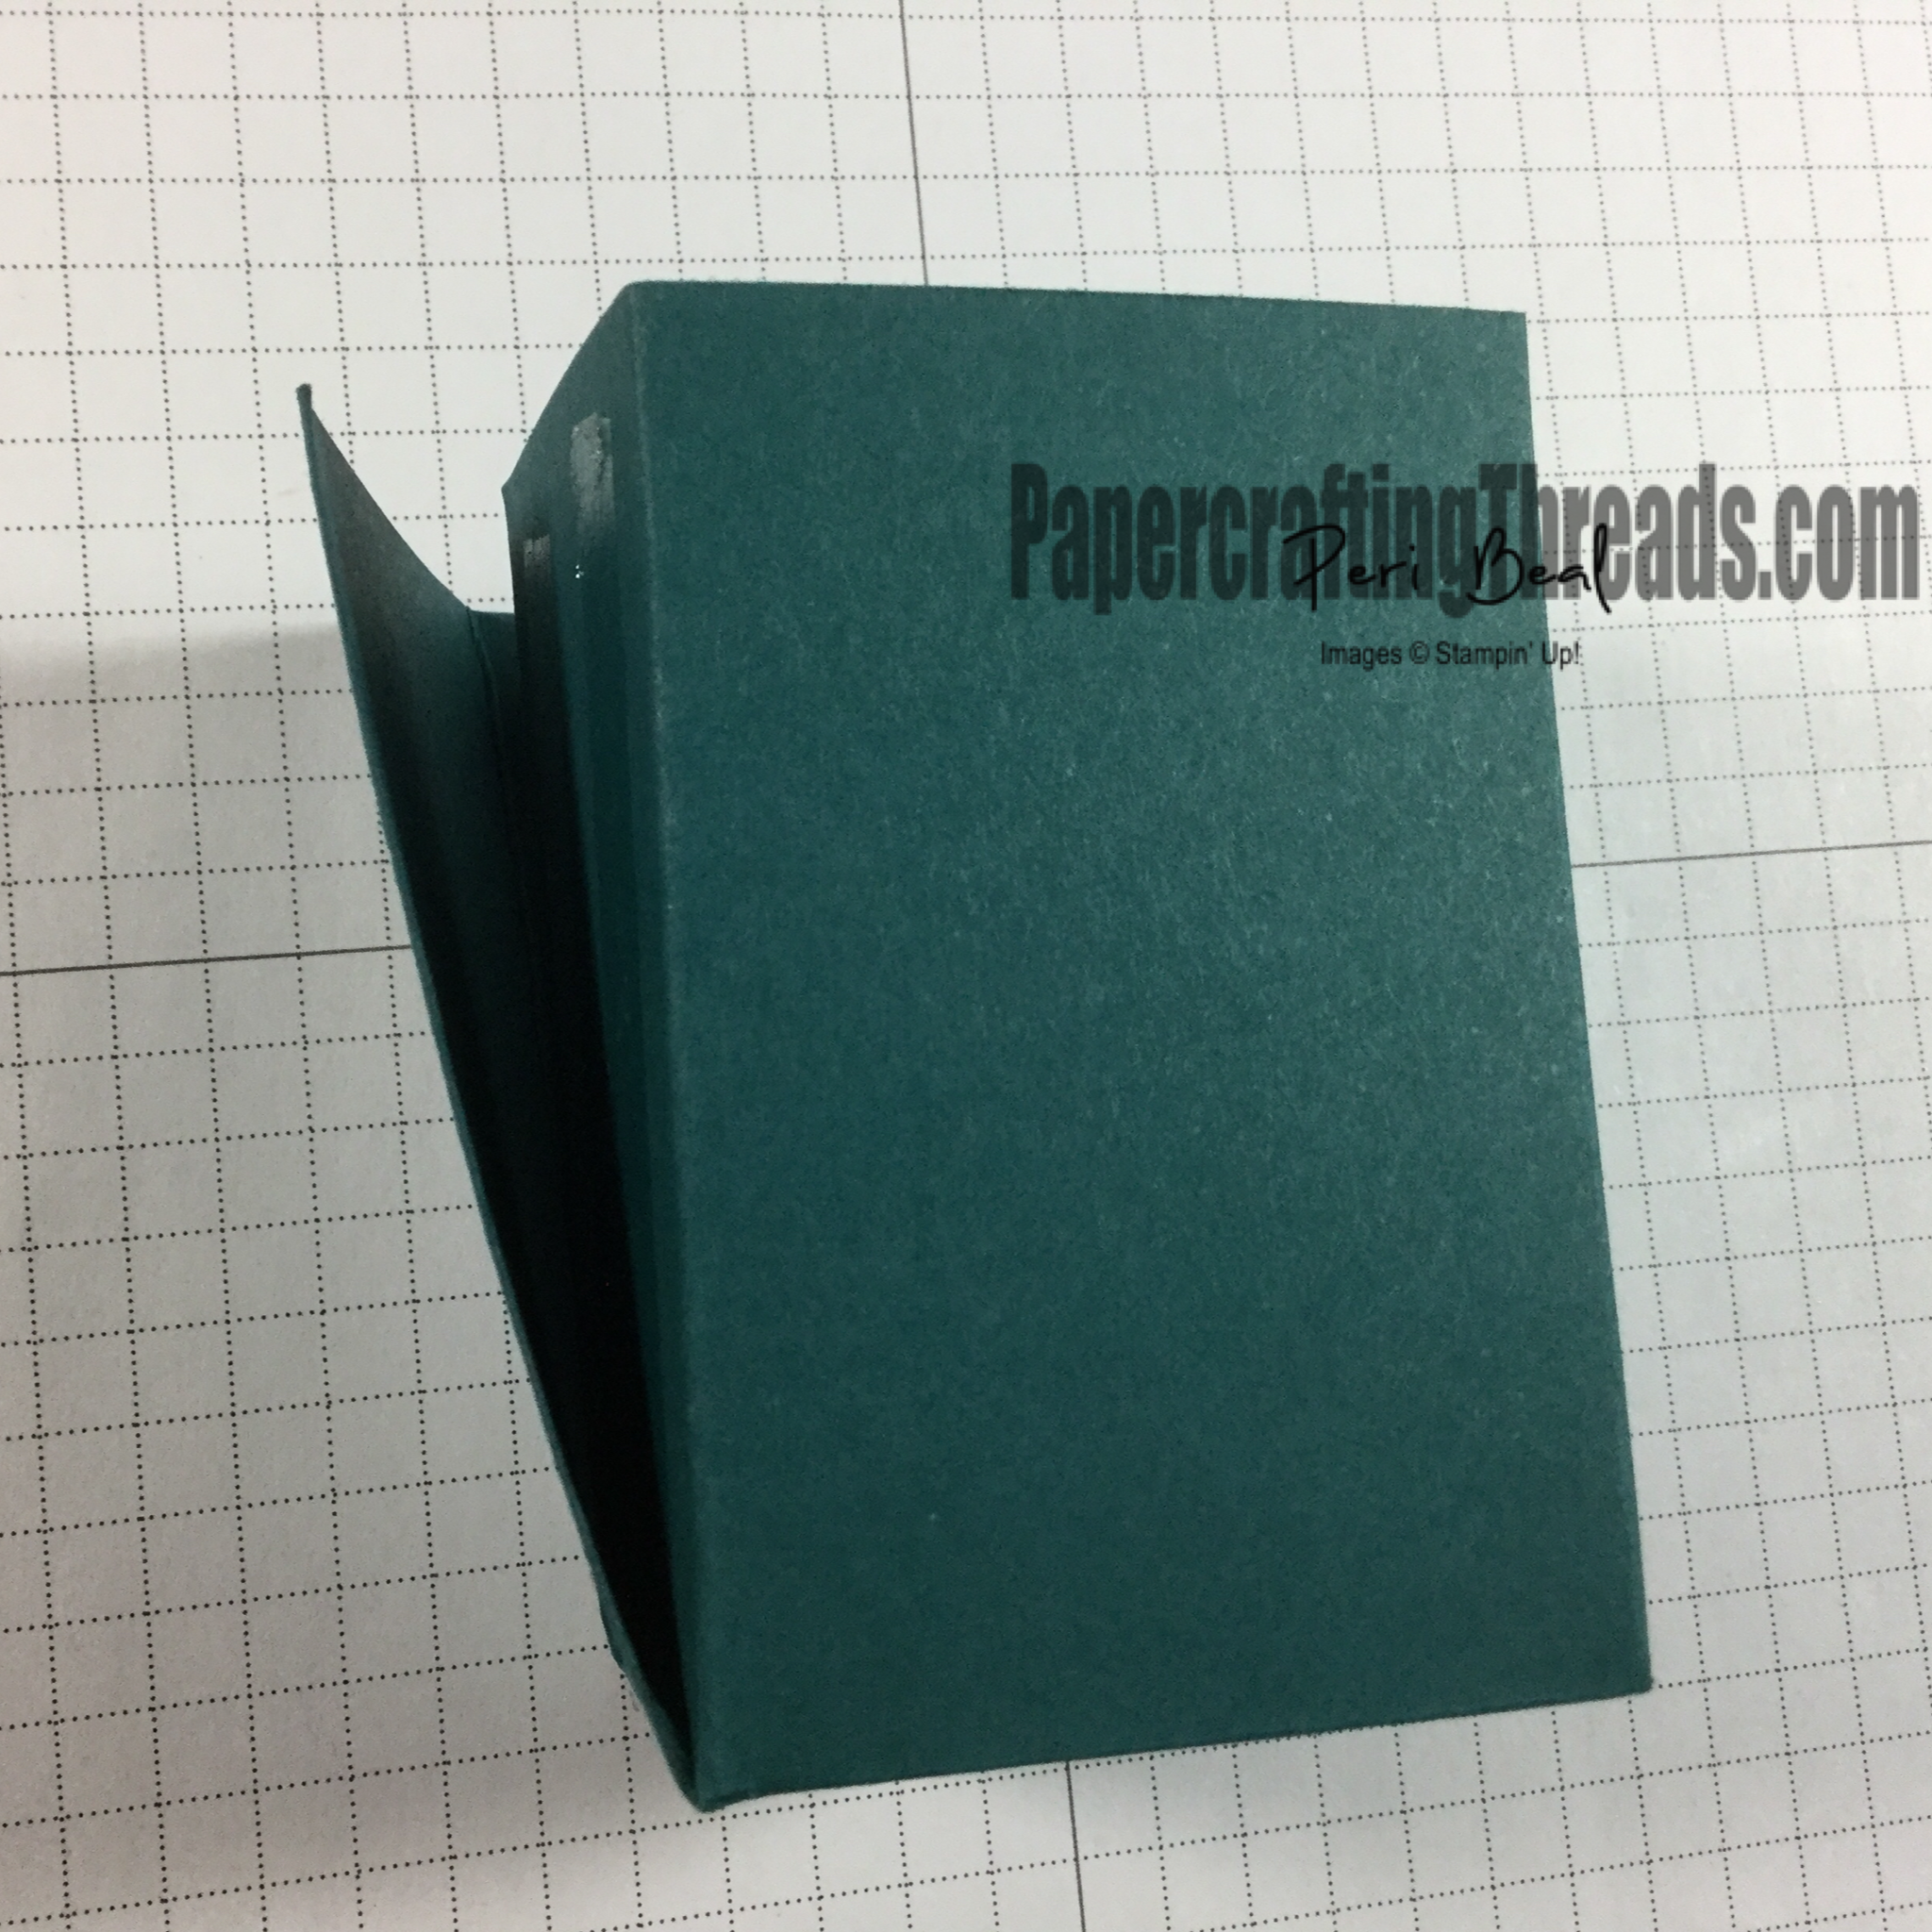
Pretty Peacock Cardstock Base 8” x 8”, score at 3” on all four sides
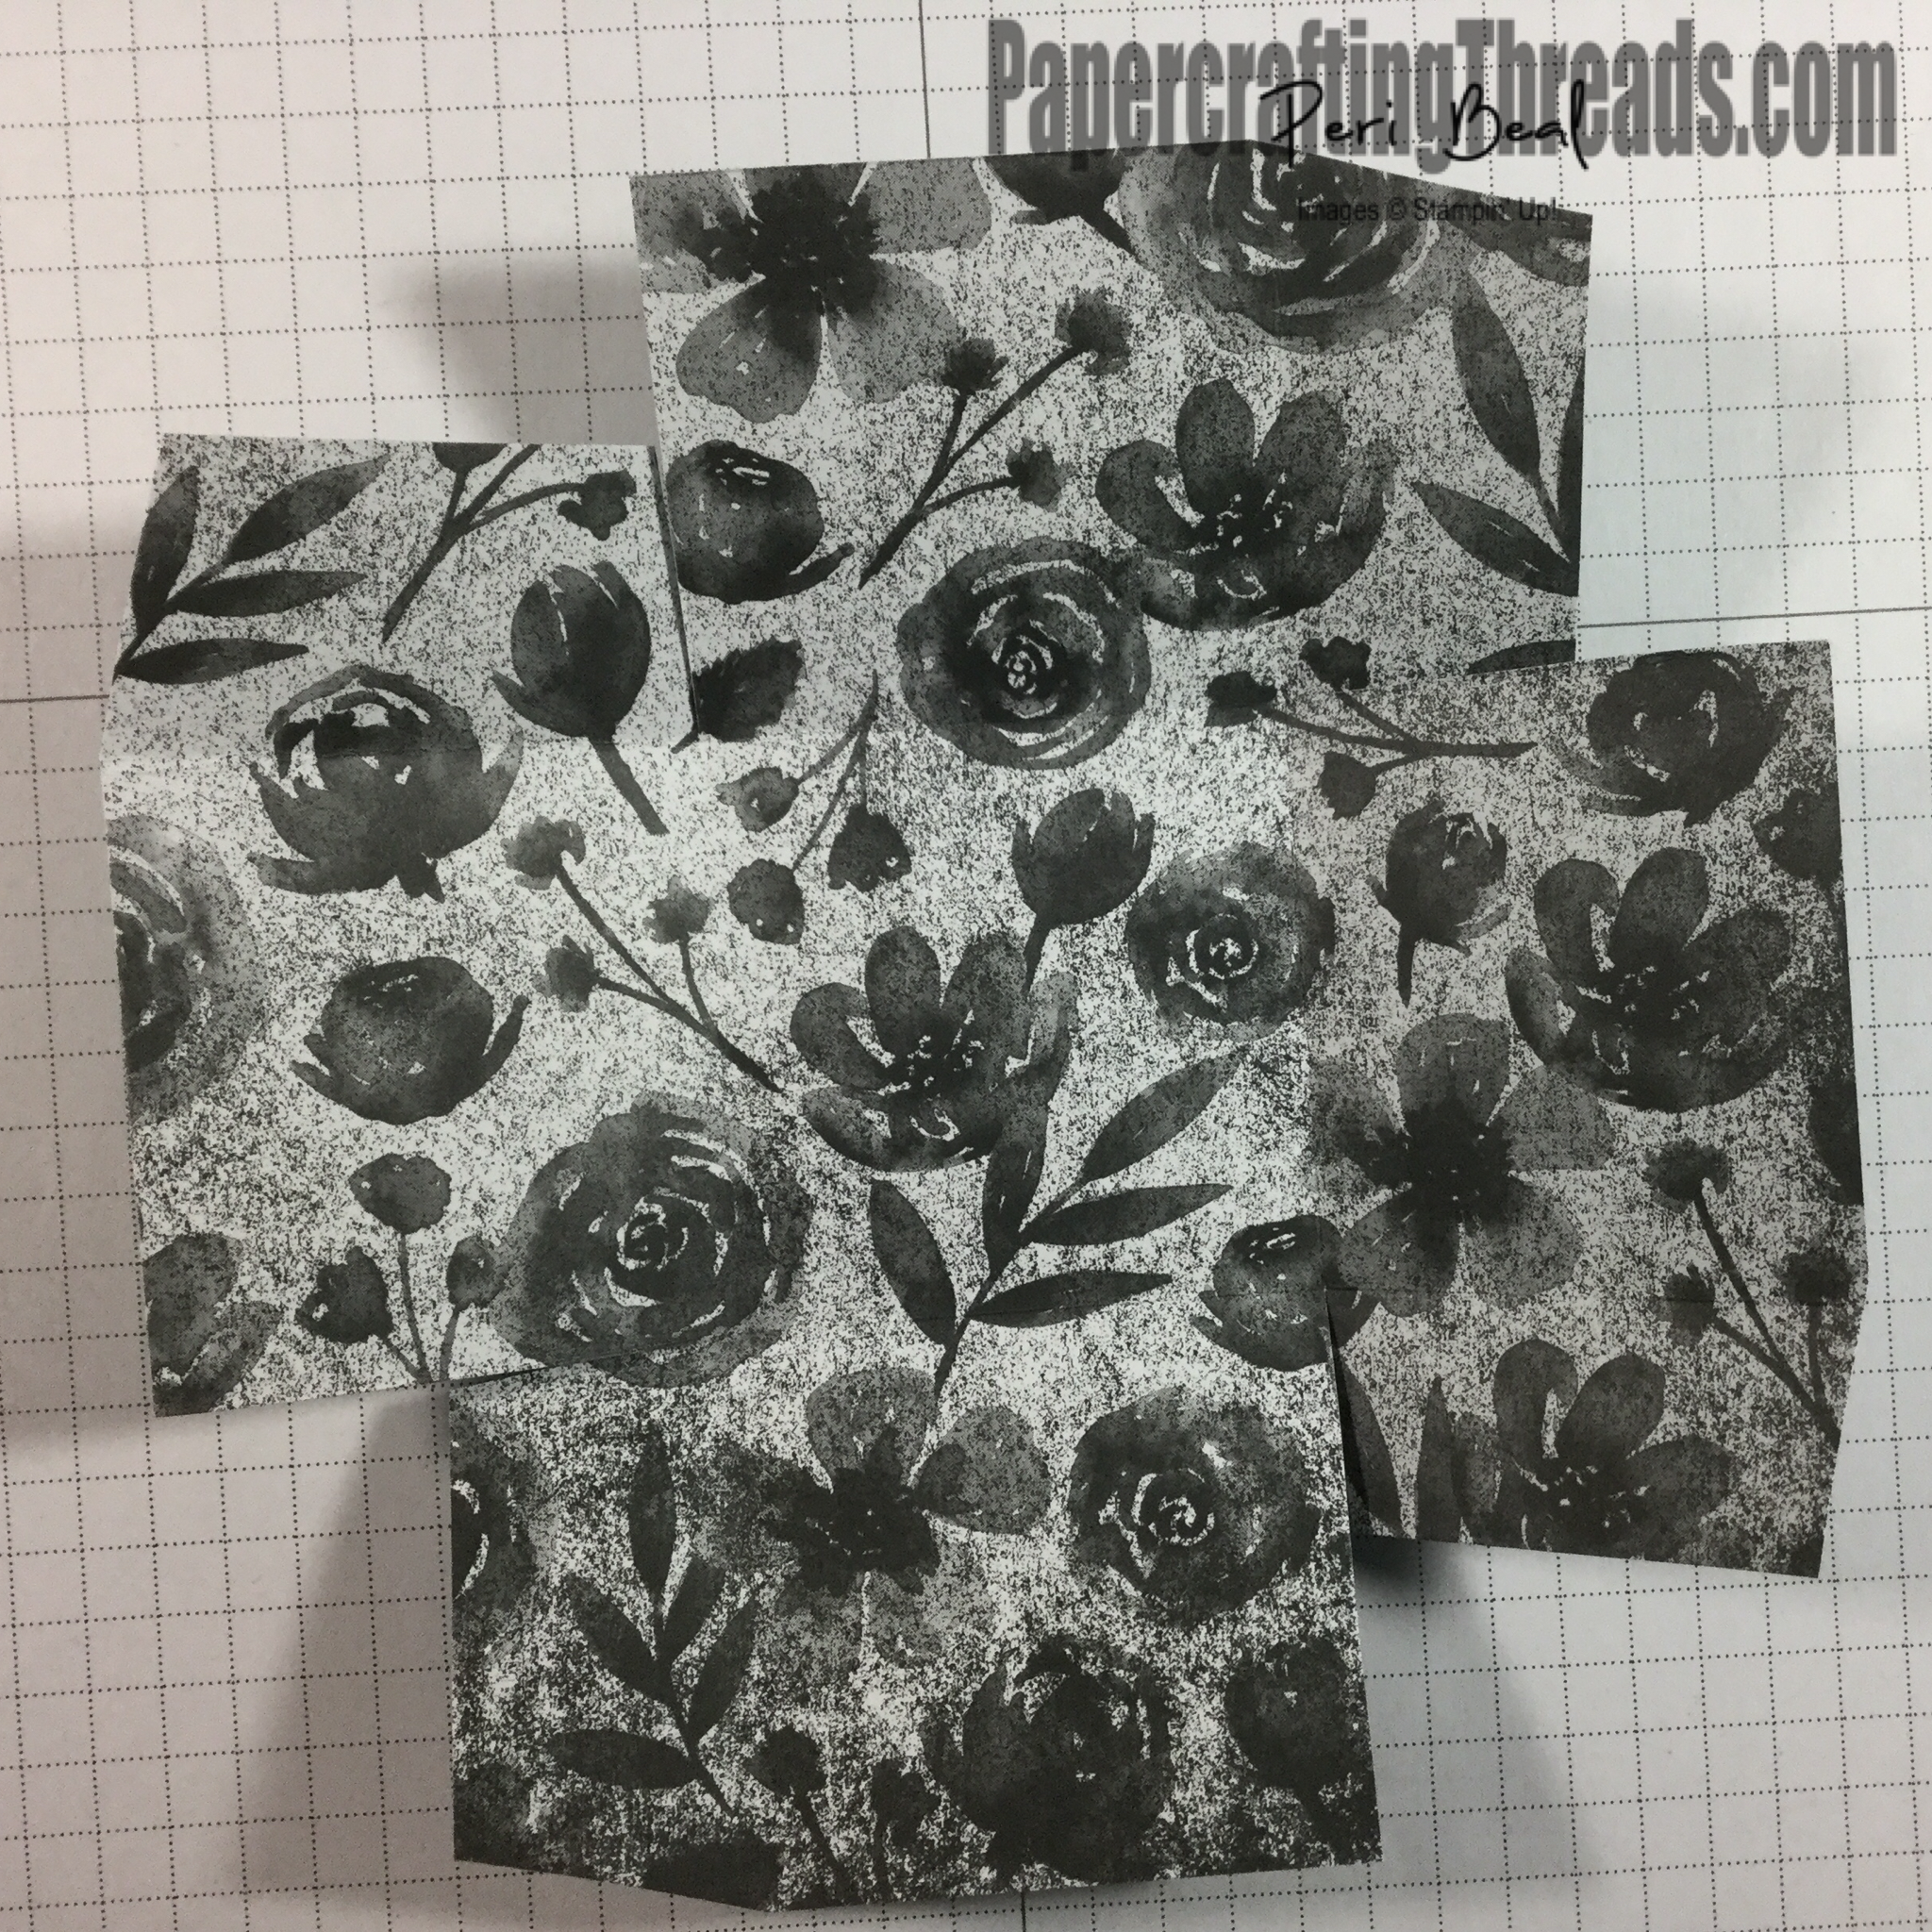
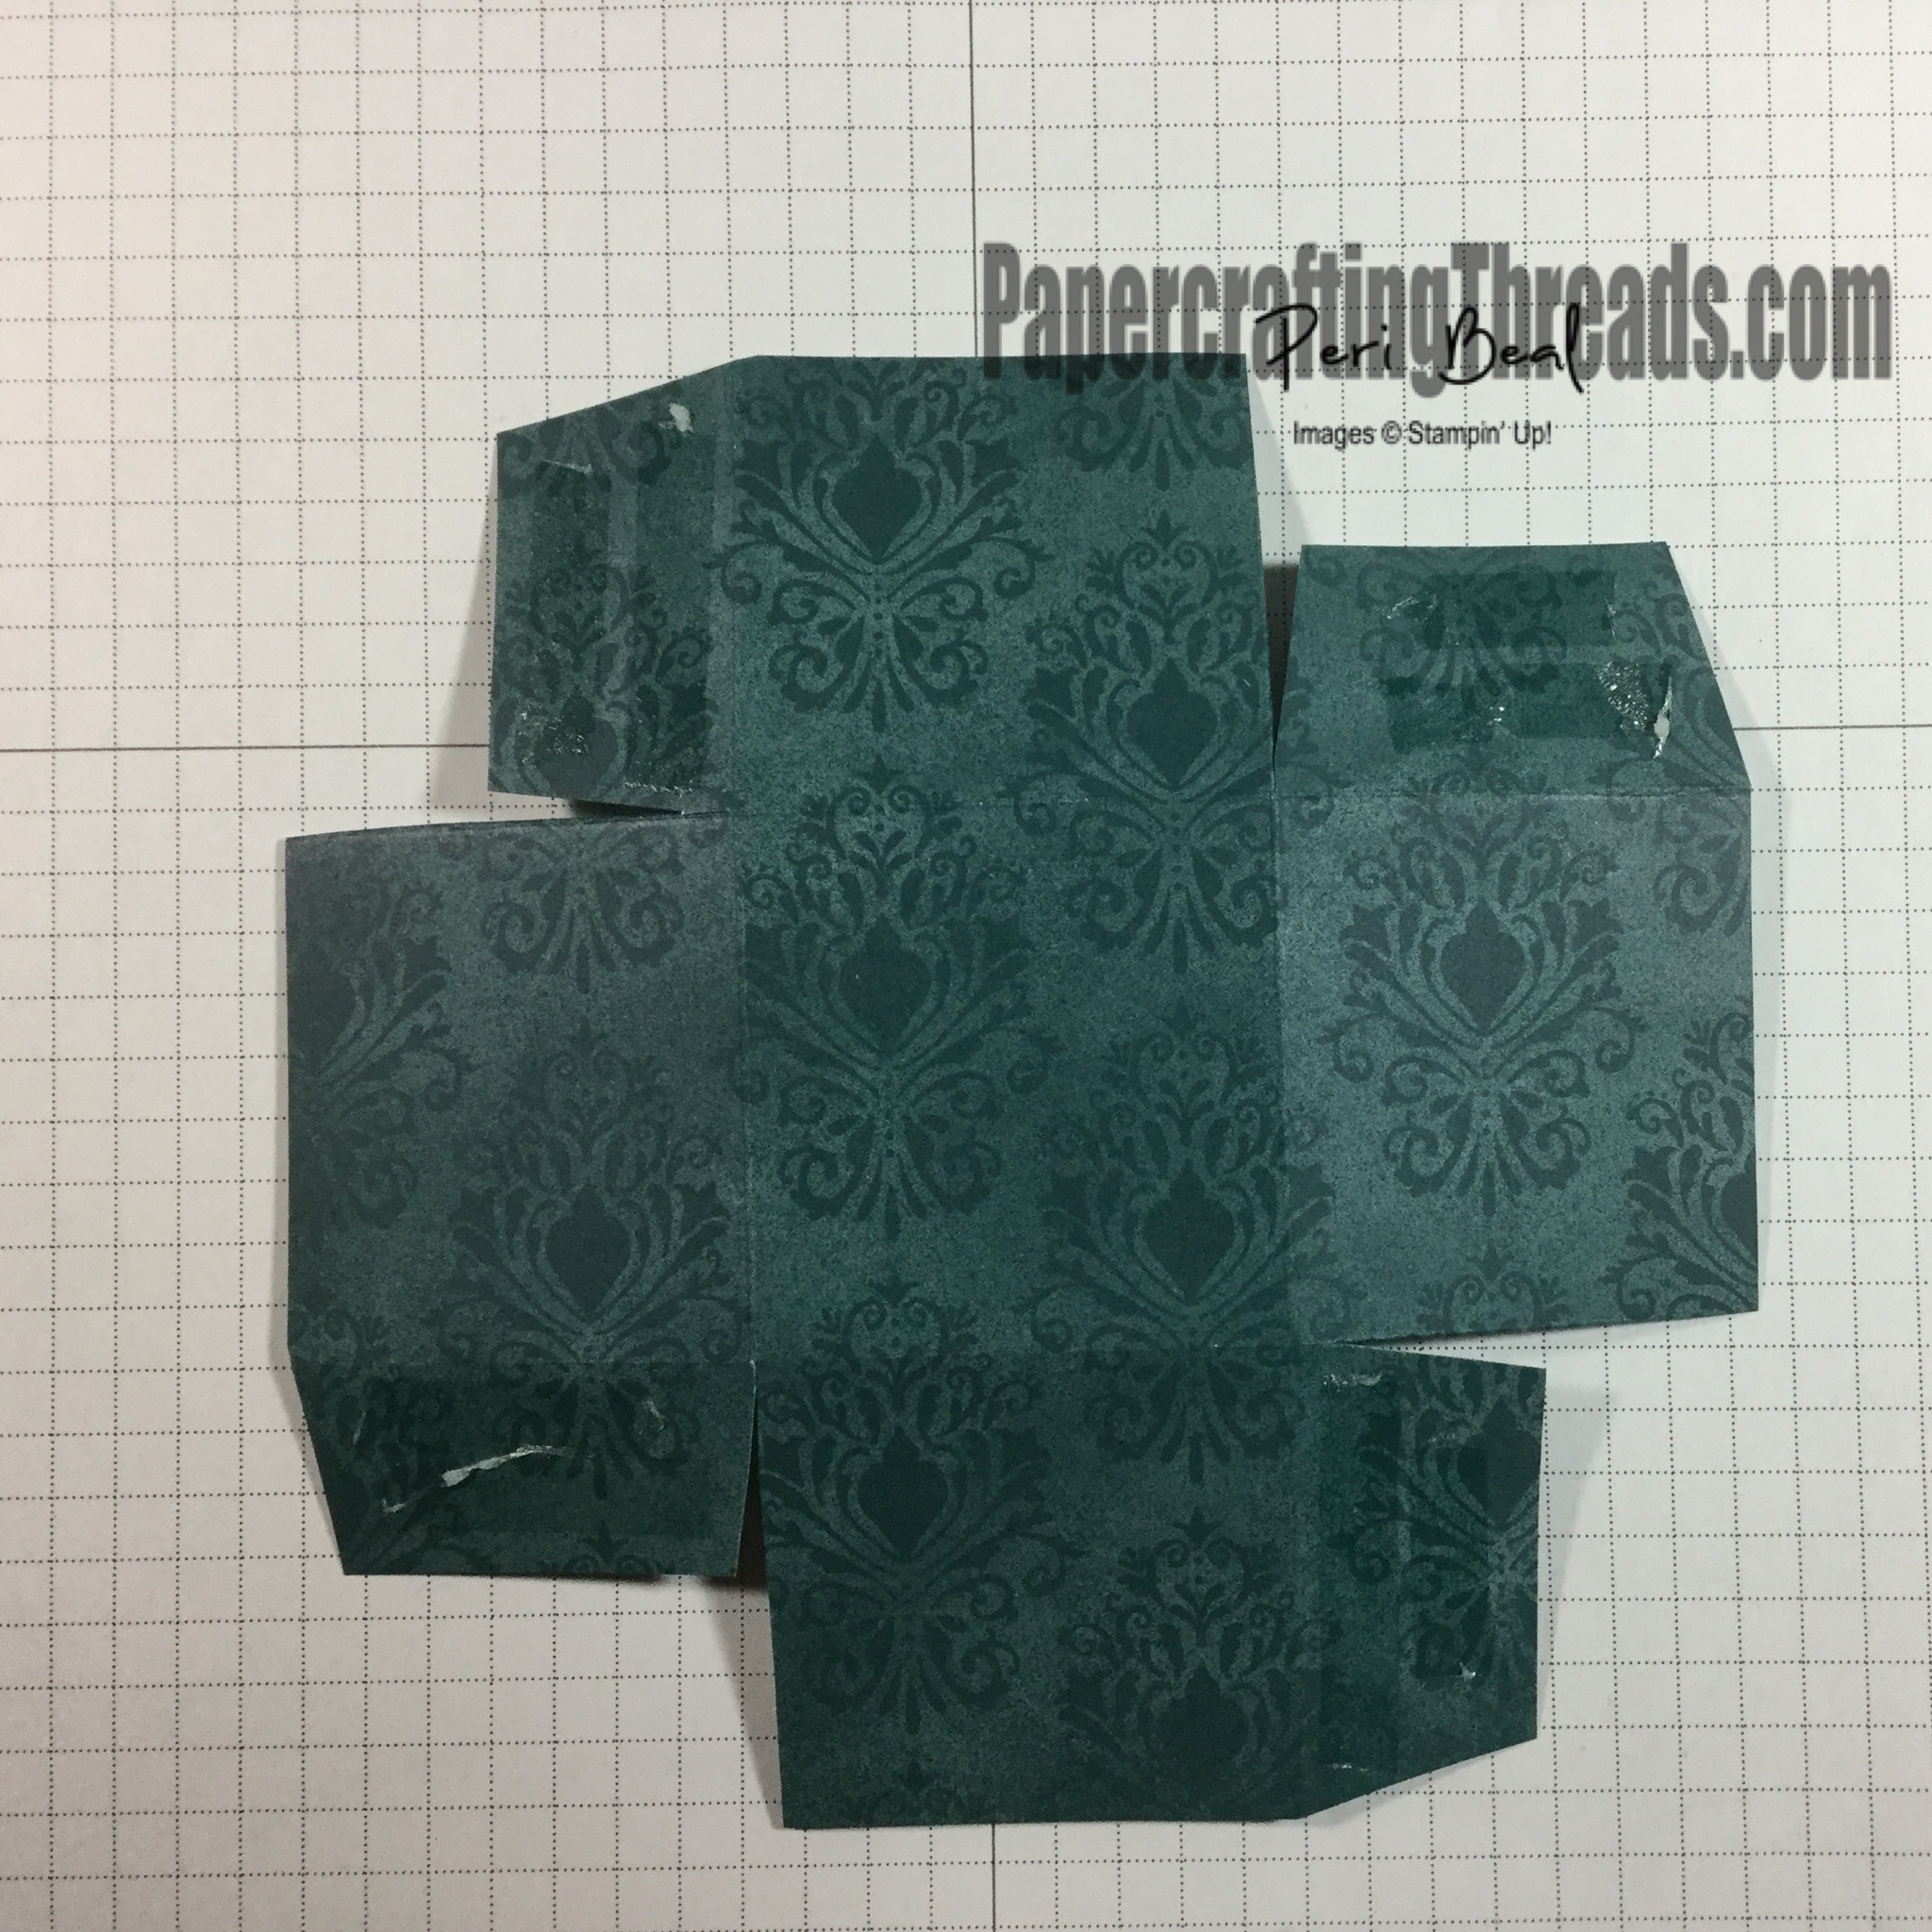
Magic in This Night DSP Lid 6” x 6”, NOTE: move paper halfway between the corner and the first tick mark on the Simple Scored Scoring Tool and  score at 2” on all four sides
Scraps of Basic Black cardstock
Hallows Night Magic Cling Stamp Set
Halloween Magic Dies
1 ½” Metallic Mesh Ribbon
Versamark
Silver Embossing Powder
Heat Tool
Diecut Machine
Glue Dots
Black Dimensionals
Stampin’ SEAL+
Simply Scored Scoring Tool


Instructions for Halloween 3D Treat Box

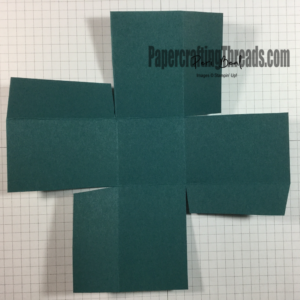
1. Fold the cardstock base on all score lines and burnish with a bone folder. Looking at the bottom right square, cut on the left score line up to the first score line from the bottom. Turn the paper 90 degrees and repeat. Repeat two more times. Notch the edges of each bottom right square, and cut off about half of each flap.

 Score and cut the base of the Halloween 3D Treat Box like this.       

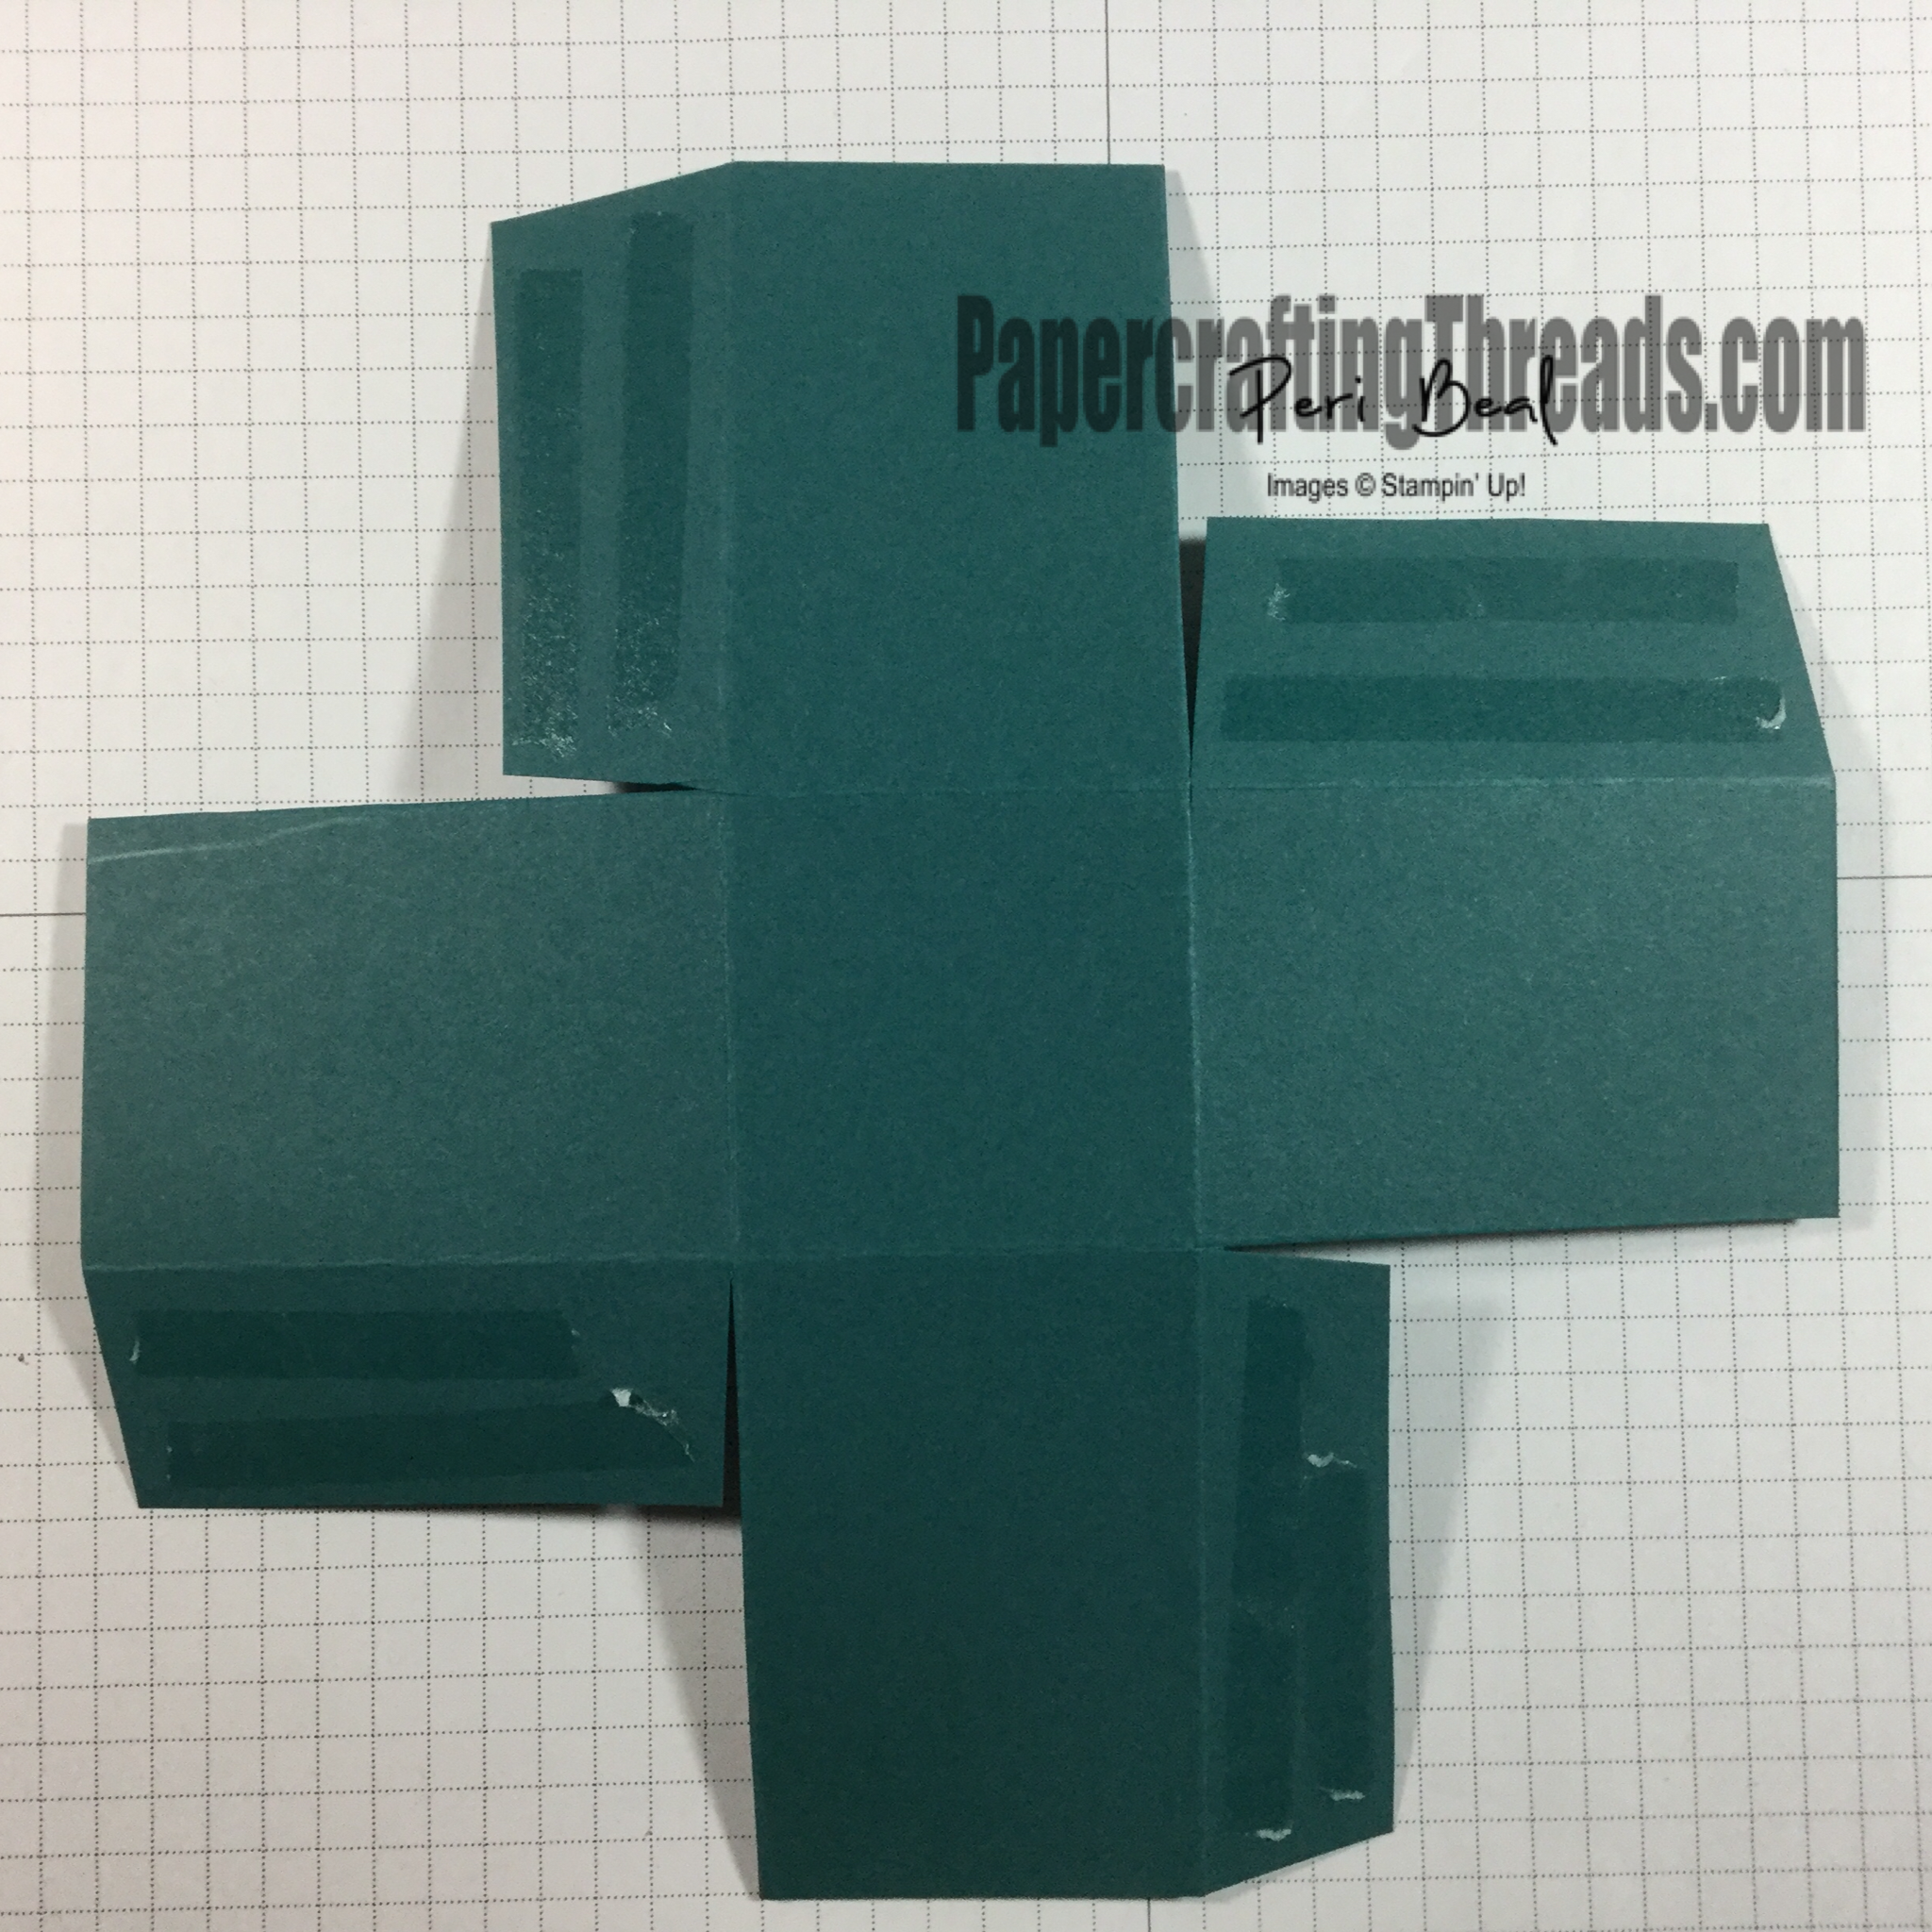
2. Flip the cardstock base over so the score lines are mountain folded, and apply Stampin’ SEAL+ adhesive (or mono adhesive or Tear ‘N Tape) to each flap and form into a box.

Add adhesive to flaps for the Halloween 3D Treat Box          Fold in flaps and secure to form base of Halloween 3D Treat Box

3.  Repeat step 1 and 2 with the Magic in This Night DSP lid.

Score and cut the lid for the Halloween 3D Treat Box.          Add adhesive to the flaps of the lid for the Halloween 3D Treat Box

4. Fill the base with treats.

5. Place the lid on the base and wrap a length of the 1 ½” Metallic Mesh Ribbon around the box and tie into a bow. Trim ends.

6. Stamp the spider web tag shape with Versamark ink on a scrap of Basic Black cardstock, sprinkle with Silver Embossing Powder and heat set with the Heat Tool. Cut out the tag with the small tag shape from the Halloween Magic Dies. Adhere the tag with a few glue dots to just the lid of the box.

7. Diecut the bats with the bat diecut. Adhere to the lid with glue dots. Adhere one bat to the corner of the tag with a mini black dimensional cut in half.

Share:

Leave a Comment
see more related posts: 3D Projects

Previous Post: « Eleven Ways to Use a Mini Paper Pumpkin Box
Next Post: Whiskey Business with Stampin’ Blends »

Reader Interactions

Leave a Reply Cancel reply

Your email address will not be published. Required fields are marked *

Primary Sidebar

Peri Beal

Cheesehead. Avid reader. Antique hunter.

Shop Online

Shop with me and get a FREE PDF tutorial bundle delivered to your inbox AND a handmade card via snail mail

Search

Papercrafting Threads

Gift Certificates
  • Email
  • Facebook
  • Instagram
  • Pinterest
  • YouTube

Sign up for my Newsletter

Sign up for my newsletter and get a free PDF tutorial as my welcome thank you!

Almost there...

Please check your email to confirm your subscription

Retired Product
Privacy Policy

The Fine Print

Just so you know... This is a personal website and I am responsible for its content. Stampin' Up!® does not endorse the use of or contents of the classes, services, or non-Stampin' Up! products I offer.

Sign up for my Newsletter

Sign up for my newsletter and get a free PDF tutorial as my welcome thank you!

Almost there...

Please check your email to confirm your subscription

Footer

  • Calendar of Events
  • 3D Projects
  • Cardmaking
  • Fun Fold
  • Product Tips & Tricks
  • Projects
  • Techniques
  • Of Interest
  • Catalogs
  • Join the Fun
  • Contact Me
  • Email
  • Facebook
  • Instagram
  • Pinterest
  • YouTube

PAPERCRAFTING THREADS

Copyright © 2025 · Refined theme customized by Catherine Carroll

Privacy Policy · Affiliate Disclosure