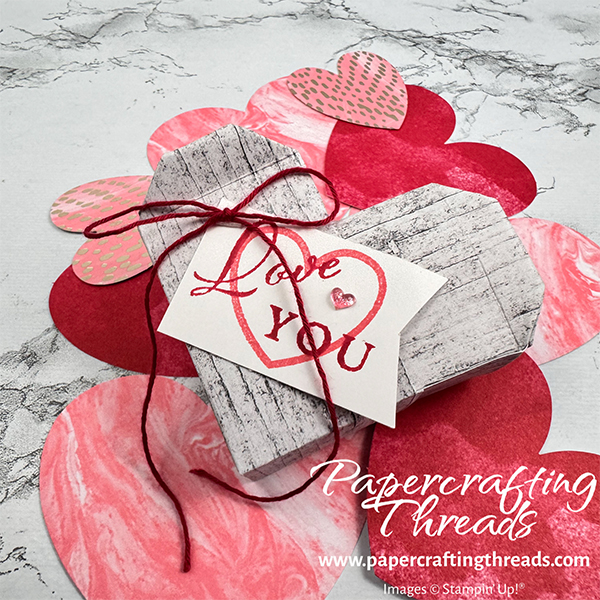
Transform a simple sheet of patterned paper into a stunning Heart Shaped Treat Box that’s sure to make hearts flutter! I’ll walk you through creating a handmade gift container that’s as unique as your love. No special dies needed! Perfect for Valentine’s Day, anniversaries, or surprising someone special. Fill with fancy treats or small trinkets. The fillable compartment measures 1″ x 1½” x 2″. Let’s get started!
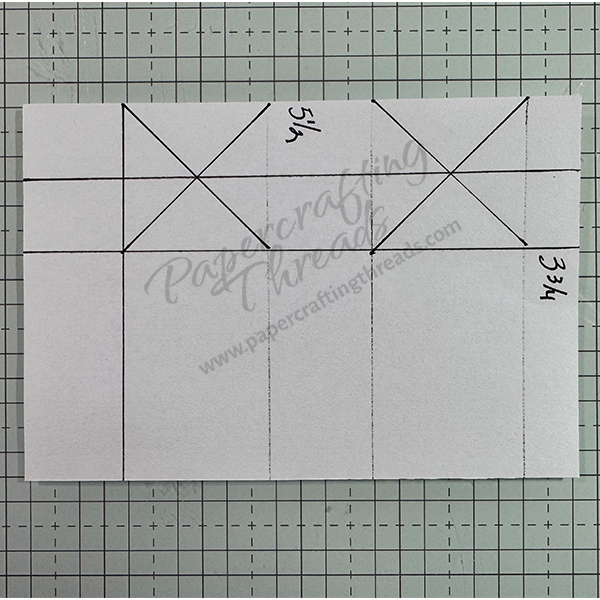
cutting & scoring guide
| Paper Dimensions | Score Short Side | Score Long Side | ||||
| 5½” x 8½” Country Woods Designer Series Paper | 1″, 2½”, 3½” & 5″ | |||||
| Cut above on long side at 3¾”, creating two pieces | ||||||
| 3¾” x 5½” piece | ¾” and 1½” | |||||
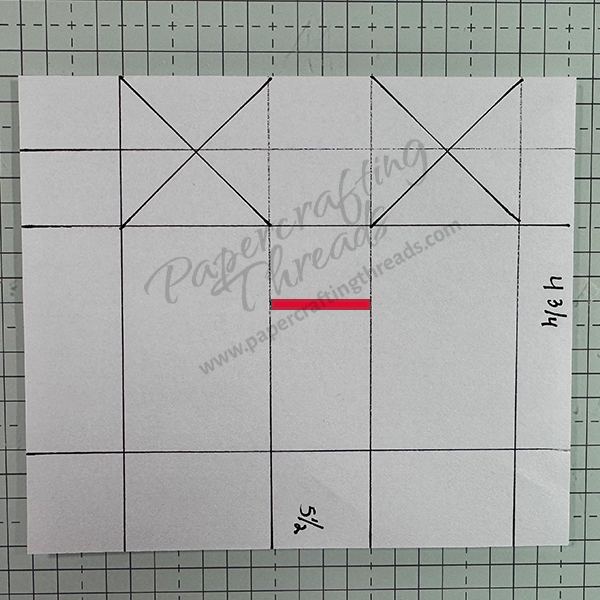
| 4¾” x 5½” remaining piece* | ¾”, 1½” & 3¾” | |||||
| Scrap of Basic White cardstock for tag |
step by step instructions for Heart Shaped treat box
Cut the patterned paper as noted in the guide above. TIP: If the patterned paper is extra ‘busy’, make a test treat box with a half sheet of cardstock first. I used a whitewashed pattern from Country Woods Designer Series Paper for my finished project. It was worth it to let the paper do all the work!!
Score X’s as shown on the smaller piece.
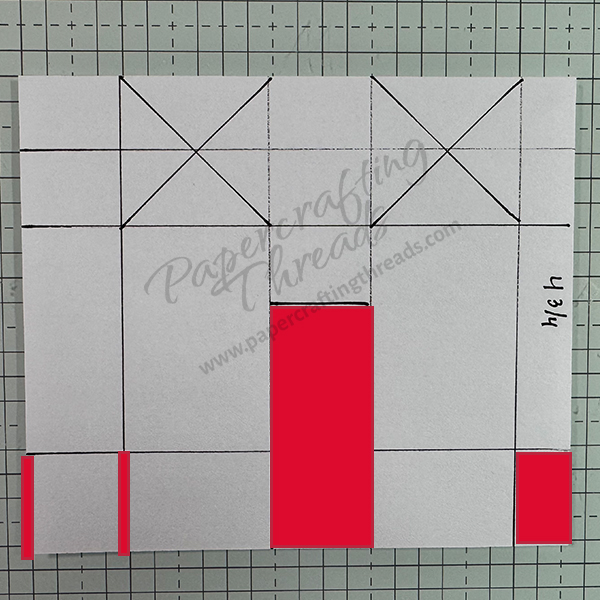
For the larger piece, after scoring the short side at 3¾”, move the piece to the 2¼: mark and cut a one inch slot between the two score lines (shown in red below). Score X’s as shown.
Remove the areas in red.
Fold and burnish on all score lines, including the diagonals. Only glue and folding to go! Refer to my YouTube video at the bottom of this post for rest of assembly. Then fill with fancy gold-foil wrapped white chocolate truffles. Or tiny handwritten love notes ❤️
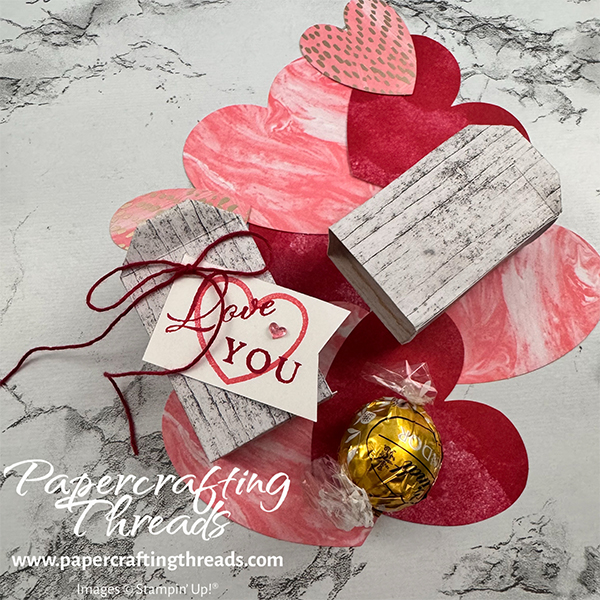
I decorated the box with elements from the January 2025 Hearts for You Paper Pumpkin Kit. Don’t miss out on the fun of next month’s Paper Pumpkin Kit! Subscribe by the 11th of each month here.
If you found this tutorial helpful, consider a contribution to my coffee fund ☕️ Coffee → Creativity → Content → More Coffee (help fuel the cycle!)
Leave a Reply