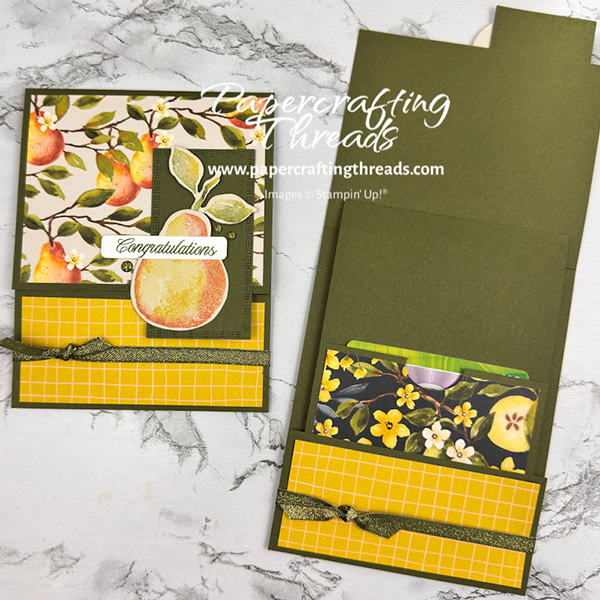
Check out this easy peasy Lift Up Gift Card Holder featuring the stunning Painterly Pears suite from Stampin’ Up! Open the top and bottom flaps to reveal a moving pocket with a gift card (or cash). And there’s plenty of room to write a personal message on the stamped liner on the back. Best of all, the whole mechanism is based on just a fun fold. Let’s get started!
cutting & scoring guide
| Paper Dimensions | Score Short Side | Score Long Side | ||||
| 4¼” x 11″ Mossy Meadow cardstock base | 2″ and 7½” | |||||
| 3¾” x 7″ Mossy Meadow cardstock for lift mechanism | ½” and 5″ | |||||
| 3¼” x 4″ Painterly Pears patterned paper top flap | ||||||
| 1¾” x 4″ Painterly Pears patterned paper bottom flap | ||||||
| 1¾” x 3½” Painterly Pears patterned paper inner flap | ||||||
| 4″ x 5¼” Basic Beige liner | ||||||
| Scrap of Mossy Meadow for die cutting | ||||||
| Scrap of Basic Beige for stamping & die cutting | ||||||
| Strip of Basic White for greeting |
step by step instructions
Cut and score all pieces of cardstock and patterned paper as noted above. Fold and burnish the base of the card like a gatefold — both sides towards each other. Fold the lift cardstock with the small tab end in a mountain fold. Then fold and burnish the other scoreline as a valley fold.
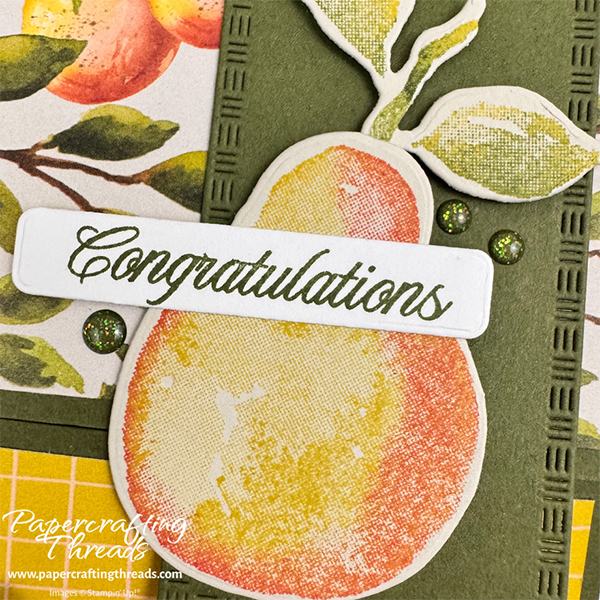
Load the detailed pear body image from Perfectly Pears stamp set with with Darling Duckling ink. Use a sponge dauber to add Strawberry Slush to the outside edges of the pear image. Go lighter on side than the other, mimicking the Painterly Pears patterned paper. Then huff and stamp the image on a scrap of Basic Beige cardstock.
Repeat with the detailed leaf image using Darling Duckling as the base ink and adding Mossy Meadow ink with a sponge dauber. Stamp on a scrap of Basic Beige cardstock.
Stamp the greeting “Congratulations” in Mossy Meadow ink on a scrap of Basic White cardstock.
Die cut the pear, leaves and greeting with coordinating dies from the Perfectly Pears die set.
Die cut the 3rd largest rectangle die from the Textured Notes die set from a scrap of Mossy Meadow cardstock.
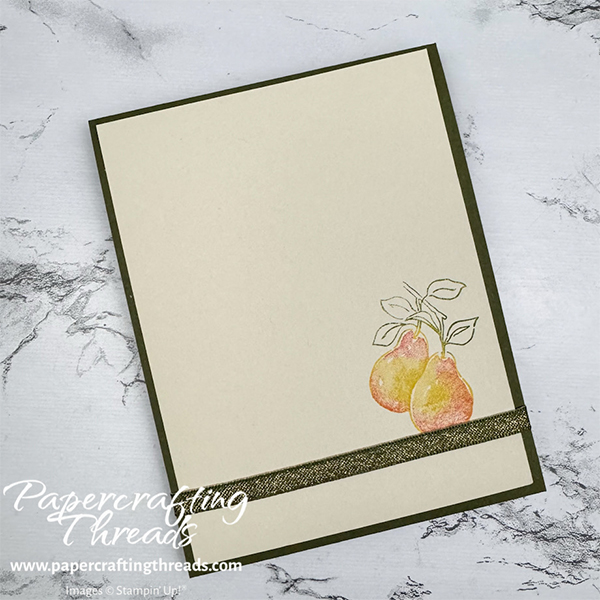
Ink the small set of pears with Darling Duckling ink. Use sponge daubers to add Mossy Meadow to the leaf portion and then Strawberry Slush to the pear bodies. Stamp about an inch from the bottom right corner of the Basic Beige cardstock liner.
assembly of the Lift Up gift card holder
Place the card base in portrait orientation on the work surface with the largest flap at the top. Open the card base. Add Tear & Tape to the top of the ½” scoreline on the lift mechanism. Flip the mechanism upside down, and line up the ½” edge just above the top scoreline on the card base. Then fold the mechanism downward on that ½” edge.
Adhere the smallest strip of patterned paper to the front flap of the mechanism. Punch a finger hole along the top edge of the inner flap with a small oval or circle punch. Add a glue dot to the back of each corner of the flap as close to the edge as possible and adhere. NOTE: Depending on the size of the gift card glue dots may need to be rolled up or omitted. The iTunes gift card shown in my sample is a bit smaller than other gift cards.
Fold outer flaps of card base over the lift mechanism. Add patterned paper to both top and bottom flaps.
decorating the lifit up gift card holder
Add Stampin’ Seal to the back of the die cut pear. Adhere the leaves to the top. Add Stampin’ Dimensionals to the back of just the top of the pear and the leaves. Adhere off center and at an angle to the die cut Mossy Meadow rectangle. Add Stampin’ Seal to the top back of the rectangle and adhere to the top flap of the card, leaving the bottom free and unattached.
Add a Stampin’ Dimensional to the back left side of the greeting. Then add Stampin’ Seal to the other half. Place the greeting over the neck of the pear and off the side a bit.
Adhere the liner to the back of the card.
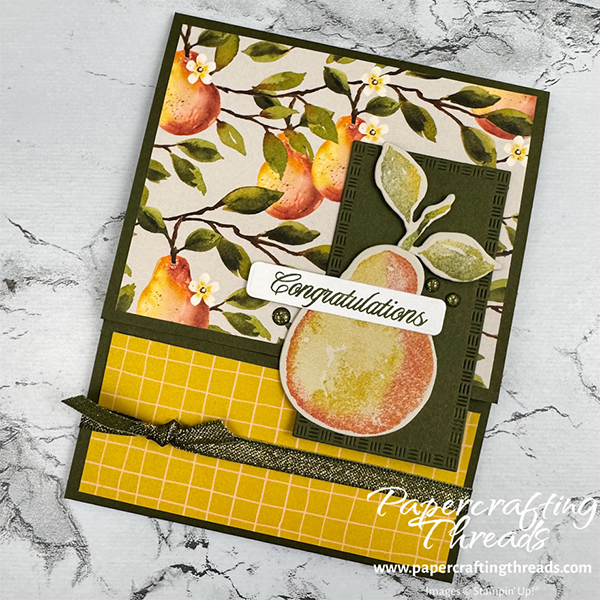
Tie a knot with a length of Mossy meadow & Gold ribbon around the bottom flap. Scatter Low Profile Sparkle Dots on the front of the card.
If you found this tutorial helpful, consider a contribution to my coffee fund ☕️ Coffee → Creativity → Content → More Coffee (help fuel the cycle!)
Love that Painterly Pears suite? Get the same supplies I used in my project over at my online store.
Leave a Reply