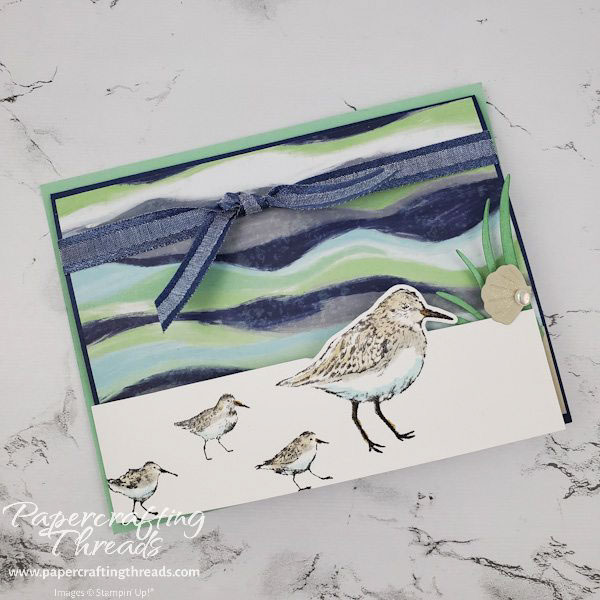
Make a Criss Cross Fun Fold card with a seashell latch! I’ll also teach you some watercolor techniques and how to partially diecut an image. Let’s get started.
Cutting & scoring guide
| Paper Dimensions | Score Long Side | |||
| 4-1/4″ x 5-1/2″ Mint Macaron cardstock base | ||||
| 5-1/4″ x 8″ Night of Navy cardstock for top flap | 4″ | |||
| 2-1/2″ x 7″ Basic White cardstock flap | 5-1/4″ | |||
| 3″ x 5-1/8″ Seaside Bay patterned paper | ||||
| 3-3/4” x 5” Basic White cardstock liner | ||||
| 1-1/4″ x 5-1/8″ Sahara Sand cardstock | ||||
| Scraps of Sahara Sand and Mint Macaron cardstock |
step by step instructions
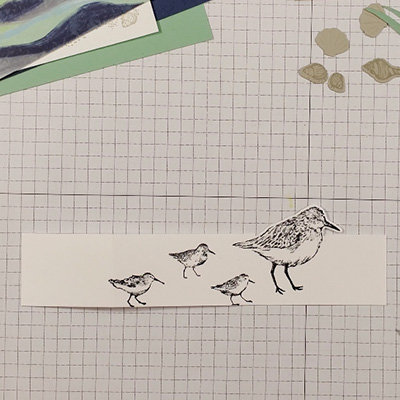
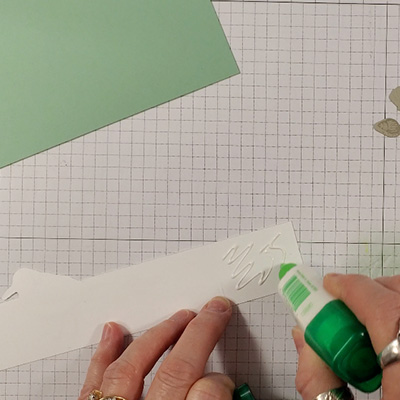
Start by stamping the birds from the Seaside Bay stamp set with Black Memento Ink on the narrow strip of Basic White cardstock as shown.
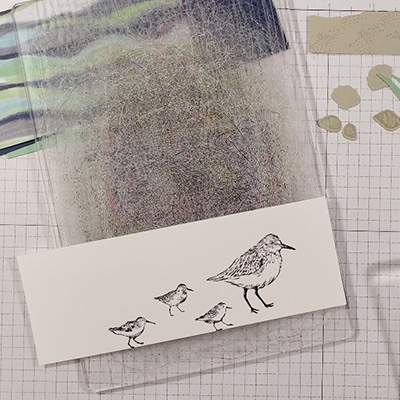
Place the diecut over the momma bird and hold in place with a piece of low tack tape. Position the cutting plates as shown below, with the edge of the top plate just below the beak and above the tail. Run through the Stampin’ Cut & Emboss.
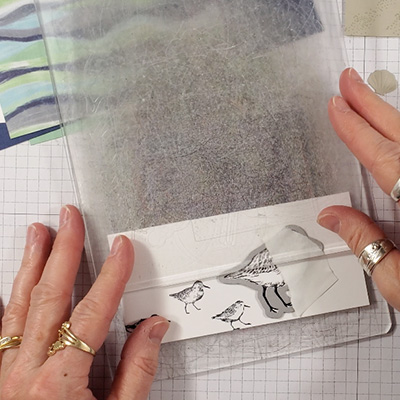
The diecut will partially cut the image just where the top plate ends! Draw a pencil line from the top edge of the cardstock strip to the cut line below the beak. And draw a second pencil line from the top edge of the cardstock strip to the cut line above the tail.
Place the cardstock strip in the cutting track of the Stampin’ Trimmer and draw the blade from the narrow end to the pencil line above the tail. Then open the trimmer, move the blade to the bottom and draw the blade up from the other narrow end to the pencil line below the beak.
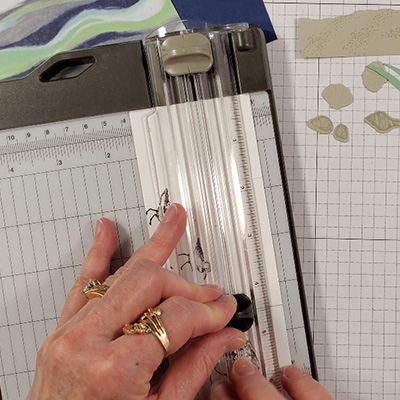
If needed, use snips to cleanly finish off the cutting. The flap should now look like this:
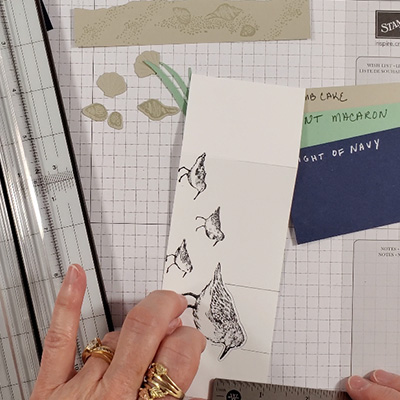
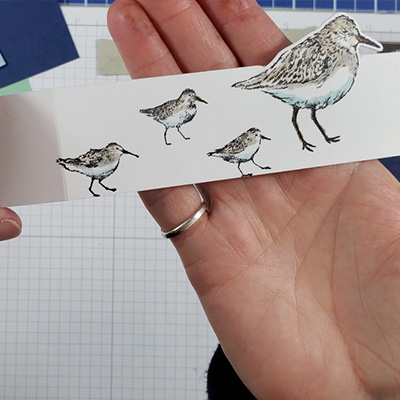
Watercolor the birds with ink pads and a water painter. I used the fine tip brush and Balmy Blue for the breast, Soft Suede for the beak and legs, Smoky Slate for the mid feathers and Crumb Cake for the back and head.
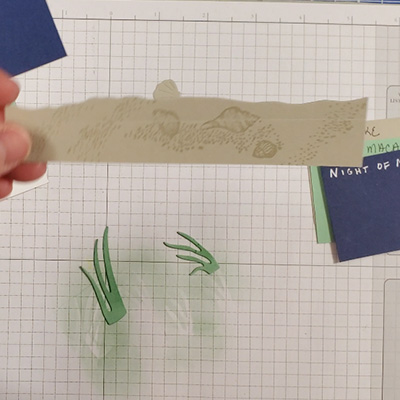
Then diecut the edge of the Sahara Sand cardstock strip with the ‘rough edge’ die. Then stamp the sand and shells images in Sahara Sand ink randomly across the strip to resemble a beach. Diecut the seagrass from Mint Macaron cardstock scraps and use a Blending Brush to add ink for depth.
Assemble the Criss Cross Fun Fold Card
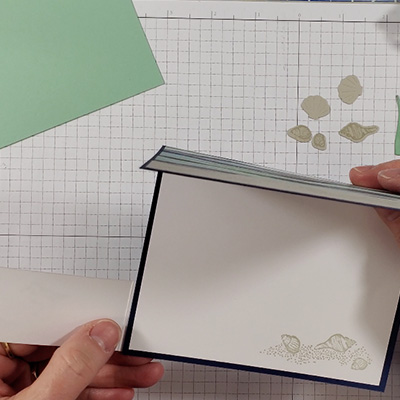
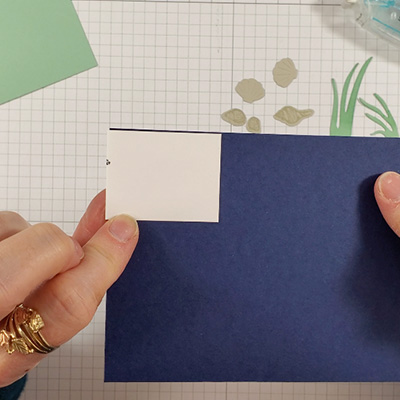
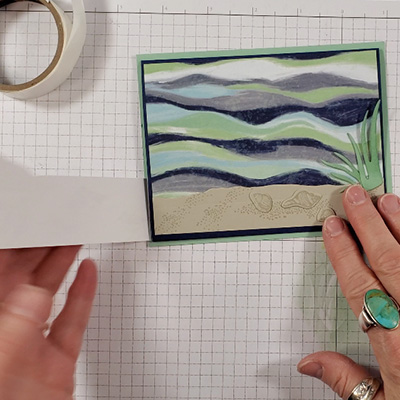
Fold the Night of Navy cardstock in half and burnish with a bone folder. Stamp seashells in Sahara Sand ink on the bottom right corner of the Basic White liner and adhere inside the Night of Navy cardstock base in landscape orientation. Adhere the striped DSP to the front of the card. Then adhere the beach overlapping the stripes to the front. Attach the bird flap by adding glue to the back of the end ‘square’ and adhering the ‘square’ to the bottom back of the Night of Navy cardstock.
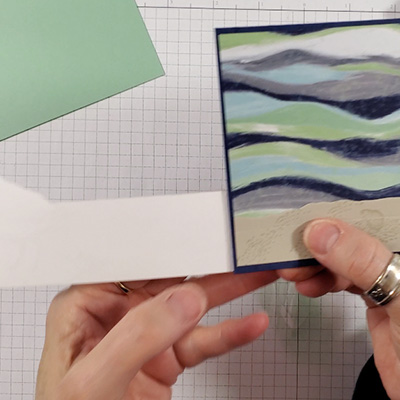
Glue the Night of Navy piece to the Mint Macaron base. Next add the seagrass with glue dots to the top right of the beach. Add stamped seashells with glue dots over the stamped images on the beach.
Close the inner Night of Navy flap, then close the bird flap over the top. Add a mini dimensional to the back of a seashell and position the shell in the seagrass to act as a latch.
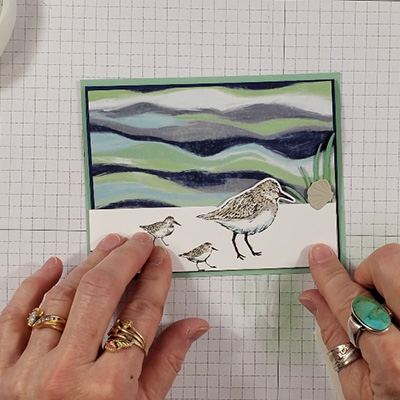
Finish decorating by adding Flat Adhesive-backed Pearls and Wink of Stella to the shells. Tie a strip of Night of Navy ribbon around the inner flap. Check out the video I made showing the entire process!
Leave a Reply