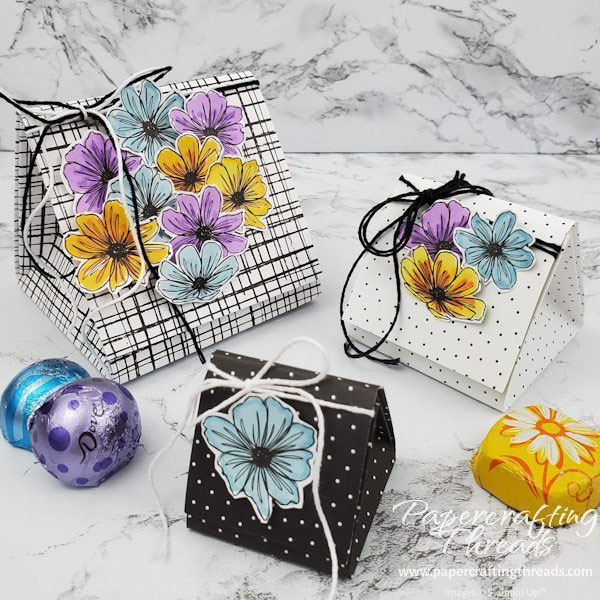
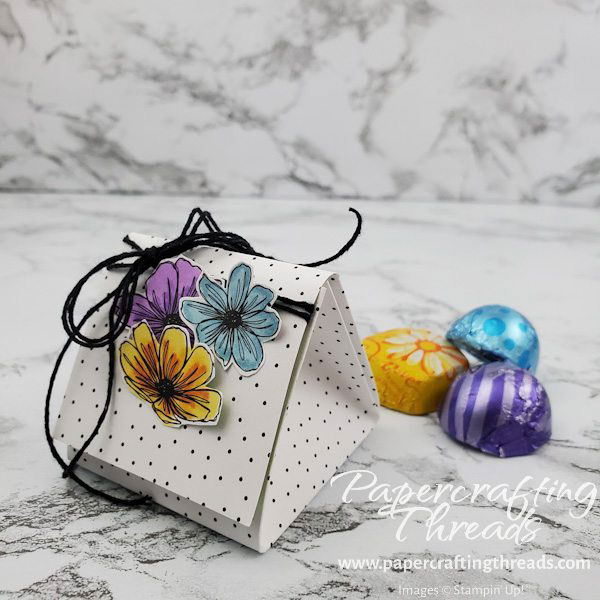
Make Triad Treat Boxes in any size you choose — Mini, Midi and Jumbo! There’s a size that’s perfect for everyone. The Mini holds one (or maybe two) Dove chocolates. The Midi holds at least three chocolates. And the Jumbo Triad Treat Box holds a handful!
Whichever size you choose to make, the only thing to keep in mind is that the starting designer series paper piece must be evenly divided into thirds on both sides. No adhesive necessary – I used mini earth magnets for my closures, but you could easily use mini velcro dots. I’ve made a chart for all three sizes for reference below. I’ll work with the Midi size for these directions, just swap out the measurements if you’re making the Minis or Jumbos.
| Paper Dimensions | Score Short Side | Score Long Side | Long Side Tic Marks | |
| Mini | 4-1/4″ x 6 “ | 1-1/2″ and 3″ | 1-1/2″, 3″, 4-1/2″ and 4-5/8″ | 2-1/4″ |
| Midi | 6″ x 8″ | 2″ and 4″ | 2″, 4″, 6″ and 6-1/8″ | 3″ |
| Jumbo | 9″ x 12″ | 3″ and 6″ | 3″, 6″, 9″ and 9-1/8″ | 4-1/2″ |
Scoring
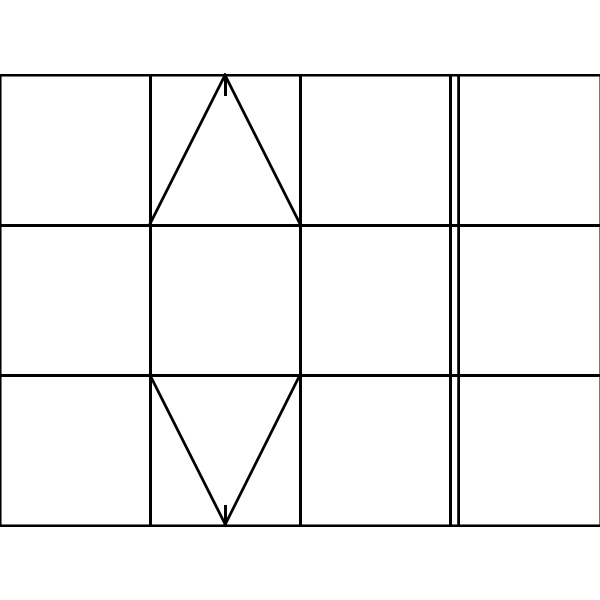
Start with a piece of designer series paper measuring 6″ x 8″ and score as noted above on the right side of the paper. The tic marks are made on BOTH long sides. Then with a ruler, score from the tic mark to the first scored corner, making a diagonal line. Repeat in the other direction. And lastly, repeat the diagonal lines on the opposite side. The piece of paper should look something like this:
Cutting
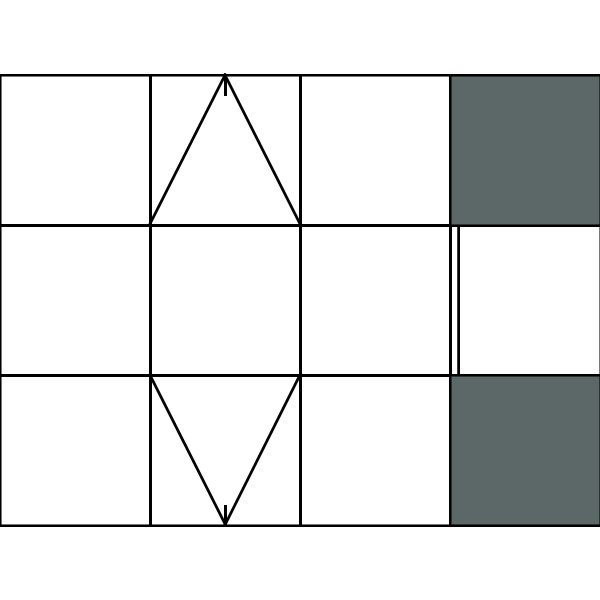
Trim the two end corner squares up to the second score line on the end where the two long side score lines are 1/8″ apart. Fold and burnish on all horizontal and vertical score lines.
Folding the Triad Treat Box
Next fold all four corner squares in half on the diagonal. Then fold the two middle squares on both diagonals.
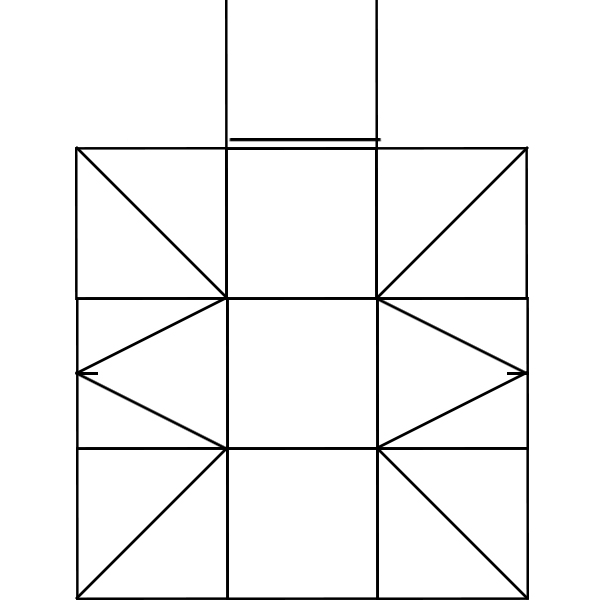
Holding the piece with the cut out square at the top, fold in the ends and sides to form a triad treat box. Open the box and place a glue dot about half an inch from the scoreline of the bottom middle square on the inside. Place a magnet on the glue dot and press. Fold the box, leaving the front flap open. Take a second magnet and let it snap in place over the first hidden magnet. Apply a glue dot to the top of the magnet, shut the flap and press.
Decorate your finished Triad Treat Box as desired. I wrapped Baker’s Twine around the flap and tied it in a pretty bow. I colored flowers from a designer series paper with my Stampin’ Blends, cut them out and used a combination of glue dots and dimensionals to stick them to the front of my treat boxes.
Leave a Reply