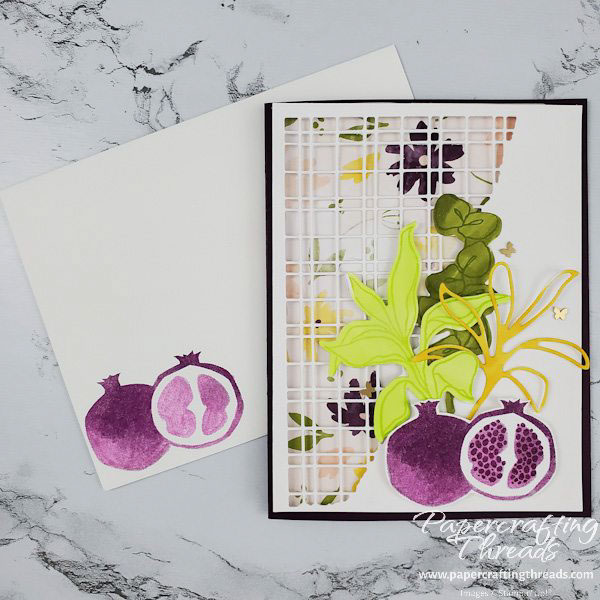
Make the perfect card with the Perfect Pomegranate stamp set. Bright and vibrant with loads of color and dimension, this card really is perfect. And pick up a few tips for die cutting and how to add sparkle to any project.
scoring & cutting guide
| Paper Dimensions | Score Short Side | Score Long Side | ||
| 4-1/4″ x 8-1/2″ Blackberry Bliss cardstock base | 4-1/4″ | |||
| 4” x 5-1/4” Basic White cardstock (x2) | ||||
| 4” x 5-1/4” Design a Dream patterned paper | ||||
| Scraps of Basic White cardstock |
To begin with, diecut three different leafy shapes from the Basic White cardstock scraps with the Splendid Stems dies.
Then color each of the shapes with a different Stampin’ Blend marker. I used Dark Daffodil Delight, Dark Old Olive, and Light Parakeet Party. Hold the brush end of the marker angled sideways for more coverage and to not tear the thin cutout. Because the Blends are alcohol ink, the streaks will fade away the more you use the marker. Or for more added interest, go back over some areas to add darker sections like I did for the tall skinny stem.
I stamped two of the die cuts with matching images from the Splendid Day set, matching the ink with the Blends color. PRO TIP: Normally I’d stamp the images in Memento black ink and then color with the Blends. But in this case I wanted a monotone look. If I had stamped the images with the classic ink first and then colored with the Blends, the ink would smear.
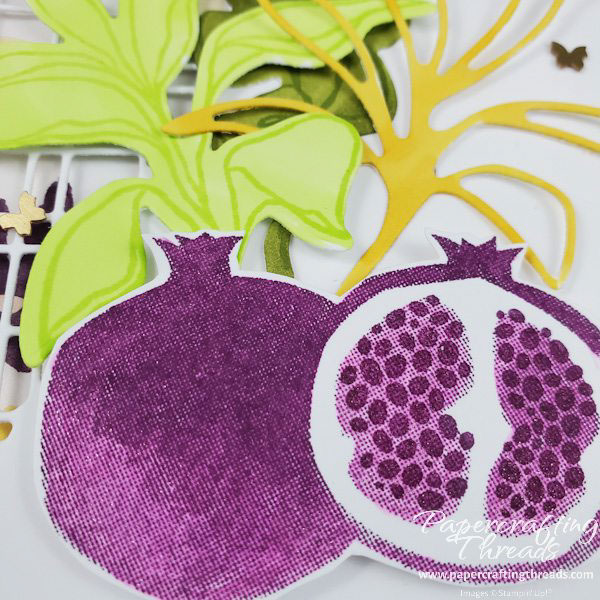
I used Blackberry Bliss ink for my pomegranates. To soften the look, add some sparkle and lighten the color, I colored over all of the Blackberry Bliss ink with a Wink of Stella brush. Be sure to wipe off any transferred ink color on the Wink of Stella brush by brushing the Wink of Stella on a piece of scrap paper until it runs clear. Then I stamped the pomegranate seeds right on top of the Wink of Stella and fussy cut around the pomegranates.
Assembling the Perfect Card
Moving on to the large Basic White piece, a little piece of removable tape held the Split Card Textures die in the upper left corner for die cutting. The second piece of Basic White cardstock is for the inside of the card. I stamped the Pomegranates in the lower right corner and added the Wink of Stella again.
Next I lined the narrow edges of the die cut cardstock with Foam Adhesive Strips. And I used pieces of Foam Adhesive Sheet for the larger area. Much quicker than lots of dimensionals and more support as well, especially since there is nothing under the actual lattice portion.
A combination of liquid glue, mini dimensionals and glue dots adhered the stem diecuts and the pomegranates for layers of dimension.
And I scattered three Brushed Brass Butterflies randomly to finish off the card. So, what do you think? Is this the Perfect Card with Perfect Pomegranate? Let me know in the comments!


I loved the card you sent me with the pomegranates. I already purchased some Wobbles! Am i the first person?
Yes you are!!! I’ll add the Perfect Pomegranate stamp set to your packet later this month 🙂 Congrats!