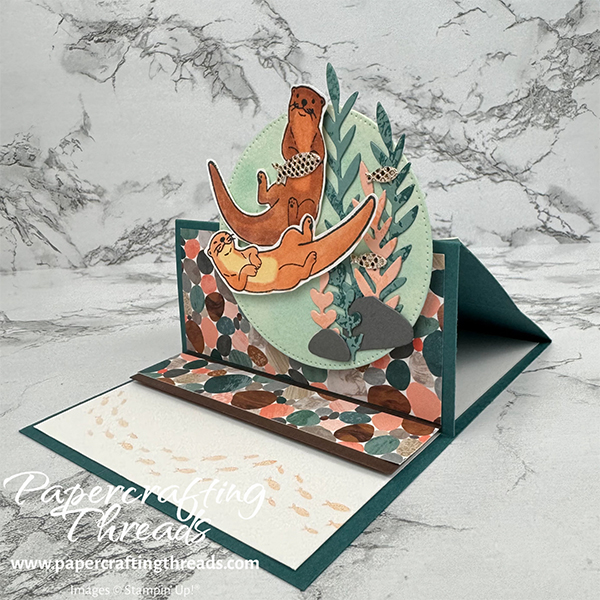
Dive into a whimsical river scene for an Otterly Awesome Easel Card! This delightful card features two of the playful river otters floating on a serene waterway. You’ll learn how to create depth and dimension for the scenery and an easy fun fold. Let’s get started!
cutting & scoring guide½”
| Paper Dimensions | Score Long Side | ||||
| 4¼” x 11″ Pretty Peacock cardstock base | 2″, 4″ & 5½” | ||||
| 1″ x 4″ Early Espresso cardstock for base of stopper | |||||
| 1¼” x 4″ patterned paper for top third section | |||||
| 1¾” x 4″ patterned paper for bottom third section | |||||
| ¾” x 4″ patterned paper for top of stopper | |||||
| 1¾” x 4″ Fluid 100 watercolor paper for middle section | |||||
| Scrap of Fluid 100 watercolor paper for die cutting circle | |||||
| 4″ x 5¼” Basic White cardstock for inner liner | |||||
| Scrap of Basic White cardstock for stamping otters | |||||
| Scraps of Lost Lagoon, Petal Pink, & Basic Gray for die cutting |
step by step guide — otterly amazing easel card
Die cut the largest circle from the Stylish Shapes dies out of the scrap of watercolor paper. Spritz water generously over the surfaces of the circle and the rectangle. Pick up some Pool Party ink on an acrylic block from the stamp pad. Using a water painter, add the Pool Party ink to both watercolor papers. Add more ink to some spots to give it the look of water. Set aside to dry.
Fold the Pretty Peacock card base in half as if it were a standard card with the seam positioned at the top. Next, fold the next scoreline up (valley fold). Then fold the remaining scoreline as a mountain fold. Unfold all except the top fold. Adhere three panels to the front: medium size patterned paper to the top section, watercolor paper to the middle, and the largest piece at the bottom. Stamp the tiny fish from the Otterly Amazing stamp set in a wavy pattern at the bottom of the white liner. Adhere to inside of card.
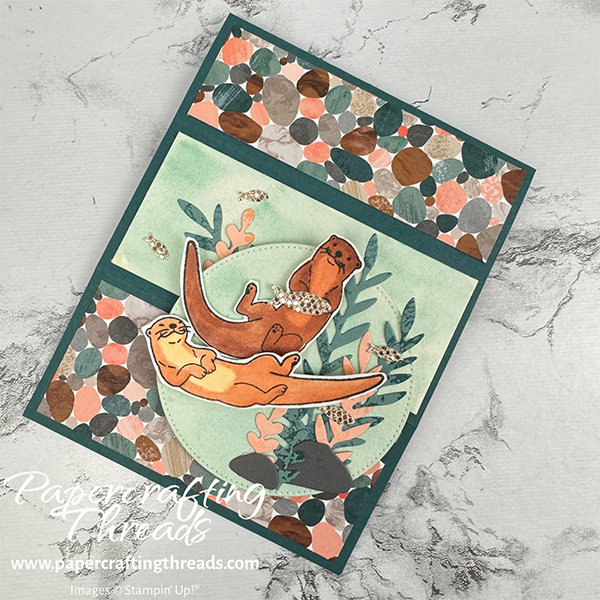
Stamp the two otters on the scrap of Basic White cardstock in Tuxedo Black Memento ink. Color with Stampin’ Blends. I used SU700 and Ivory for the laid back otter, and SU400, SU600 and SU700 for the curled otter. Die cut or fussy cut the otters.
adding texture to die cuts
Randomly stamp the scrap of Lost Lagoon multiple times with the blobby image from Of Art & Texture with Pretty Peacock ink. And randomly stamp the scrap of Petal Pink with Petal Pink ink. Die cut multiples of the foliage. Then die cut two rocks from Basic Gray cardstock. Die cut the fish from some type of glittery paper (I used the retired Be Dazzling specialty paper). Then assemble the scene on the watercolor paper as shown. Adhere the circle to the front bottom section with dimensionals.
Stamp the fish image in Petal Pink ink in a swirly pattern on the bottom of the Basic White liner and adhere to inside of card. Adhere the last strip of patterned paper to the strip of Early Espresso. Pop up on dimensionals and adhere to inside of card, just above fish.
If you found this tutorial helpful, consider a contribution to my coffee fund ☕️ Coffee → Creativity → Content → More Coffee (help fuel the cycle!)
Want to make your own with these cuties? Shop my online store today, as availability is while supplies last.
Leave a Reply