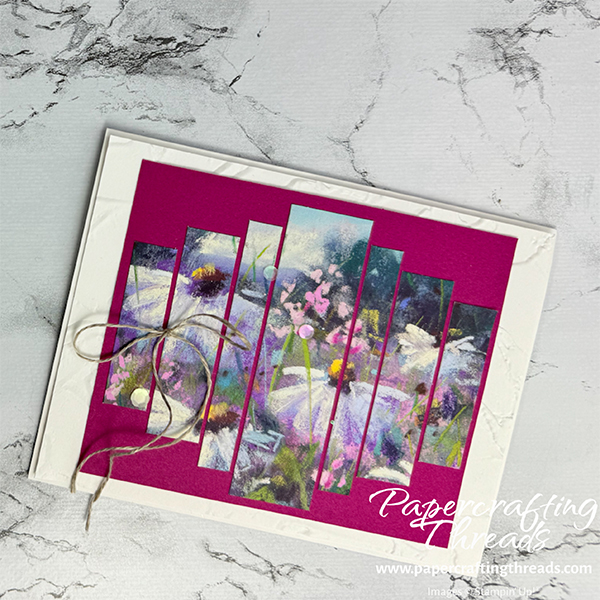
Take a gorgeous scenic panel and stretch it out into a Panoramic Panel Card with this March 2024 Paper Pumpkin Kit Alternative. It’s slicing and dicing and reassembling all made easy. Don’t have the kit? Not to worry! Use any piece of patterned paper with a scene. This tutorial easily adapts.
cutting & scoring guide
| Paper Dimensions | Score Long Side | |||||
| 8-1/2″ x 11″ Basic White cardstock base | 4-1/4″ | |||||
| 4-1/8″ x 5-3/8″ Basic White cardstock for embossing | ||||||
| 3-3/4″ x 4-1/2″ Berry Burst cardstock for mat | ||||||
| 3-1/2″ x 4″ scenic patterned paper |
step by step instructions for panoramic panel card
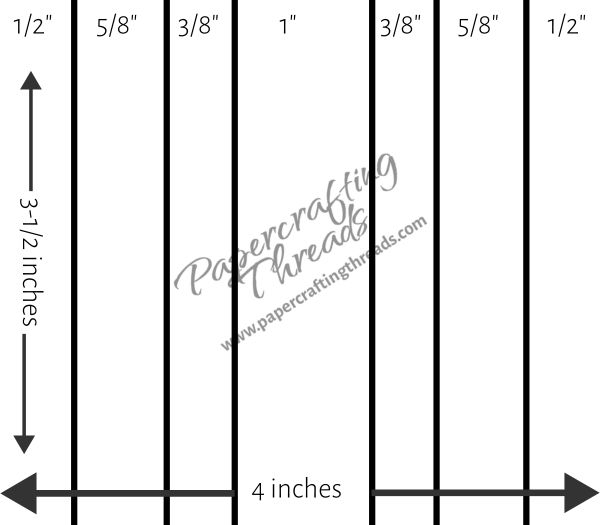
Choose the scene for the card’s focal point, keeping in mind that the corners of the scene will be omitted. I used the front panel of the landscape oriented card base from the Paper Pumpkin Kit. Cut the panel to 3-1/2″ x 4″. Slice the panel into strips as shown in the template below. I cut both 1/2″ pieces, then the 5/8″, etc., and lined them up off to the side as I went.
Once all of the strips are cut and lined up to recreate the original scene, cut BOTH ends of each strip as shown in the table below. Because the final design is graduated, the same amount is cut from BOTH ends of each strip is to keep the scene lined up.
| Strip Width | Cut from BOTH ends | |||||
| 1/2″ | 3/4″ | |||||
| 5/8″ | 1/2″ | |||||
| 3/8″ | 1/4″ | |||||
| 1″ | none |
Reassemble the scene on the piece of Berry Burst cardstock. Use liquid glue to adhere in place, leaving approximately 1/16″ space between panels and even space between the top and bottom edges of each strip.
Emboss the Basic White cardstock piece with the Painted Textures 3D embossing folder. Adhere the Berry Burst panel to the embossed panel. Adhere to the front of the Basic White card base.
Add a linen thread bow and scatter multifaceted sequins as shown in the original picture. I also adhered a strip of the leftover paper from the scene inside the card.
Check out my YouTube channel below for a short video tutorial. Be sure to like, subscribe and share!


Leave a Reply