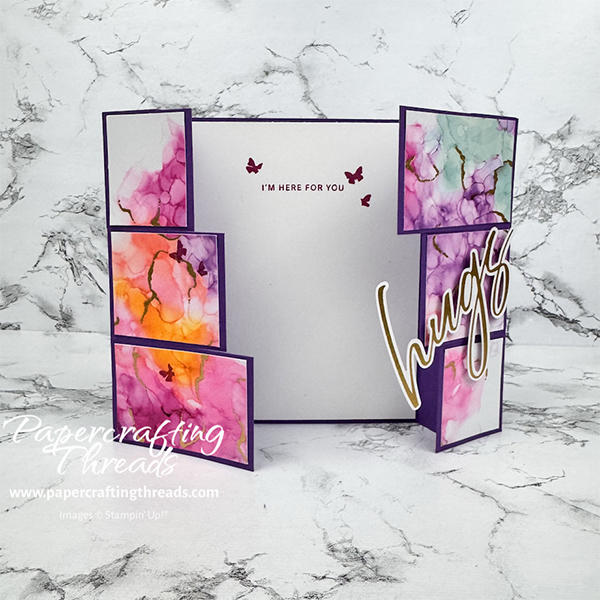
Today, I’m excited to share my Portrait Puzzle Slider Card. There’s something magical about getting a handmade card that does more than just open and close. This interactive card combines the mesmerizing swirls of an alcohol ink pattern with a puzzle element. As the puzzle pieces slide apart, the heartfelt message is revealed within. It’s a perfect blend of art and engineering that creates a truly memorable experience. And it’s easy – no special tools needed. Let’s get started!
cutting & scoring guide
| Paper Dimensions | Score Short Side | Score Long Side | ||||
| 5¼” x 8⅛” Gorgeous Grape cardstock base | 1″ & 2″ each end | |||||
| 4⅛” x 5¼” Gorgeous Grape cardstock mat | ||||||
| 3¾” x 4¾” patterned paper | ||||||
| 4″ x 5⅛” Basic White cardstock liner |
step by step instructions
Prepare all cardstock as noted above. Slice the Gorgeous Grape mat into three equal strips by placing the long side at the top of the Stampin’ trimmer, cutting once at 1¾” and then again. Position the pieces off to the side as the original piece. Place the top strip in the trimmer and cut at 1-9/16″ on the long side. Set aside in position. Place the middle strip in the trimmer and cut at 2-1/16″ on the long side. Set aside in position. Place the bottom strip in the trimmer and cut at 2-9/16″ on the long side. Set aside in position.
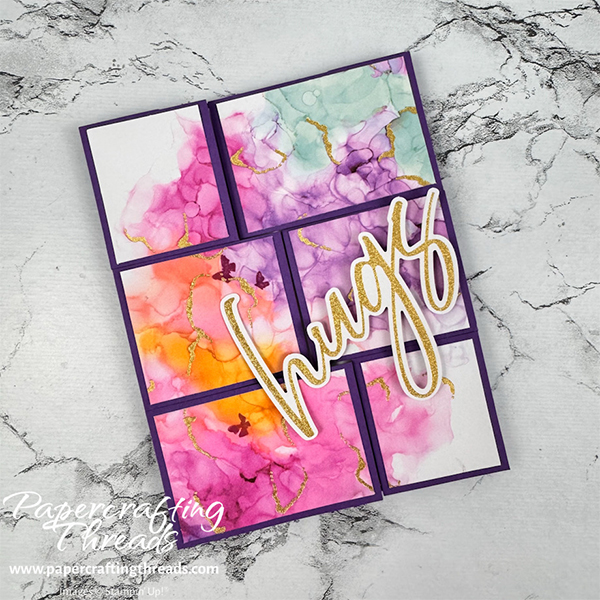
I used one half of a card base from the Inked Occasions Paper Pumpkin Kit April 2025 for my focal point. If you’re using something else, pick a bold pattern. Trim patterned paper to 3¾” x 4¾”. Set the paper down in portrait orientation. Place in trimmer with long side at top and slice into three equal strips measuring 1⅝” in width. As done with the Gorgeous Grape mat, position the pieces off to the side creating the image as it looked before cutting. Place the top strip in the trimmer and cut at 1⅜” on the long side. Set aside in position. Place the middle strip in the trimmer and cut at 1⅞” on the long side. Set aside in position. Place the bottom strip in the trimmer and cut at 2⅜” on the long side. Set aside in position.
Adhere the patterned paper strips onto the corresponding Gorgeous Grape mats, being careful to keep the original pattern.
assembly of the portrait puzzle slider card
Fold both sides inward on the scorelines of the card base. Fold on the remaining scorelines outward. Add liquid glue to the left side flap. Position the top left piece of the matted design at the top left flap, aligning the edges and press to adhere. Place the left center piece on the flap and press to adhere. And finally, adhere the bottom left piece in position on the flap.
Add liquid glue to the top right flap and work your way down the flap with the remaining pieces.
Stamp the sentiment on the Basic White cardstock liner in Berry Burst ink. Stamp butterflies around the sentiment and adhere the liner inside the card.
Cut up mini dimensionals and adhere behind the ‘ugs’ of the diecut ‘hugs’ greeting from the Paper Pumpkin Kit. Place at a slant on the right half of the puzzle pieces as shown. Stamp more butterflies around the greeting.
I hope you enjoy making this style of card. I’ve seen many versions of this in landscape orientation but not in portrait. I made a quick video for my YouTube channel if you need a visual. Don’t be intimidated by the sixteenths measurements!
If you found this tutorial helpful, consider a contribution to my coffee fund ☕️ Coffee → Creativity → Content → More Coffee (help fuel the cycle!)
Leave a Reply