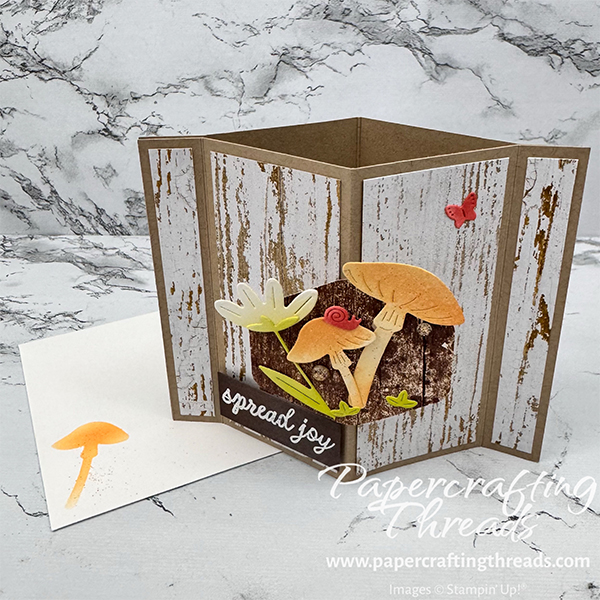
Have I ever got a cute and easy fun fold card for you – check out my Push and Pop Card. I’ve also heard this fold called a pop out diamond fold. No matter what you call it, it’s pretty cool. I love the rustic feel of the woodgrain. And I’ve got a faux watercolor technique that adds loads of texture to the toadstools. Let’s get started!
cutting & scoring guide
| Paper Dimensions | Score Short Side | Score Long Side | ||||
| 5½” x 8½” Crumb Cake cardstock base | ¾”, 2¾” & 4¾” | |||||
| 1¼” x 3″ Crumb Cake cardstock mechanism | ½” & 1″ both ends | |||||
| ½” x 4″ Country Woods patterned paper (cut 4) | ||||||
| 1¾” x 4″ Country Woods patterned paper (cut 2) | ||||||
| 1¾” x 4″ Basic White cardstock (cut 2) | ||||||
| ¾” x 2″ Early Espresso cardstock for greeting | ||||||
| Scrap of Country Woods cardstock for punching hexagon | ||||||
| Scraps of Basic White cardstock for die cutting |
step by step instructions
Prep all paper as noted. Cut Crumb Cake base cardstock in half, creating two identical pieces measuring 4¼” x 5½” each. Fold middle scoreline as a mountain fold and the two end scorelines as valley folds on both pieces.
Choose one to be the front piece. Adhere the two wider strips of white wood-patterned DSP to either side of the middle scoreline. Then adhere the two narrow DSP strips to each side.
Adhere the two Basic White strips to either side of the middle scoreline on the back piece. Adhere the two remaining narrow strips of DSP to each side.
Place the back piece face down. Add liquid glue to the narrow flap on the left. Line up the top piece and press to adhere. Add liquid glue to the narrow flap on the right. Line up the top piece and press to adhere.
Creating the Push and Pop Mechanism
Fold the mechanism on the four scorelines as valley, mountain, mountain, valley folds. Add liquid glue to the bottom of one of the ‘legs’. Align the flap with the center front scoreline of the card front and press to adhere. Add liquid glue to the bottom of the opposite ‘leg’, align the flap on the other side of the center scoreline and press to adhere.
Punch a hexagon shape from the dark brown wood pattern DSP. Adhere with liquid glue to the mechanism.
Using the Cute as a Bug die cut set, die cut one large toadstools, two small toadstools, a flower blossom and stem, the three tiny leaf sets and the butterfly, snail and dragonfly from scraps of Basic White cardstock. Reinsert the die cuts into the negatives. Don’t have the Cute As A Bug die set? Visit my online store here to purchase yours today!
Faux Watercolor Technique
Use a blending brush to add Peach Pie ink, using different amounts of pressure for uneven color, to the toadstools. Flick water from a water painter over the images. Splatter with ink from a Dark Timid Tiger Stampin’ Blend.
Use Lemon Lime Twist ink and another blending brush for all foliage, with the ink quite heady. Blend Lemon Lolly ink on the base of the flower blossom. And use Calypso Coral on the snail, butterfly and dragonfly.
Adhere the images as shown, using a combination of dimensionals and liquid glue, creating dimension and layers.
Stamp the greeting in Versamark ink on the strip of Early Espresso, sprinkle with white embossing powder and heat set. Pop up on dimensionals and adhere. Scatter Iridescent Foil Gems on the front.
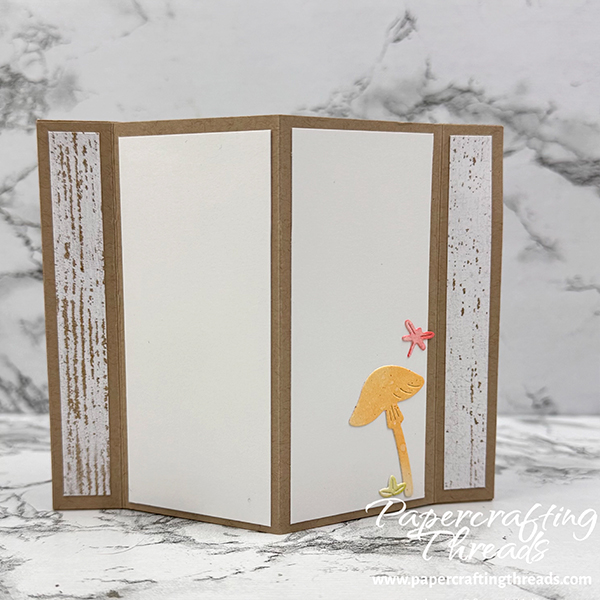
Adhere one small toadstool, a tiny piece of foliage and the dragonfly on the Basic White liner.
If you found this tutorial helpful, consider a contribution to my coffee fund ☕️ Coffee → Creativity → Content → More Coffee (help fuel the cycle!)
Bonus tip: Use one of the negatives from the small die cut toadstools as a stencil to blend a toadstool on the lower left corner. Add some splatter with the Dark Timid Tiger Stampin’ Blend. You can see what the envelope looks like decorated on the cover of my YouTube video below.
Leave a Reply