The Nature’s Poem Suite in the new Annual catalogue is a natural winner! A perfect complement to our long-running Lovely as a Tree stamp set, the Rooted in Nature stamp set has a total of 16 rubber stamps – 12 of them with matching dies in the Nature’s Roots Framelits Dies. Even better – you can buy them as a Bundle, and save 10%!
NATURE’S ROOTS FRAMELITS DIES
This set is unique in that along with the 9 cutting dies, it has 3 embossing dies! You can create beautifully embossed leaves that add a ‘wow’ factor to your project.
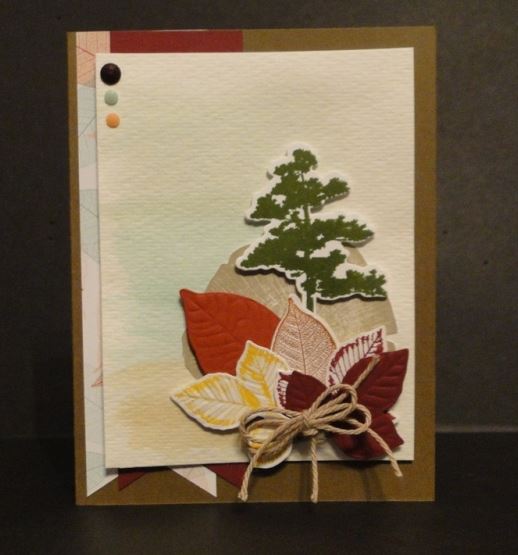
This card is created using both the stamp set and the dies, along with some new colours.
DETAILS
Start by creating a colour wash background on a panel of Watercolour Paper. First, wet the paper with your wet Aqua Painter. Next, pick up ink from the lid of the ink pads; use Mint Macaron, Pool Party and Soft Suede Classic Inks. After creating the wash, set aside the panel to dry.
On a separate piece of Whisper White cardstock, stamp the tall single tree image in Mossy Meadow ink, and 2 of the leaf trio images; once in Merry Merlot and once in Crushed Curry ink. Next, stamp the trunk round image in Crumb Cake ink, and the medium leaf in Cajun Craze ink.
Use the Nature’s Roots Framelits Dies to die cut all of the stamped images. Die cut an extra leaf trio from Merry Merlot cardstock, and a large leaf from Cajun Craze cardstock.
USING THE EMBOSSING DIES AND EMBOSSING MATS
You want to die cut your shapes before embossing them, otherwise when you run them through the Big Shot to cut after embossing, the embossing will be flattened.
First, create your ‘sandwich’.
- If you have the ‘old’ Base Plate, flip open Tab 1.
- Add the first Cutting Plate.
- Place the embossing die on the cutting plate, face up (embossing area facing you).
- Place your die cut in the embossing die. It will ‘sit’ inside the lip of the embossing die. You can hold it in place with a bit of Washi Tape, or a Post-it Note, if you like.
- Place the Blue Embossing Mat over top of the embossing die/cardstock.
- Place the white Impressions Plate on top, and then run through the Big Shot.
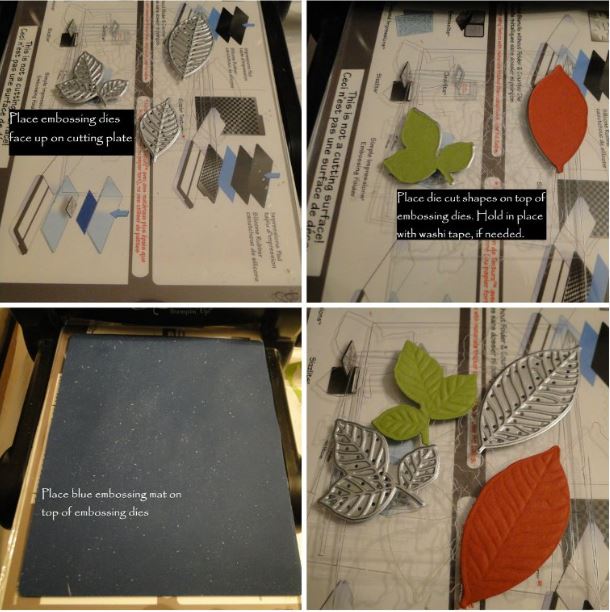
You can do all of your embossing at once – one piece of cardstock per embossing die at a time.
LAYER IT TOGETHER
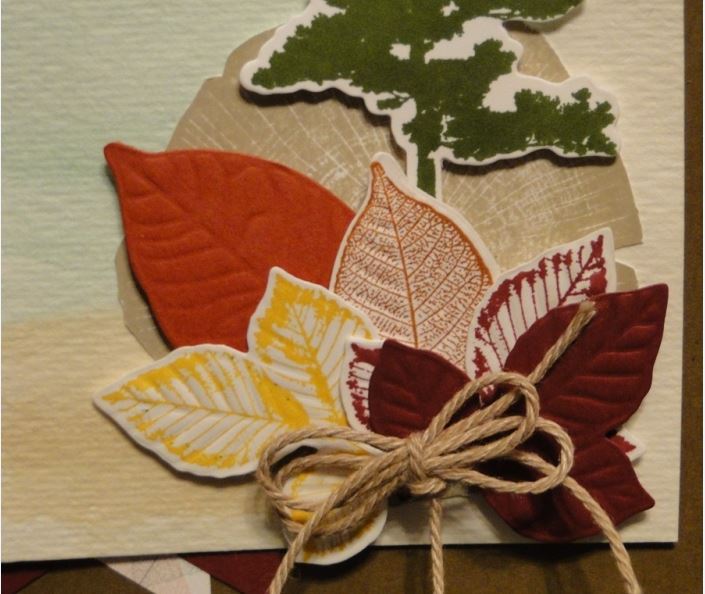
Hand cut the round tree trunk die with your Paper Snips, then attach it to the right bottom corner of your colour-washed paper. Use Multipurpose Liquid Glue to attach it. Next, layer on the die cut tree and leaves, with Stampin’ Dimensionals.
Finish off the card front by tying a double bow with the new Nature’s Twine in Crumb Cake, and attach it with Mini Glue Dots to the front of the leaves. Add 3 of the Faceted Dots in the upper left hand corner. (I used one Blackberry Bliss, one Mint Macaron and one Grapefruit Grove).
Create your card base of Soft Suede cardstock. Next, create 2 banners, one from Merry Merlot cardstock and one from Nature’s Poem Designer Series Paper. Use the Banner Triple Punch the create banner tails on one end of each, then glue to the card base with liquid glue.
Leave a Reply