Make a custom-sized Shadow Box Frame to showcase your stamping projects! This 3D home decor project needs no special tools, just a one piece of cardstock, a way to score, sharp scissors and liquid glue. Let’s get started!
formula for shadow box frame
To make this frame fit any piece of stamped artwork, I’ve got you covered with a formula.
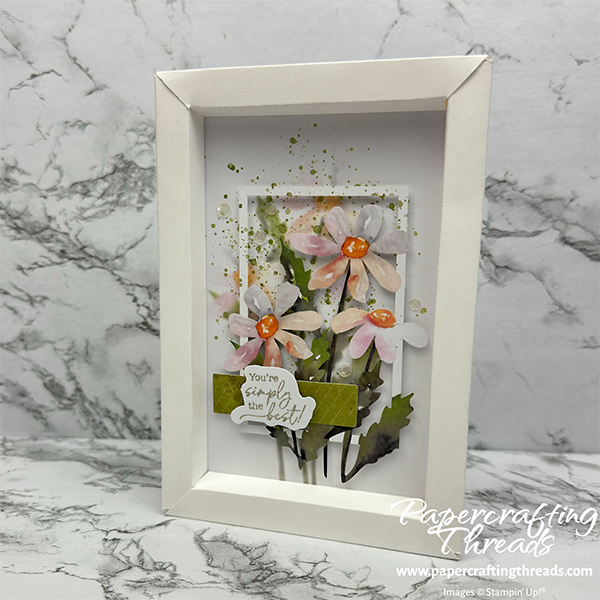
1) Determine the size of the inner artwork. I trimmed a card base from the July 2024 Painted Petals Paper Pumpkin Kit to measure 3-1/2″ x 5-1/2″.
2) Determine the raised frame edge, depth and frame. In this case, my raised frame edge is the same on all sides at 1/2″. NOTE: The raised frame edge does not have to be the same as the depth.
3) Add THREE of the raised frame edge measurements and TWO of the depth measurements.
1/2″ + 1/2″ + 1/2″ + 1/2″ + 1/2″ = 2-1/2″
4) Double the result of Step 3. So 2-1/2″ x 2 = 5″.
5) Add 5″ to the artwork size.
3-1/2″ + 5 = 8-1/2″
5-1/2″ + 5 = 10-1/2″
Cut Basic White cardstock 8-1/2″ x 10-1/2″ to make this shadow box frame.
scoring & cutting guide with template
Since our raised frame edge is 1/2″ on all sides, score the long sides every half inch from both sides at 1/2″, 1″, 1-1/2″ and 2″. Score the short sides the same, plus an addition. Score another half inch in at 2-1/2″ running from the top edge to the second score line. Repeat all the way around.
In the template below, the score lines are shown as dashes.

Next, cut as shown by the shaded area in the template.
assembly
Fold on all scorelines. Adhere the first layer of the artwork in the center. Add Tear ‘N Tape to the top flap on all four sides. Starting with the length, fold in two ‘channels’. Remove the backing of the Tear ‘N Tape. Roll over two more channels and burnish. Roll back and burnish again. Pinch the first side into place. Repeat on the opposite side.
Flatten the sides and fold the bottom piece in. The sides should clear the edges of the side frames. If not, trim the edge just to the second score line. Keep the corner neat as that will show on the finished frame.
Fold in one channel. Remove the backing of the Tear ‘N Tape. Roll over two more channels and burnish. Pinch into place. Push the tiny flaps in to the side channels and manipulate the corners into place. Repeat on the top edge.
Once frame is squared up, add a dot of liquid glue to the tops of the small flaps and hold until set. If corners don’t hold in place, tuck a mini glue dot in the front crease.
Finish decorating by adding layers on top of the artwork. I used Dimensionals to pop up the focal floral piece. The labels, sentiment and sequins are all pieces from the Paper Pumpkin Kit.
Check out my video over on my YouTube channel for a visual.
Leave a Reply