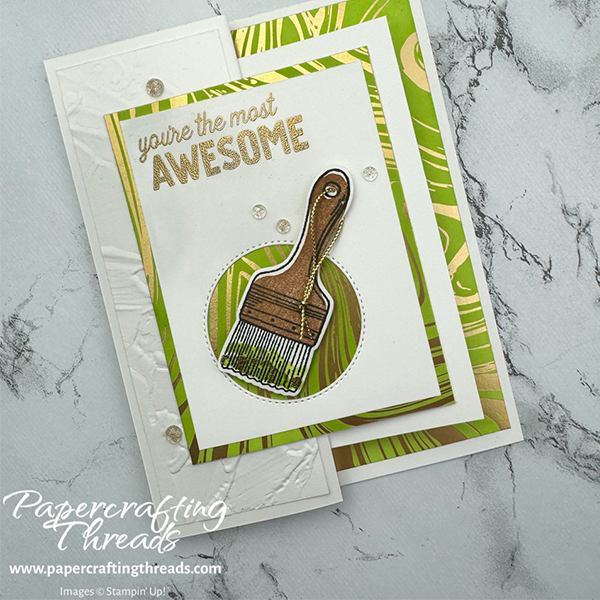
A Shiny Double Decker Card is just the ticket for a fun card to brighten any day. And the patterned paper uses an easy emboss resist technique. And even better the gold marbled paper is FREE during Sale-a-bration. The Most Adored DSP is so versatile – one side is rich, gorgeous gold foil in fabulous patterns, and the other side is Real Red, Flirty Flamingo and white with a heart theme. And we’re going to the green side! Let’s get started!
cutting & scoring guide
| Paper Dimensions | Score Long Side | ||||
| 5-1/2″ x 8-1/2″ Basic White cardstock base plus a scrap for stamping & die cutting | |||||
| 1-7/8″ x 5-1/4″ Basic White cardstock for embossing | |||||
| 2-1/4″ x 3″ Basic White cardstock for mechanism | 3/4″, 1-1/2″ & 2-1/4″ | ||||
| 3″ x 4-1/2″ Basic White cardstock bottom deck | |||||
| 3″ x 4″ Basic White cardstock top deck | |||||
| 4″ x 6″ Most Adored DSP top deck (cut down to 3″ x 4″ after inking) | |||||
| 2-3/4″ x 3-3/4″ Basic White top deck focal layer | |||||
| 4″ x 6″ Most Adored DSP inner back (cut down to 4″ x 5-1 /4″ after inking |
inking the marble
Start with two pieces of the marbled patterned Most Adored DSP measuring at least 4″ x 6″. Swipe Parakeet Party ink directly on the paper, rotating directions until completely covered. Don’t worry if it’s a little streaky as the ink will absorb into the paper and even out. Wipe over the gold foil with a paper towel to remove any trace of ink. Set aside to dry.
Stamping & heat embossing
Stamp the paintbrush image from the Trusty Tools stamp set in Tuxedo Black Memento ink on the scrap of Basic White Cardstock. Stamp the image again in the lower left corner of the Basic White bottom deck. Add the handle color with the stamp and Pecan Pie ink. Add the paint with the stamp and Parakeet Party ink. I double stamped the paint – one at the end of the bristles and again just a bit higher and slightly overlapping the first layer of ink. Heat set the bristles, because we want that ink to be completely dry for the next step.
Stamp the paint image with Versarmark ink just once, at the end of the bristles. Add Gold Embossing Powder, and brush away some of the powder with a dry paintbrush. This lets more of the Parakeet Party color show through. Heat set. Stamp the sentiment you’re the most AWESOME from the Trusty Tools stamp set in Versamark on the top left corner of the Basic White top deck focal layer. Add Gold Embossing Powder and heat set.
Diecut the paintbrush from the scrap. Diecut the third largest circle from Stylish Shapes dies below the sentiment on the focal layer.
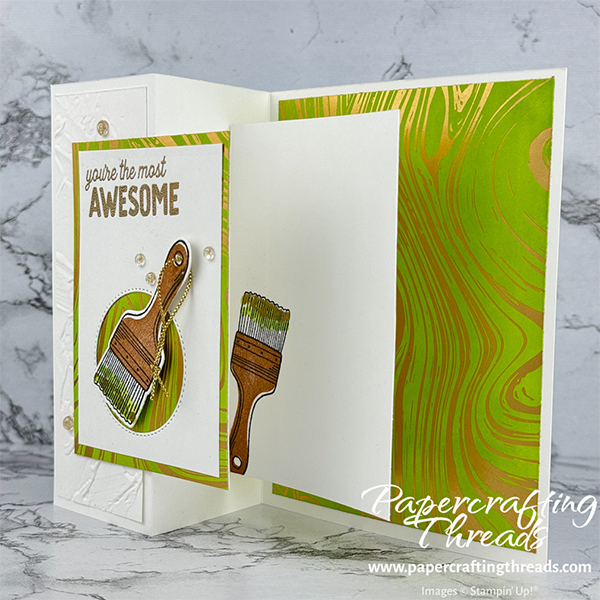
creating the shiny double decker card mechanism
Create a Z-fold with the Basic White card base. Cut one of the green marbled Most Adored DSP sheets to 4″ x 5-1/4″ and apply to the inner back panel of the card base. Emboss the narrow Basic White strip with the Painted Texture 3D embossing folder and adhere to the front panel.
Fold the mechanism scorelines as mountain folds. Add glue to the top flaps. Flip the mechanism glue-side down and adhere to the inside of the card, lining up the scoreline of the mechanism with the inside scoreline of the card base. Press and burnish to adhere. Add glue to the shelf of the mechanism and adhere the bottom deck.
Add dimensionals to the back of the diecut paintbrush, thread the handle with gold cording and pop the brush up on the focal panel with the bristles over the cutout circle. Fold the card closed and adhere the top deck to the embossed panel, offsetting the deck to center over the bottom deck. Scatter Iridescent Foil Gems on the front of the card and it’s done.
The bright lime green and the different shiny bits of gold make this one of my favorite cards ever. The Shiny Double Decker Card shimmers and shines so that pictures don’t do it justice. Make one (or two!) and you’ll see what I mean. Get all supplies here in my online store today!
Leave a Reply