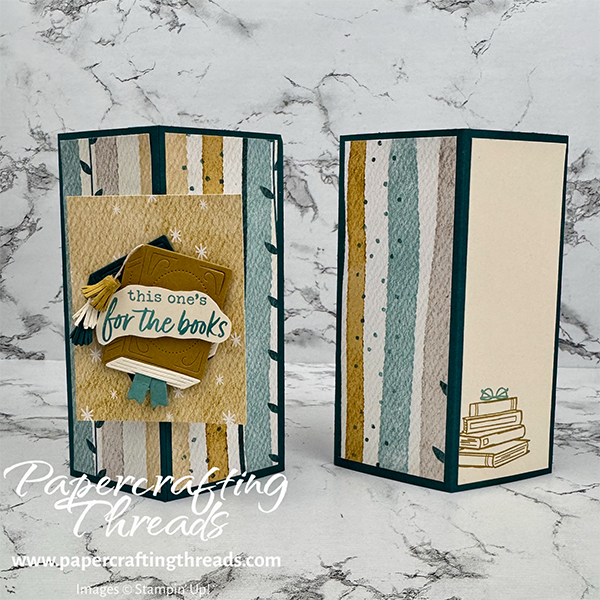
I’m excited to share a unique Stand Up Tower Card that’s perfect for book lovers and crafting enthusiasts alike. This freestanding tower card brings together shades of vanilla, peacock, wheat, and granite to create a sophisticated color palette that commands attention.
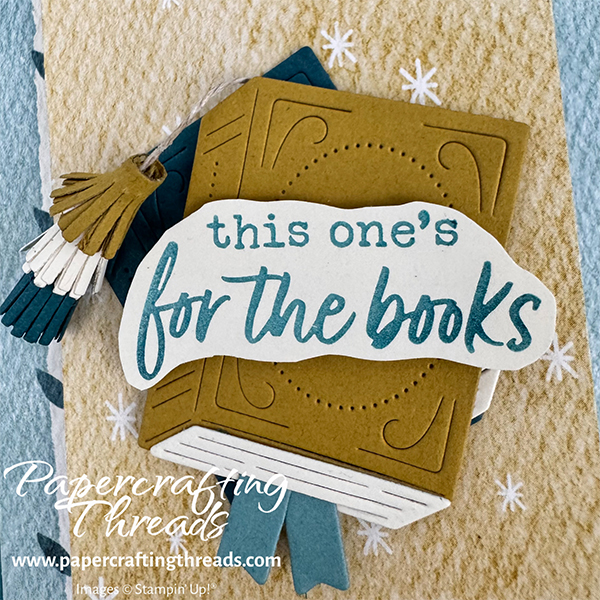
The star of this design is the dimensional pop-up panel featuring a 3-D like stack of books. Each book is layered to create depth and visual interest, while delicate details like miniature bookmarks and a three-tiered tassel flowing from the top book’s spine add those special finishing touches that make handmade cards truly special.
This card is perfect for celebrating literary lovers, graduations, or any milestone worthy of remembering. The tower design allows the card to stand independently, making it both a card and a keepsake display piece. Let’s get started!
cutting & scoring guide
| Paper Dimensions | Score Short Side | Score Long Side | ||||
| 5½” x 8½” Pretty Peacock cardstock base | 2″, 4″, 6″ & 8″ | |||||
| 1″ x 2″ Pretty Peacock cardstock for mechanism (cut 2) | 1″ | |||||
| 1¾ ” x 5¼ ” Everyday Happiness patterned paper (cut 3) | ||||||
| 2½” x 3¼ ” Everyday Happiness patterned paper mat | ||||||
| 1¾ ” x 5¼ ” Very Vanilla cardstock for ‘liner’ | ||||||
| Scraps of Pretty Peacock, Wild Wheat, Lost Lagoon and Very Vanilla cardstock for die cutting |
step by step instructions
Die cut two book bases from Pretty Peacock and Wild Wheat cardstock. Also diecut pages from Very Vanilla. Then diecut three tassels, one each from Pretty Peacock, Wild Wheat and Very Vanilla. And finally die cut a pair of bookmark ends from Lost Lagoon.
Create a string of tassels by first gently running the diecuts over the edge of a bone folder to soften the fibers. Wrap each tassel around the barrel of the stylus tip on the Take Your Pick tool or a pointy tool, as if quilling. This trains the paper to go in the direction you want.
Tie a double knot in the end of a 5″ length of linen thread. Run a bead of glue on the solid edge of one of the diecut tassels, place the knot at one end and roll tightly. Add a bead of glue on the next tassel, place slightly above the first tassel and roll tightly. Repeat with the last tassel. Once dry, flick the cut ends of each tassel to loosen them up. Adhere with a glue dot to the back of the Wild Wheat book spine. Cut off any excess linen thread. (See closeup photo towards the end of this post for reference.)
Stamp the greeting in Pretty Peacock ink on a scrap of Very Vanilla and fussy cut. Stamp the book stack in Wild Wheat ink towards the bottom of the Very Vanilla strip. Add the pair of glasses on top of the stack in Lost Lagoon ink.
stand up tower card base & mechanism
Mountain fold all score lines on the Pretty Peacock card base. Apply liquid glue to the ½” flap, fold over the opposite side and adhere, forming a tower shape.
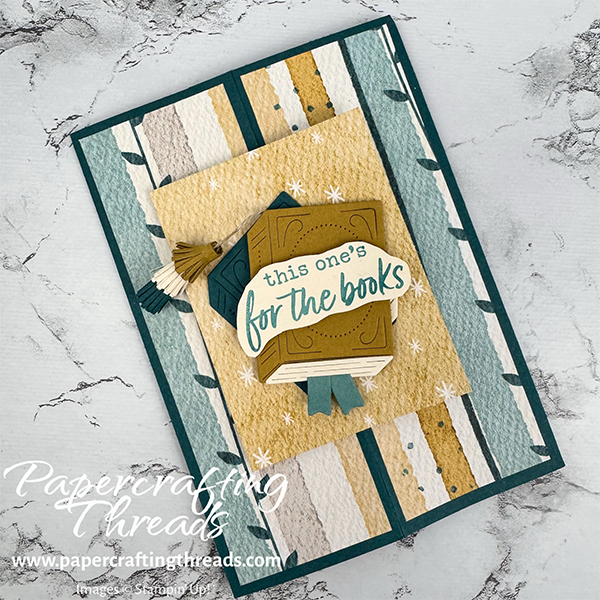
Adhere two of the gorgeous Everyday Happiness strips to the card base panels on the front of the card. TIP: I positioned the seam as my ‘front’. Doing this makes the sealed tab invisible. Adhere the remaining patterned strip and the Very Vanilla book stack strip to the back panels.
Fold the two mechanisms in half on the scorelines. Hold one like a book, add adhesive to the back and adhere to the right of the front seam, approximately halfway between the top and bottom. Hold the remaining mechanism opening to the left, with the fold on the right — the exact opposite of the first one. Again, apply adhesive to the back and adhere butted up to the left of the front seam, but not touching the first piece.
Close both mechanisms, add liquid glue to the tops and adhere the DSP mat in the center. Glue the Pretty Peacock book at an angle to the front of the mat. Add dimensionals to the back of the Wild Wheat book and adhere on top of the first book at the opposite angle. Then place dimensionals on the back of the sentiment and adhere to front of books.
Write your message on the back Very Vanilla panel and fold flat to mail! I can’t wait to make other versions of this Stand Up Tower Card. Though as an avid reader, this one will always hold a special place in my heart.
If you find this tutorial helpful, consider a contribution to my coffee fund ☕️ Coffee → Creativity → Content → More Coffee (help fuel the cycle!)
And of course, I had to make a video – check it out over on my YouTube channel. Like, share and comment so I can keep making these free tutorials available.
Leave a Reply