Papercrafting Threads

  • Tutorials
    • PDF Tutorials
    • 3D Projects
    • Cardmaking
    • Fun Fold
    • Product Tips & Tricks
    • Projects
    • Techniques
  • Catalogs
  • Shop & Specials
    • Shop My Stampin’ Up! Online Store
    • Special Offers
    • Buy Me A Coffee
    • My Favorite Things on Amazon
    • Gift Certificates
  • Contact Me
  • Join the Fun
    • Join the Fun
    • Special Join Offers
  • Calendar of Events
  • Paper Pumpkin
    • Paper Pumpkin Kits
    • Paper Pumpkin Stamp Case Inserts
  • Nav Social Menu

    • Email
    • Facebook
    • Instagram
    • Pinterest
    • YouTube

Tall Cornstalks

April 30, 2021 Leave a Comment

30 Apr

Tall cornstalk meets Hey Chick for this vibrant birthday card

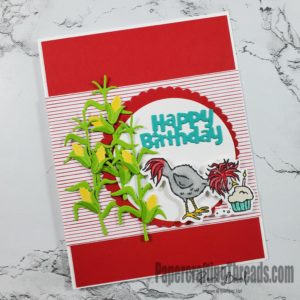
I grew cornstalks out of paper! And it only took a minute. My farmer husband is so jealous. Read on to see just how easy it is to use teeny tiny elements in crafting. All you need are the right tools for the job, just like all a farmer needs is the right tractor.

Three Tools for Easy Teeny Tiny Elements
  1. Silicone Craft Sheet
  2. Take Your Pick Tool
  3. Liquid Glue
Step by Step Assembly

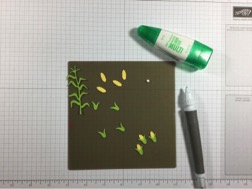
Diecut corn cobs and husks from Daffodil Delight cardstock. Diecut stalks from Granny Apple Green cardstock. Cornstalk dies are from the Hey Chick bundle available until May 3, and includes a 10% discount. Chick and Happy Birthday die is from the Hey Birthday Chick bundle.

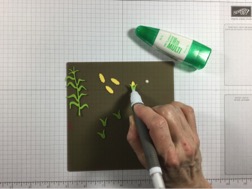
Squeeze a small dab of glue onto the Silicone Mat.

Pick up the husk with the Take Your Pick Tool and dab the back of the husk into the glue.   

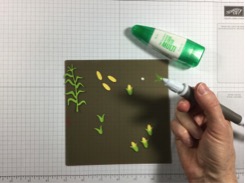
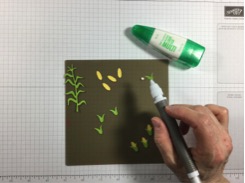
Place husk on top of cob. Repeat until all cobs are assembled. Then add the corn cobs to the stalk in the same way, by picking up the assembled cobs and dipping the back into the glue and place on the stalk.  And once dry, stick your cornstalks on your project using the same method to get the adhesive on the back.


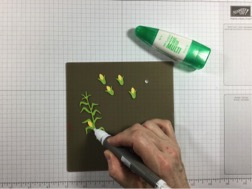
Because everything is done on the Silicone Craft Sheet, the cornstalks will not stick to your work surface. Then, just rub the dried glue off of the silicone mat with your fingertips and it’s ready to go for the next project.

While I used this method for assembling cornstalks, you can use it for any teeny tiny element, like flowers and leaves, sequins and pearls, and the list goes on.

Share:

Leave a Comment
see more related posts: Product Tips & Tricks

Previous Post: « Fancy Fold Card with Peony Garden
Next Post: 2021-2022 Annual Catalog »

Reader Interactions

Leave a Reply Cancel reply

Your email address will not be published. Required fields are marked *

Primary Sidebar

Peri Beal

Cheesehead. Avid reader. Antique hunter.

Shop Online

Shop with me and get a FREE PDF tutorial bundle delivered to your inbox AND a handmade card via snail mail

Search

Papercrafting Threads

Gift Certificates
  • Email
  • Facebook
  • Instagram
  • Pinterest
  • YouTube

Sign up for my Newsletter

Sign up for my newsletter and get a free PDF tutorial as my welcome thank you!

Almost there...

Please check your email to confirm your subscription

Retired Product
Privacy Policy

The Fine Print

Just so you know... This is a personal website and I am responsible for its content. Stampin' Up!® does not endorse the use of or contents of the classes, services, or non-Stampin' Up! products I offer.

Sign up for my Newsletter

Sign up for my newsletter and get a free PDF tutorial as my welcome thank you!

Almost there...

Please check your email to confirm your subscription

Footer

  • Calendar of Events
  • 3D Projects
  • Cardmaking
  • Fun Fold
  • Product Tips & Tricks
  • Projects
  • Techniques
  • Of Interest
  • Catalogs
  • Join the Fun
  • Contact Me
  • Email
  • Facebook
  • Instagram
  • Pinterest
  • YouTube

PAPERCRAFTING THREADS

Copyright © 2025 · Refined theme customized by Catherine Carroll

Privacy Policy · Affiliate Disclosure