
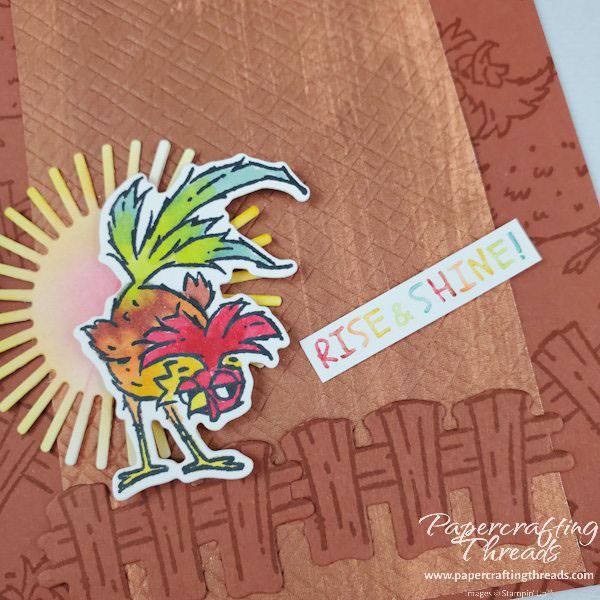
This adorable rooster card showcases three ways to add color to card elements: a diecut image, a stamped line art image, and a sentiment stamp. Let’s get started before the sun sets!
The card base is the fantastic Copper Clay, 8-1/2″ x 5-1/2″, scored on the long side at 4-1/4″ and folded in half. I stamped the fence image and the rolypoly rooster from the Hey Chuck stamp set in matching Copper Clay ink randomly on the front of the card. Then I addd a strip of Fresh As A Daisy patterned paper running down the center of the card front. I stamped the fence twice in Copper Clay ink on Copper Clay cardstock, diecut the images and connected them
add color with blending brushes
Blending Brushes add color in layers with no sharp edges. Great for soft looks, though can give a brighter look with many layers of ink.
I used blending brushes to color two diecut sun halves, starting in the center with Flirty Flamingo. Then I added Crushed Curry ink to the rays and blended where the two colors met.
add color with Stampin’ blends
Stampin’ Blends add color vividly, and as the name suggests, blends into adjacent colors. Use only on cardstock. Color will soak through cardstock to the back – that’s a good thing, as the ink will blend better.
I stamped the rooster in Tuxedo Black Memento ink on a scrap of Basic White cardstock. Beginning with a Light Real Red Stampin’ Blend, I colored the rooster’s head with a fine tip. Then I added strokes of Dark Real Red to the comb from the center out.
Next I blended the darker color with the Light Real Red. Crushed Curry covers the neck ruff. I used Light Pumpkin Pie for the belly, then went back over the line where the two colors met with the Light Crushed Curry. Light Cajun Craze finishes the rest of the body and the wings. And again, blending the edge with the previous color, Light Pumpkin Pie. Light Lemon Lime Twist covers his bum and the start of his tail feathers. I even blended this edge with the previous color, Light Cajun Craze. And finally, Light Lost Lagoon colored the last of the tail feathers, with one last going over the edge with Light Lemon Lime Twist.
Make a rainbow with stampin’ write markers
Stampin’ Write Markers can go directly on stamp surfaces for spot on color.
For the sentiment, I used Stampin’ Write Markers. Use the thick brush end to swipe each letter individually with a different color. I followed ROYGBIV and used Real Red, Cajun Craze, Pumpkin Pie, Crushed Curry, Lemon Lime Twist and Lost Lagoon. When I had done each color once, I just started over from the beginning. After the stamp is completely inked up, HUFF on the stamp and stamp!
Which method is your favorite way to color? Get your favorite coloring supplies from my online store today! And check out the video on what to use when over on my YouTube channel.
Leave a Reply