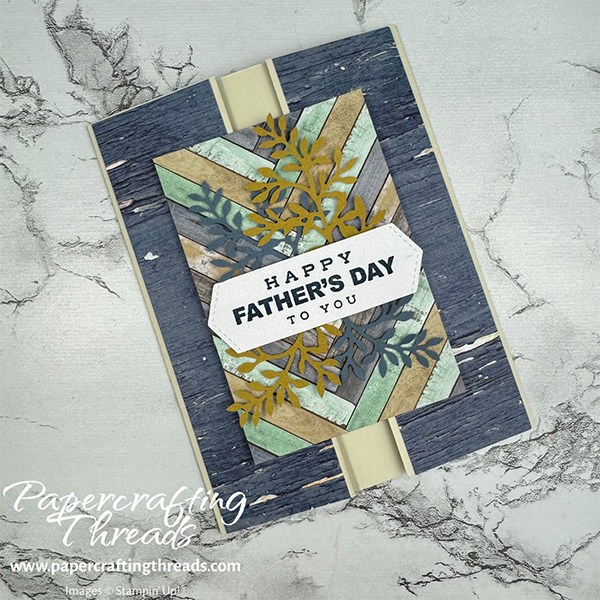
For dads, brothers, uncles, and father figures, a puzzling Tucked Gate Fold Card that’s a bit beyond the ordinary but still easy to make! The gate fold sides tuck under the woodgrain centerpiece for an intriguing hinge opening. Let’s get started!
cutting & scoring guide
| Paper Dimensions | Score Short Side | Score Long Side | ||||
| 5-1/2″ x 8-1/2″ Basic Beige card base (on BOTH ends) | 2-1/8″ & 4″ | |||||
| 1-5/8″ x 5-1/2″ Basic White panels for inside (cut two) | ||||||
| 1-5/8″ x 5-1/2″ patterned paper panels for front (cut two) | ||||||
| 2-3/4″ x 4″ patterned paper for centerpiece |
I used pieces from the The Best There Is Paper Pumpkin Kit. If not using the kit, you’ll also need a scrap Basic White for the sentiment and scraps for die cutting.
step by step instructions for tucked gate fold card
Score BOTH ends of the card base at 2-1/8″ and 4″, then trim off 5/16″ (a scoche more than 1/4″) from BOTH ends. NOTE: While the width of the card base could have been adjusted at the beginning, it’s a tad ‘easier’ to do the trimming now. Fold the two outer flaps inward towards the center spine like a gate.
Adhere the patterned paper strips to the outside of the gate flaps. Decorate the Basic White panels by stamping second generation trees in Misty Moonlight towards the bottom. Add more leaves by stamping randomly with full strength ink. Then adhere the panels on the inside of the gate flaps.
Decorate the centerpiece panel. I used die cuts, a banner and the sentiment from the kit.
Add four Dimensionals down the center of the ‘spine’ on the card base. Center and adhere the focal point. Tuck the gate flaps under the centerpiece.
I’ve made a short how to video below. Wondering how you can get the kits I use in my alternative projects? Subscribe to new Paper Pumpkin kits here. Each kit contains a stamp set, mini stampin’ spot, and supplies to make either cards or treat holders. Then watch my blog and YouTube channel for alternative ways to use the kit!

Leave a Reply