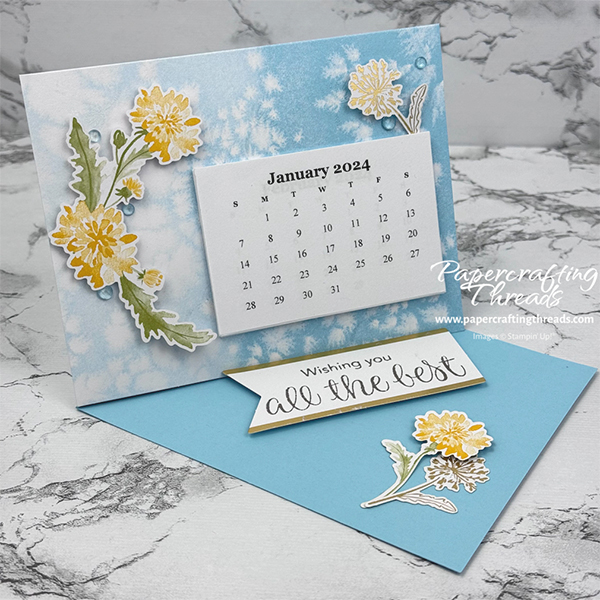
Start the new year off wishing for all the best with a Twisted Easel Calendar Card! It’s a showstopper and incredibly easy. Plus it folds flat for mailing in a standard size card envelope (though it might take a little extra postage, but it’s worth it.) I used the All the Best December 2023 Paper Pumpkin kit for my card parts. Let’s get started.
creating the mechanism
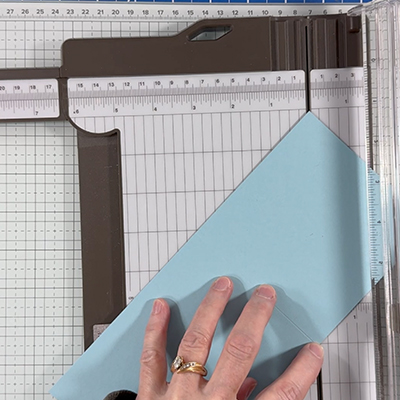
Cut a piece of Balmy Blue cardstock 4-1/4″ x 9-3/4″ and score on the long side at 5-1/2″. This creates a 4-1/4″ square on one flap. Fold and burnish the spine crease as you would for a regular landscape card. Unfold, then score from the bottom left of the crease to the top right corner of the front of the card. Open the card, fold on the diagonal and burnish. This creates the twisted easel mechanism!
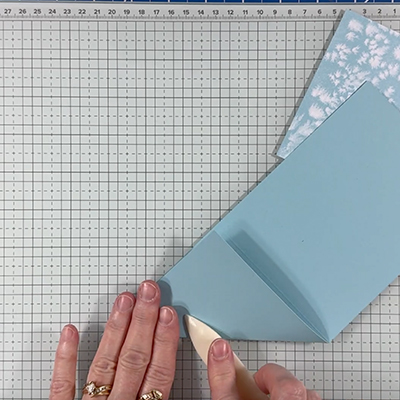
Next, with the card front closed, apply adhesive to just the bottom triangle. Trim one of the card bases from the kit to 4-1/4″ x 5-1/2″. Apply to the front of the closed card, adhering it to the bottom triangle.

decorating the twisted easel calendar card
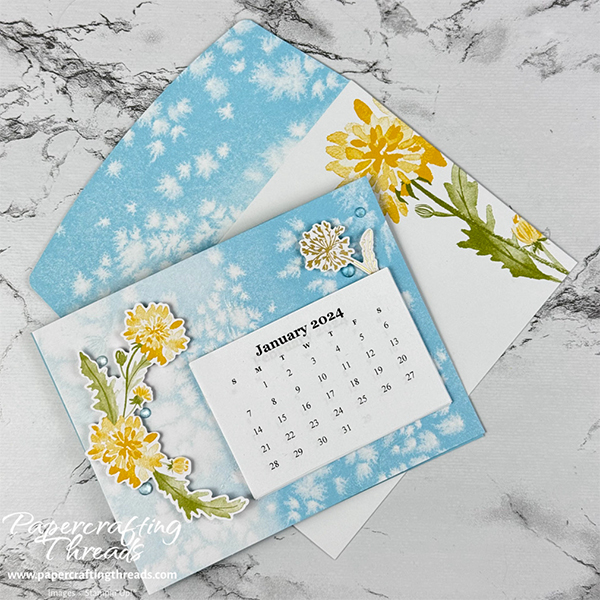
I stamped the dandelion fluff from the kit with Versamark ink, sprinkled clear embossing powder, and heat set for shiny dandelion fluff floating across the front panel. I added my calendar. Dandelion diecuts and blue adhesive gems from the kit decorate the front.
Create a stopper to hold the easel in place with one of the banners from the kit. The sentiment I wanted to use from the kit was too long to fit on the banner. So I masked the bottom two lines of the text with removable labeling tape, inked with Pebbled Path, removed the tape and stamped the first word on the banner. Then I cleaned the stamp, masked the top and bottom words, leaving just the middle words showing, inked and stamped. After cleaning the stamp again, I masked the top two lines of text, inked, removed the mask and stamped the remaining word in line with the others. And voila, the text now fits perfectly on the banner. I popped the banner up on dimensionals and added it to the inside of the card to hold the easel upright. A few more flower diecuts finish it off.
I love how the kit’s parts create such a hopeful and cheerful theme for the new year. If you haven’t tried the Paper Pumpkin kits yet, I highly recommend them. Projects can be made as designed or changed up like I did. Kits are guaranteed and you can cancel anytime. January is a great time to get a prepaid subscription and qualify for FREE saleabration items at the same time. And I’ve posted a short YouTube video so you can see the card in action.
Oh, almost forgot..I ordered the Post-It Removable Labeling Tape from Amazon. I printed the calendar from the internet, but you can also order batches of the small calendars from Vippies.com
Leave a Reply