Papercrafting Threads

  • Tutorials
    • PDF Tutorials
    • 3D Projects
    • Cardmaking
    • Fun Fold
    • Product Tips & Tricks
    • Projects
    • Techniques
  • Catalogs
  • Shop & Specials
    • Shop My Stampin’ Up! Online Store
    • Special Offers
    • Buy Me A Coffee
    • My Favorite Things on Amazon
    • Gift Certificates
  • Contact Me
  • Join the Fun
    • Join the Fun
    • Special Join Offers
  • Calendar of Events
  • Paper Pumpkin
    • Paper Pumpkin Kits
    • Paper Pumpkin Stamp Case Inserts
  • Nav Social Menu

    • Email
    • Facebook
    • Instagram
    • Pinterest
    • YouTube

Watercolor Brusho Adds Gorgeous Color

December 29, 2017 Leave a Comment

29 Dec

Watercolor Brusho

Watercolor Brusho adds gorgeous color effortlessly, and each time you use it, it is unique!

Havent used Brusho before? Let me give you a few quick tips.

1) Wet your paper first. I used watercolor paper for this card, but you can use other paper, just use less water.

2) Poke 1 or 2 holes in the top of the Brusho container.

3) Start with the lightest color first.

4) Shake the Brusho sparingly over the wet paper. Spritz with water, wait a moment, spritz again.

5) Repeat step 4 until desired color.

6) Add different colors of Brusho as desired, repeating step 4.

7) Dry with heat tool.

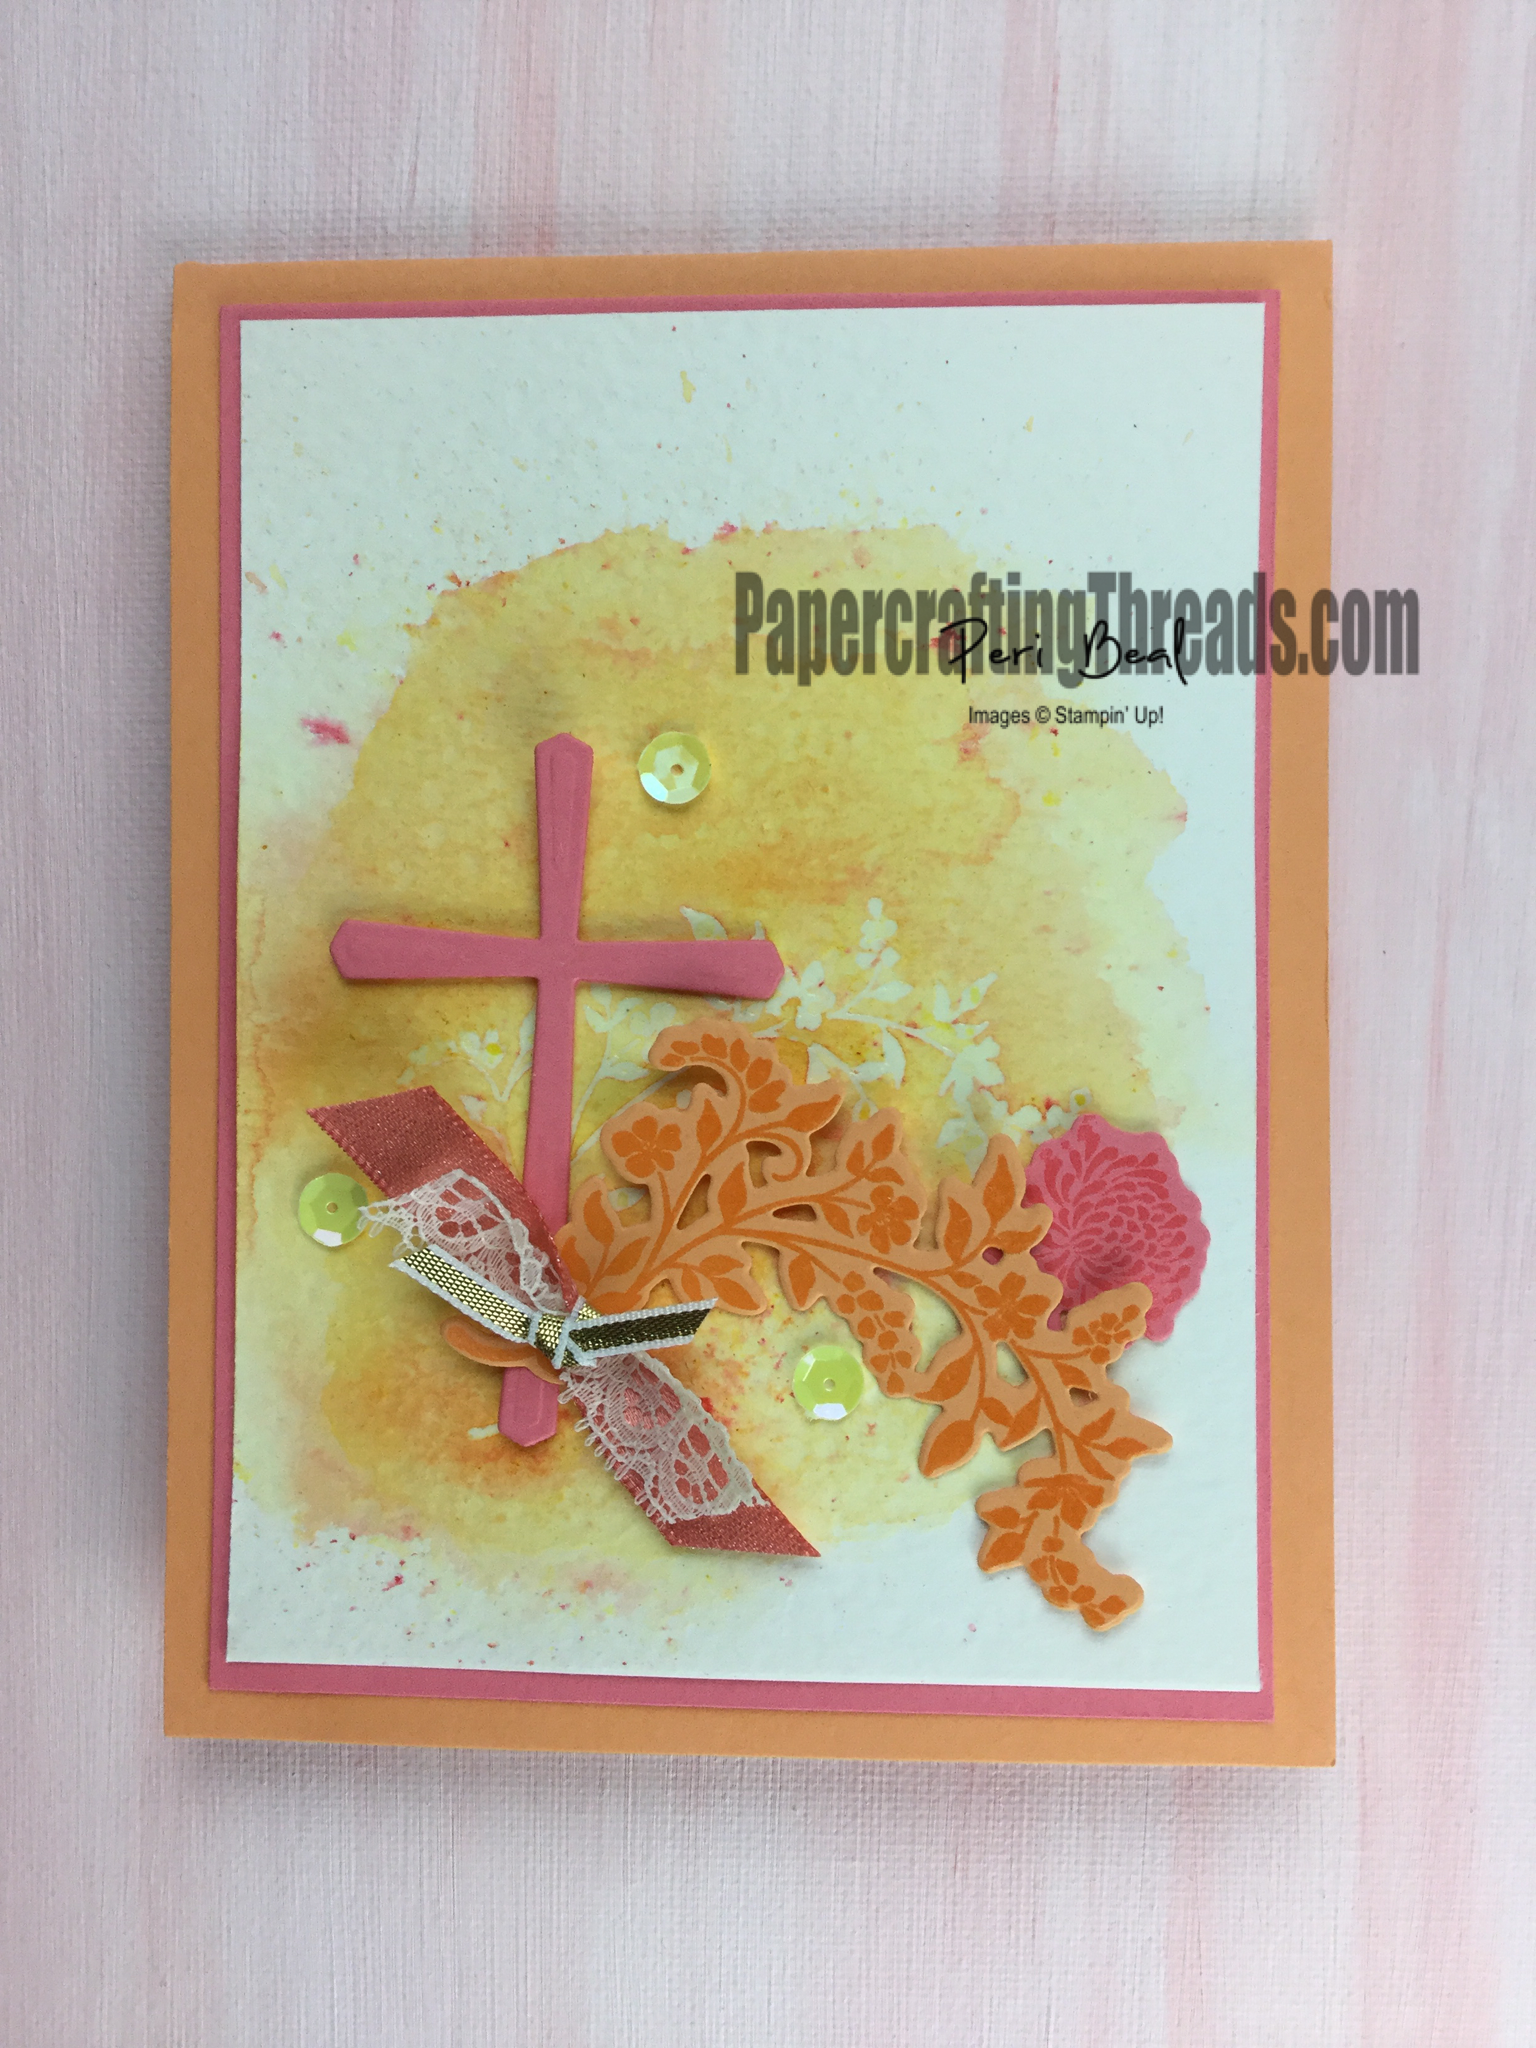
I embossed the branch of flowers image first by stamping the image with Versamark and embossing with clear embossing powder. Then I started with the yellow Brusho and ended with the orange Brusho following the steps listed above. I love the washed watercolor look as well as the little specks of color dotted randomly across the surface.

Then I added the embossed cross from Hold on to Hope, a new stamp set and Framelit bundle available June 3 from the new Occasions catalog. I stamped and clear embossed another branch of flowers as well as a mum and die cut both, and adhered with rolled up glue dots.

I tied a piece of Very Vanilla Lace Trim and a piece of the Calypso Coral Shimmer Ribbon (free with a $50 purchase beginning in January) together with the gold 1/8 inch ribbon and used a glue dot to stick the whole thing on the card front.

And Tutti-fretting Adhesive-backed(!) sequins scattered on top finish off the card.

Watch for more projects coming up using the amazing watercolor Brusho!

Share:

Leave a Comment
see more related posts: Cardmaking· Product Tips & Tricks

Previous Post: « Shut the Barn Door
Next Post: A Magical Day »

Reader Interactions

Leave a Reply Cancel reply

Your email address will not be published. Required fields are marked *

Primary Sidebar

Peri Beal

Cheesehead. Avid reader. Antique hunter.

Shop Online

Shop with me and get a FREE PDF tutorial bundle delivered to your inbox AND a handmade card via snail mail

Search

Papercrafting Threads

Gift Certificates
  • Email
  • Facebook
  • Instagram
  • Pinterest
  • YouTube

Sign up for my Newsletter

Sign up for my newsletter and get a free PDF tutorial as my welcome thank you!

Almost there...

Please check your email to confirm your subscription

Retired Product
Privacy Policy

The Fine Print

Just so you know... This is a personal website and I am responsible for its content. Stampin' Up!® does not endorse the use of or contents of the classes, services, or non-Stampin' Up! products I offer.

Sign up for my Newsletter

Sign up for my newsletter and get a free PDF tutorial as my welcome thank you!

Almost there...

Please check your email to confirm your subscription

Footer

  • Calendar of Events
  • 3D Projects
  • Cardmaking
  • Fun Fold
  • Product Tips & Tricks
  • Projects
  • Techniques
  • Of Interest
  • Catalogs
  • Join the Fun
  • Contact Me
  • Email
  • Facebook
  • Instagram
  • Pinterest
  • YouTube

PAPERCRAFTING THREADS

Copyright © 2025 · Refined theme customized by Catherine Carroll

Privacy Policy · Affiliate Disclosure