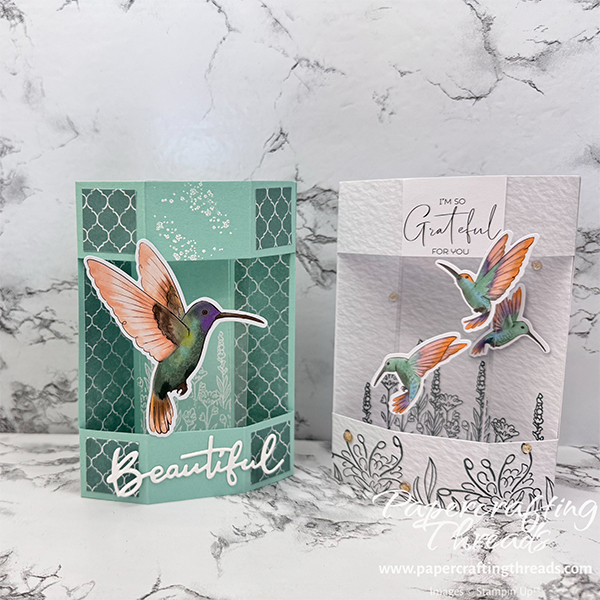
Hummingbirds hover in mid air in my Floating Hexagon card. Follow along as I walk you through the steps to make these 3D cards that pop up for display and fold flat to fit in an A2 envelope. No special tools or dies needed, just a great paper trimmer. Let’s get started!
cutting & scoring guide
| Paper Dimensions | Score Short Side | Score Long Side | ||||
| 5½” x 8½” card base from Paper Pumpkin Kit | 1½” & 3″ | |||||
| 1½” x 5½” patterned paper for center panel | ||||||
| 1-3/16″ x 5½” patterned paper (cut two) for side panels | ||||||
| 1½” x 5½” window sheet for floating panel |
step by step instructions
I used pieces from the Fluttering Garden March 2026 Paper Pumpkin Kit for my white card, but feel free to substitute items from your stash. Missing out and want to get future Paper Pumpkin Kits delivered right to your door? Visit my online store today.
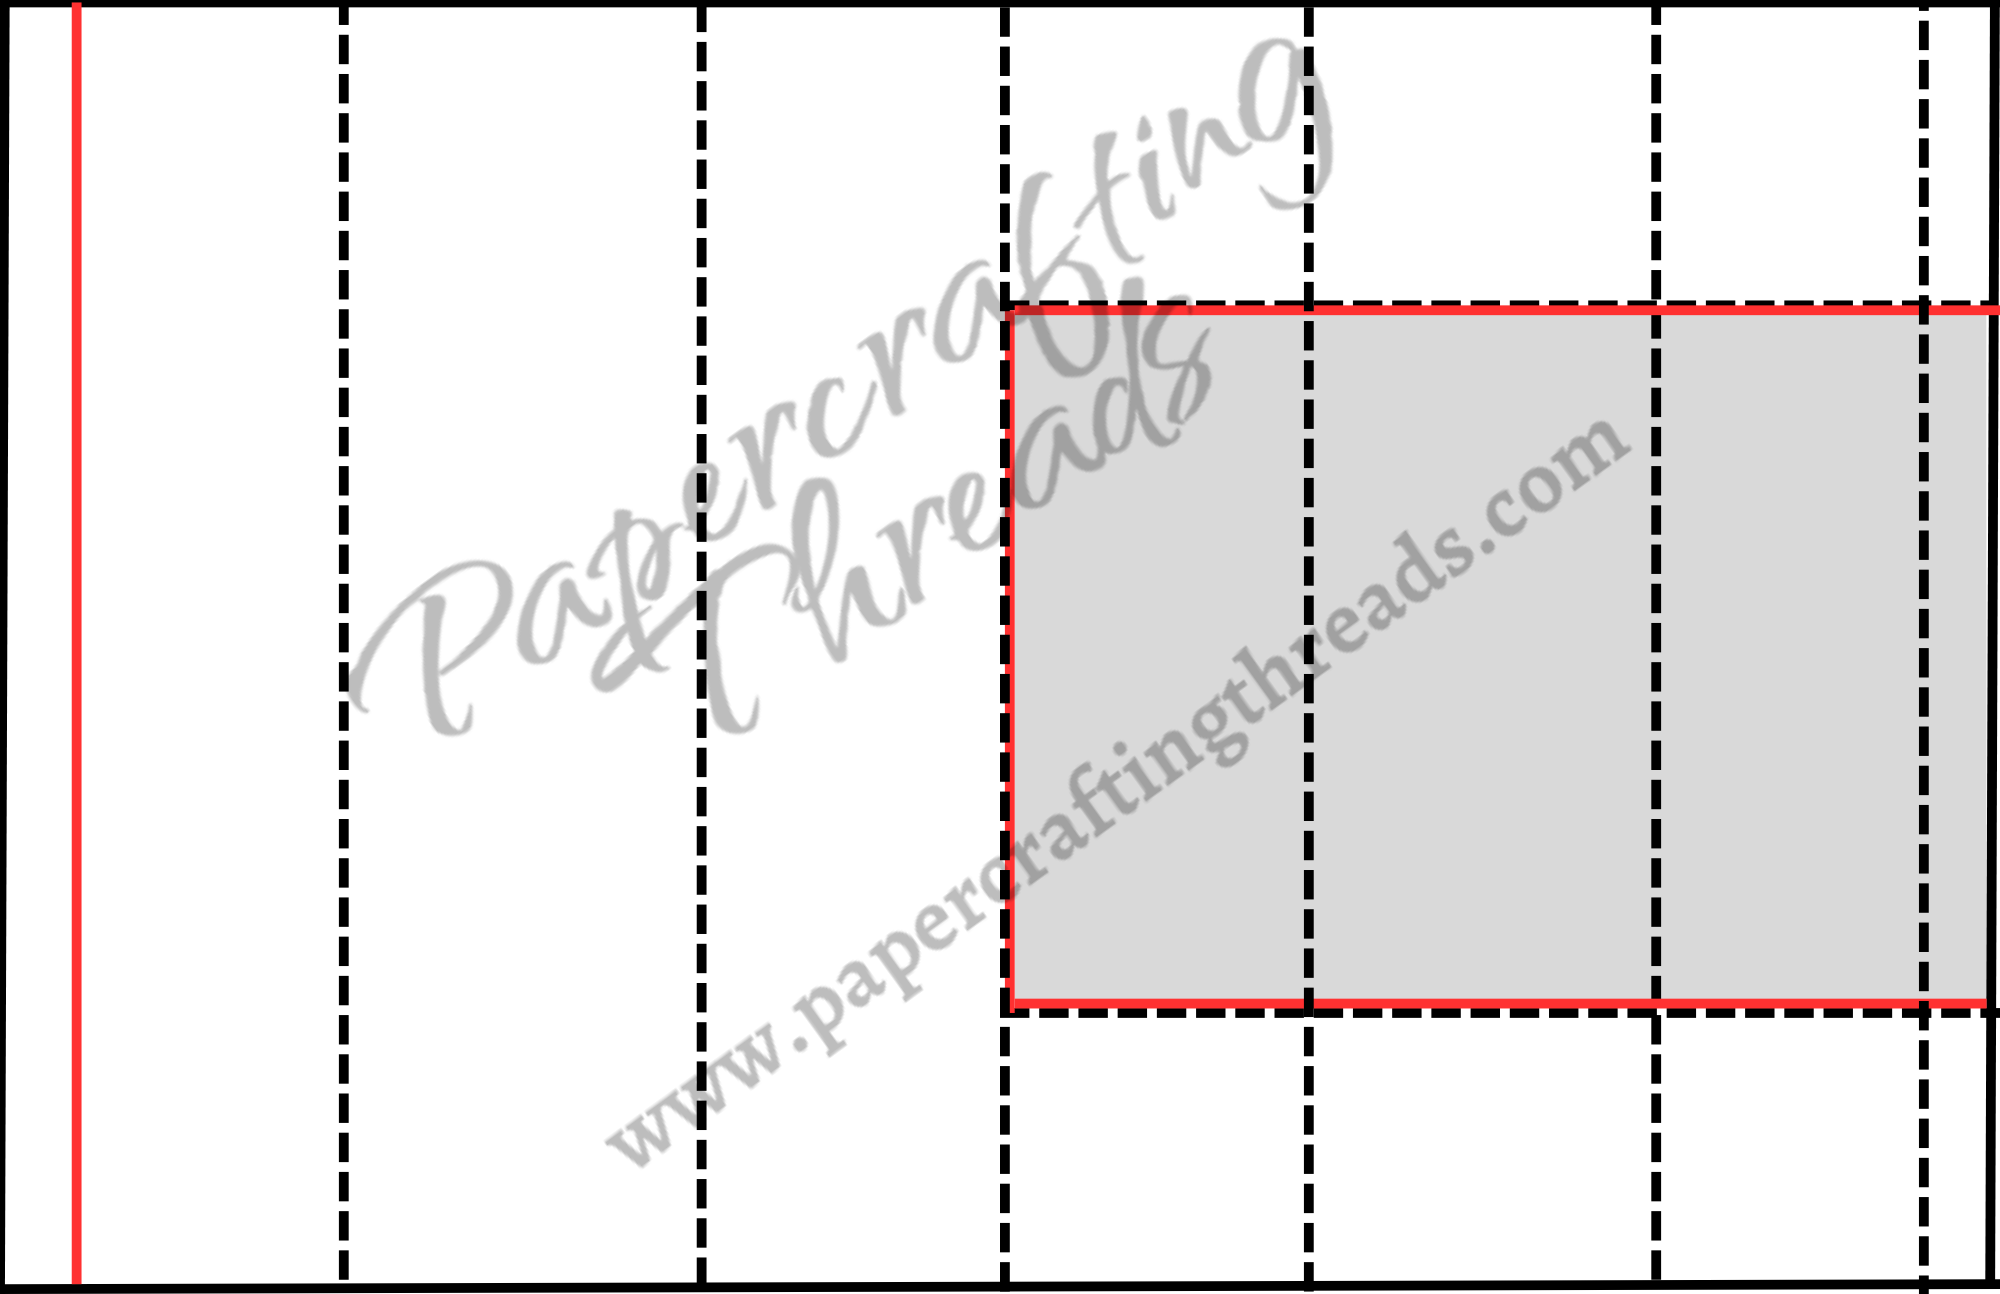
Place card base in trimmer and score the left panel at 1½” and 3″. The center is already scored at 4¼”. (If you are making this using a piece of cardstock instead of an already prepared card base, score at 4¼”.)
Rotate the base 90 degrees so the score lines run horizontally on the lower half, place back in the trimmer at the 1¼” mark on the left, and pull the cutting blade down to the first scoreline (4¼” on the vertical ruler). Slide the base over and use the 1¼” ruler on the right side of the cutting blade as the guide and again pull the cutting blade down to the first scoreline (4¼” on the vertical ruler).
Place the card base back in the trimmer with the long edge at the top. Move the left side over to 5½” and score the narrow top and bottom ‘arms’, leaving the middle free of scoring. Repeat at 7″ and again at 8¼”.
Align the 4¼” score line in the cutting track and remove the middle section. Turn the card base 180 degrees and remove ¼” from the fully intact side. Fold and burnish all score lines as valley folds.
Stamping
Lay the three panels previously cut from another kit card base on a piece of scrap paper, sandwiching the wider piece between the two narrower pieces, and butting the edges together to form one continuous panel. Ink the tall flower panel with Basic Gray ink, stamp on a sticky note (with the sticky edge at the bottom) twice, and fussy cut both images. Stay on or just inside the stamped outline of the images. Do not worry about precision, this is for a mask and flowers are forgiving. Hold the scissor blades at a 45 degree angle and move the paper, not the scissors, for easier cutting.
Now stamp the floral image at the bottom center of the middle panel. Ink and stamp again on the right panel, making the tallest flower shorter than the stamped image in the middle panel. Then ink again and stamp on the left panel, again adjusting the height of the tallest flower so it’s different than the previously stamped images. Place a mask over the center image and over the right image. Ink and stamp again, placing this image between the two masked images and at a different height. And one more time, ink and stamp the image between the left and center images. Remove the masks and save with the stamps for other projects.
Stamp the ‘floofy’ floral image from the kit along the bottom strip also in Basic Gray. Add in stamped leaf images to fill in along the lower edge.
Final Assembly of the Floating Hexagon Card
Adhere the left stamped strip in place and adhere the center strip. Add adhesive to the tabbed end of the lower strip and press into place on the right edge of the card base. Repeat with the upper strip. Add adhesive to the remaining right strip and slide into place, covering the tabs.
Place glue dots at the top and bottom edges of the window sheet panel. Remove the backings and slide the window sheet inside the center front of the card with adhesive side facing up, pressing the upper and lower strips onto the window sheet to adhere.
Trim the ‘I’m so grateful for you’ circle sentiment on the bottom and both sides to fit the center of the upper strip. Adhere in place, turn the card over and use the edge of the card base as a guide to trim off the top of the circle.
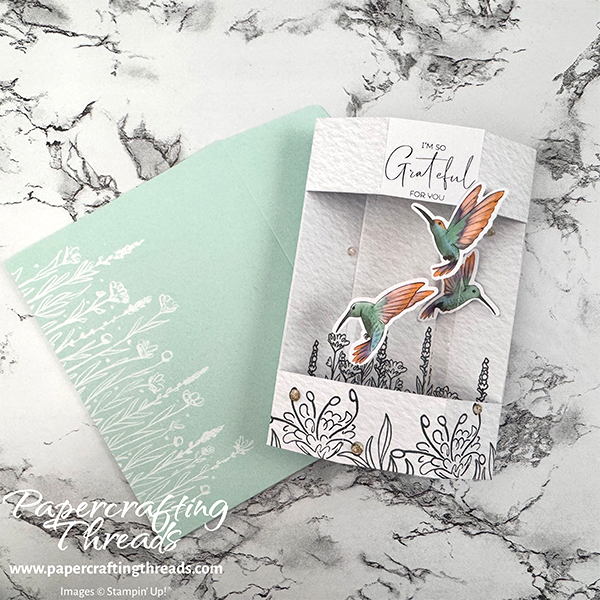
Adhere the three small hummingbirds in position as shown with glue dots for the two on the window sheet and a mini dimensional for the one on the right side of the back panel. Scatter adhesive gems as desired.
If you are finding this tutorial helpful, consider a contribution to my coffee fund ☕️ Coffee → Creativity → Content → More Coffee (help fuel the cycle!)
Version Two of the Floating Hexagon Card
| Paper Dimensions | Score Short Side | Score Long Side | ||||
| 5½” x 9″ Pool Party cardstock | 1¼” & 3″ | |||||
| 1″ x 5¼” patterned paper – Painted Illusions DSP (cut four) | ||||||
| 1″ x 1″ patterned paper – Painted Illusions DSP (cut four) | ||||||
| 1½” x 5½” window sheet for floating panel | ||||||
| Scraps of Basic White cardstock for die cutting word | ||||||
| Scrap of Adhesive sheet for die cutting word |
This version has a slightly larger center panel. Measurements are noted above and just slightly different than the first version.
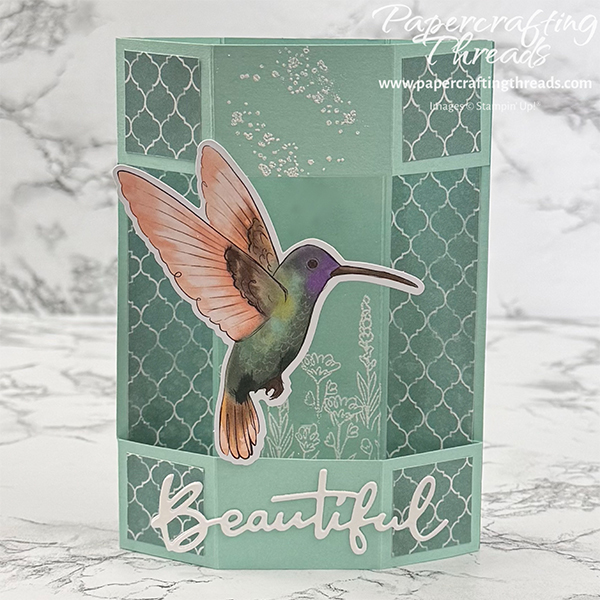
Score the long side at 1¼”, 3″, 4¼”. Rotate 90 degrees and score the short side at 1¼” and 4¼”. Rotate back to the long side and score the top and bottom panels or ‘arms’ at 5½”, 7¼” and 8½”. Decorating the second version is slightly different. Adhere the extra two slim panels to the back. Add the four one-inch squares to the front strips as shown.
Stamp the floral image on the center panel both front and back with Versamark ink and then heat set with white embossing powder. Adhere the inside left panel. Fold back the tabs on the ‘arms’, add adhesive, and press to adhere to the front right side. Use glue dots to add the window sheet floating from the top center arm to the bottom center arm as in the first version. And the sentiment ‘Beautiful’ was die cut twice from Basic White cardstock, once with adhesive sheet backing, and stacked together before adhering to the card front.
Which is your favorite? I’m finding it hard to choose. And it’s interesting how the finished size of both cards is the same, but the white one looks taller and slimmer – all optical illusion.

Leave a Reply