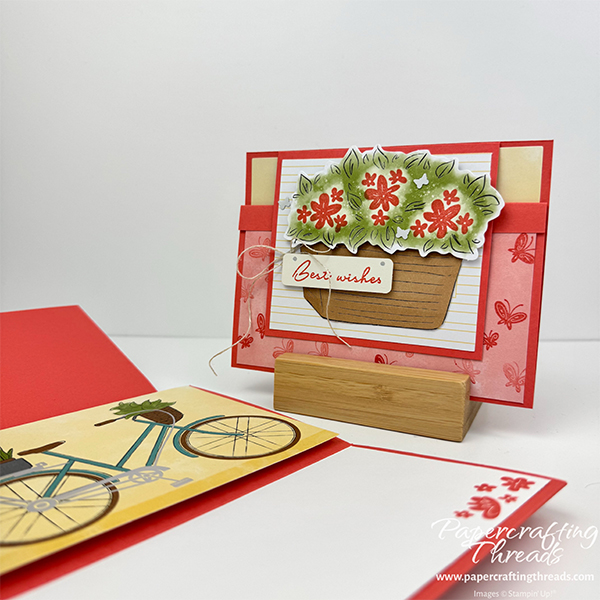
This Easy Little Fun Fold card comes together so quickly it’s a breeze to make multiples. My version uses pieces from the June 2026 Bikes & Blooms Paper Pumpkin kit for decorating, so it comes together even quicker. It’s kind of addicting, as I can’t wait to make even more versions of this simple but ‘wow’ card. So let’s get started!
cutting & scoring guide
| Paper Dimensions | Score Short Side | Score Long Side | ||||
| 5½” x 8″ Calypso Coral cardstock base | ½” and 3¾” | |||||
| 4″ x 4″ Calypso Coral cardstock for upper flap | ½” | |||||
| 3¾” x 3¼” patterned paper for front upper flap | ||||||
| 5¼” x 4″ patterned paper for inner focal point | ||||||
| 5¼” x 3″ patterned paper for front lower flap | ||||||
| 5¼” x 3″ Basic White cardstock for liner |
Want to Subscribe to Paper Pumpkin?
If you’re not already getting the marvelous monthly Paper Pumpkin craft kits in your mailbox, it’s a great time to subscribe. My subscribers get a handmade card from me and a downloadable PDF tutorial with up to 12 projects from multi-demonstrators using loads of current Stampin’ Up! products.
Subscribe here and select me as your demonstrator to get next month’s kit!
step by step instructions
Cut cardstock as described above. For the front upper flap patterned paper, I chopped up one of the yellow patterned envelopes from the kit. Since the envelope has a preprinted address square in the center front, I first cut off just a sliver of one side and the bottom so I could lay it flat. Then I trimmed about ⅞” of the sides and about ½” from the top and bottom, leaving that rectangle somewhat centered (doesn’t need to be perfect). For the front lower flap, I cut up one of the Calypso Coral card bases from the kit.
Cut the bike portion away from the large precut bicycle image from the kit, leaving the basket with greenery. Then trim around the basket and greenery, removing the majority of the white edging. Pull out the large precut greenery image Stamp the floral images in Calypso Coral ink on the precut greenery piece from the kit. Ink and stamp the sentiment on the label. Using the larger floral image stamp, ink and stamp in the lower right corner of the Basic White piece. And finally, repeatedly ink and stamp the butterfly images on the section of Calypso Coral card base. I used both 1st and 2nd generation ink.
Creating the Easy Little Fun Fold
Mountain fold the narrow flap and valley fold the remaining scoreline of the card base. Place on work surface in landscape orientation with the largest flap at the top. Mountain fold the narrow flap of the 4″ x 4″ Calypso Coral cardstock. Apply liquid glue or Tear & Tape to the flap. Adhere the narrow flap along the top edge of the card base, with the piece extending down over the card base, and leaving equal spacing on the left and right. Open the just-adhere flap towards the top. Adhere the large bicycle image from the kit to the inside of the card, covering the adhered narrow flap. Then adhere the Basic White piece to the inside lower flap.
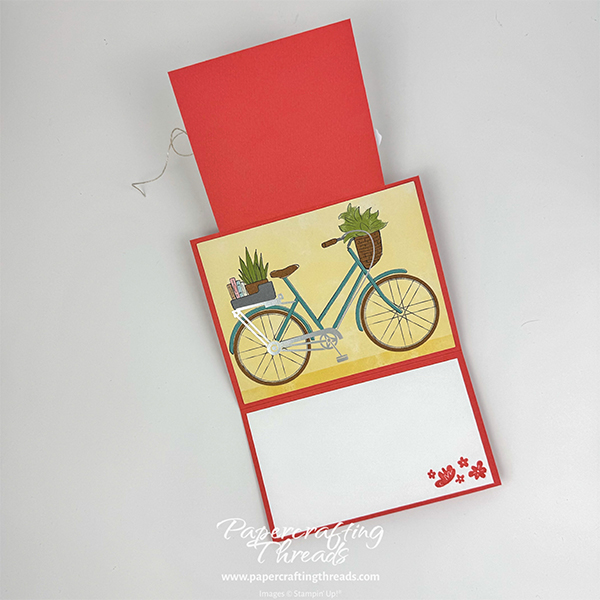
Fold the lower flap of the card base up. Glue the butterfly patterned paper to the front of the lower flap. Then add glue to the narrowest flap and press that down over the butterfly patterned paper.
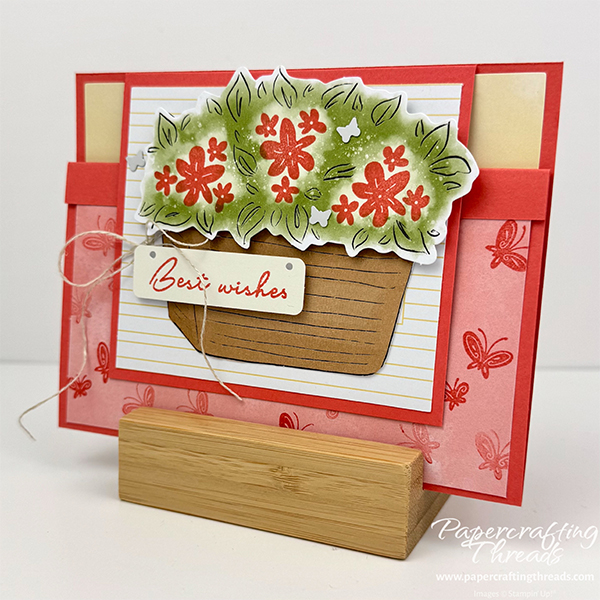
Close the square-ish flap down over the butterfly patterned paper. Adhere the striped bit of envelope to the flap. Then adhere the basket with greenery over the blank address square, covering it as much as possible. I left a tiny bit peeking out on the left side. Pop up the stamped greenery on dimensionals and adhere over the flat greenery in the basket. Pop up the sentiment and add it to the left side of the basket. Tie a bow with linen thread and tuck in to the left top corner of the sentiment strip. Finish by scattering some of the silver self-adhesive butterflies around the greenery in the basket.
If you found this tutorial helpful, consider a contribution to my coffee fund ☕️ Coffee → Creativity → Content → More Coffee (help fuel the cycle!)
Great card!! Would love to see more! Julie Smith
Thanks Julie!