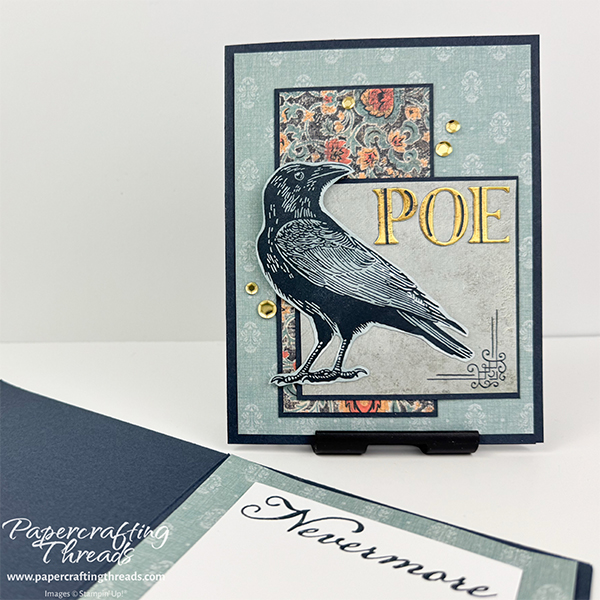
Meet my Raven’s Tale + hot foil card! Pick your shade of blue, I used a deep blue in place of black to add depth and moodiness. Add in the gold foil and the font to make the perfect gothic-inspired card! So let’s get started…
cutting & scoring guide
| Paper Dimensions | Score Short Side | Score Long Side | ||||
| 8½ x 5½” Secret Sea cardstock base | 4¼” | |||||
| 4″ x 5¼” Beautiful Gallery DSP mat plus second for liner (light blue w/flourishes) | ||||||
| 2⅛” x 4½” Secret Sea mat | ||||||
| 2″ x 4⅜” Beautiful Gallery DSP (brocade pattern) | ||||||
| 3″ x 3″ Secret Sea mat | ||||||
| 2⅞” x 2⅞” Beautiful Gallery DSP (pale blue grunge pattern) | ||||||
| 3″ x 4¼” Basic White cardstock | ||||||
| Scrap of Basic White cardstock for stamping raven | ||||||
| Scrap of Secret Sea cardstock for letters |
step by step instructions
Stamp the raven image from the Raven’s Tale stamp set on the scrap of Basic White in Secret Sea ink. Don’t have the stamp set yet? Visit my online store and order it today. Fussy cut the image with fine-tipped scissors. PRO TIP: To cut out the legs, use a small ⅛” hole punch in the white space between the legs. Then use scissors to finesse the cut. Stamp the flourish in the lower right corner of the Beautiful Gallery pale blue grunge pattern square and on one of the large light blue with flourishes pattern pieces. Ink and stamp the sentiment ‘Nevermore’ in Secret Sea centered across the top of the Basic White cardstock.
Adhere the square DSP to the matching Secret Sea mat. And adhere the brocade pattern DSP to its matching Secret Sea mat. Fold the Secret Sea card base in half and burnish the fold line. Adhere the stamped patterned liner to the inside of the card. Then center and adhere the Basic White liner on top.
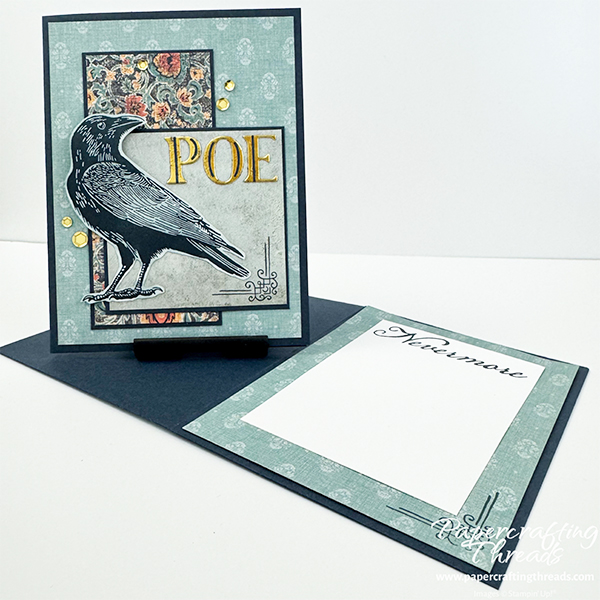
Adhere the plain large DSP pattern to the card front. Using the photo as a guide, adhere the two matted patterned papers.
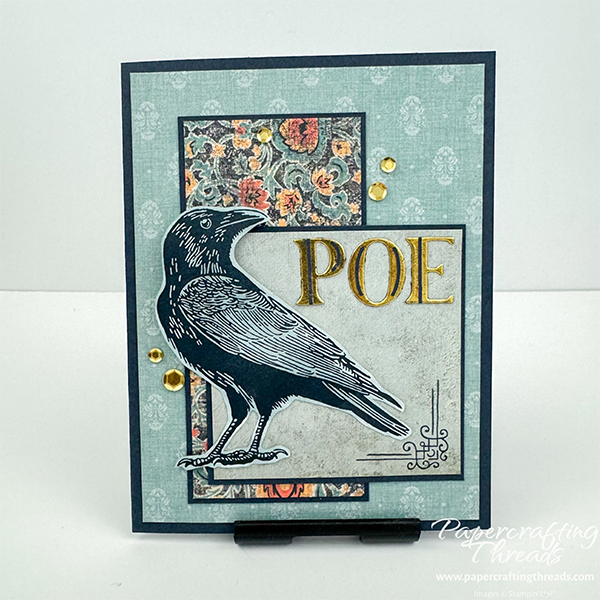
Place the raven on a scrap piece of paper, and color all of the white with a Dark Cloud Cover Blend alcohol marker. Go over parts of the wing an extra time or two to add more depth. Place dimensionals behind the beak and head, liquid glue on the legs, feet and tail and adhere to the front of the card, positioning the bird to break the plane on the left and top.
Hot Foil How To
I’ve been looking at hot foiling for some time now and am so excited that Stampin’ Up! partnered with Spellbinders for the release of the Stampin’ Hot Foil System. For me this is a must-have in my craft room, just like a diecutting machine and my Silhouette. The Luxe Alphabet & Numbers Hot Foil Dies were the first in my cart because of that font. I have so many ideas in my head right now it’s almost painful! (plus these dies even be used without a hot foil system – more on that in another post).
Plug in the Stampin’ Hot Foil System, let it heat, add the hot foil die, let it heat, add the gold foil shiny side down, add Secret Sea cardstock. Make the sandwich and run s-l-o-w-l-y through the Cut & Emboss machine. Peel back that foil and gasp! Stunning foiled alphabet. Then add the die cut image and run through the Cut & Emboss machine to cut out all of the gorgeous letters in one pass. I’ve already done this 3 times with Secret Sea and 5 times with Basic Black – I’ve got loads of letters to make any word I want all ready to go!
Now back to the Raven’s Tale. Add liquid glue sparingly to the back of the letter ‘E’ and position on the card front. Working backwards, add the ‘O’ and lastly the ‘P’.
Place drops of liquid glue on the card front for the loose gold sequins. Let the glue set up for a minute or two, then use the Take Your Pick tool to adhere the sequins. Sit back and admire.
Let me know in the comments if you’d like a full video tutorial!
If you found this tutorial helpful, consider a contribution to my coffee fund ☕️ Coffee → Creativity → Content → More Coffee (help fuel the cycle!)

Leave a Reply