Papercrafting Threads

  • Palette Threads
  • Tutorials
    • PDF Tutorials
    • 3D Projects
    • Cardmaking
    • Fun Fold
    • Monday Mashup
    • Product Tips & Tricks
    • Projects
    • Techniques
  • Shop & Specials
    • Shop My Stampin’ Up! Online Store
    • Print Catalog
    • Special Offers
    • Buy Me A Coffee
    • My Favorite Things on Amazon
    • Gift Certificates
  • Contact Me
  • Join the Fun
    • Join the Fun
    • Special Join Offers
  • Calendar/Events
  • Paper Pumpkin
    • Paper Pumpkin Kits
    • Paper Pumpkin Stamp Case Inserts
  • Nav Social Menu

    • Email
    • Facebook
    • Instagram
    • Pinterest
    • YouTube

Celestial Copper

October 9, 2019 Leave a Comment

9 Oct

Celestial Copper shines against a Celestial Copper against Pretty Peacock card base adds richness to this card

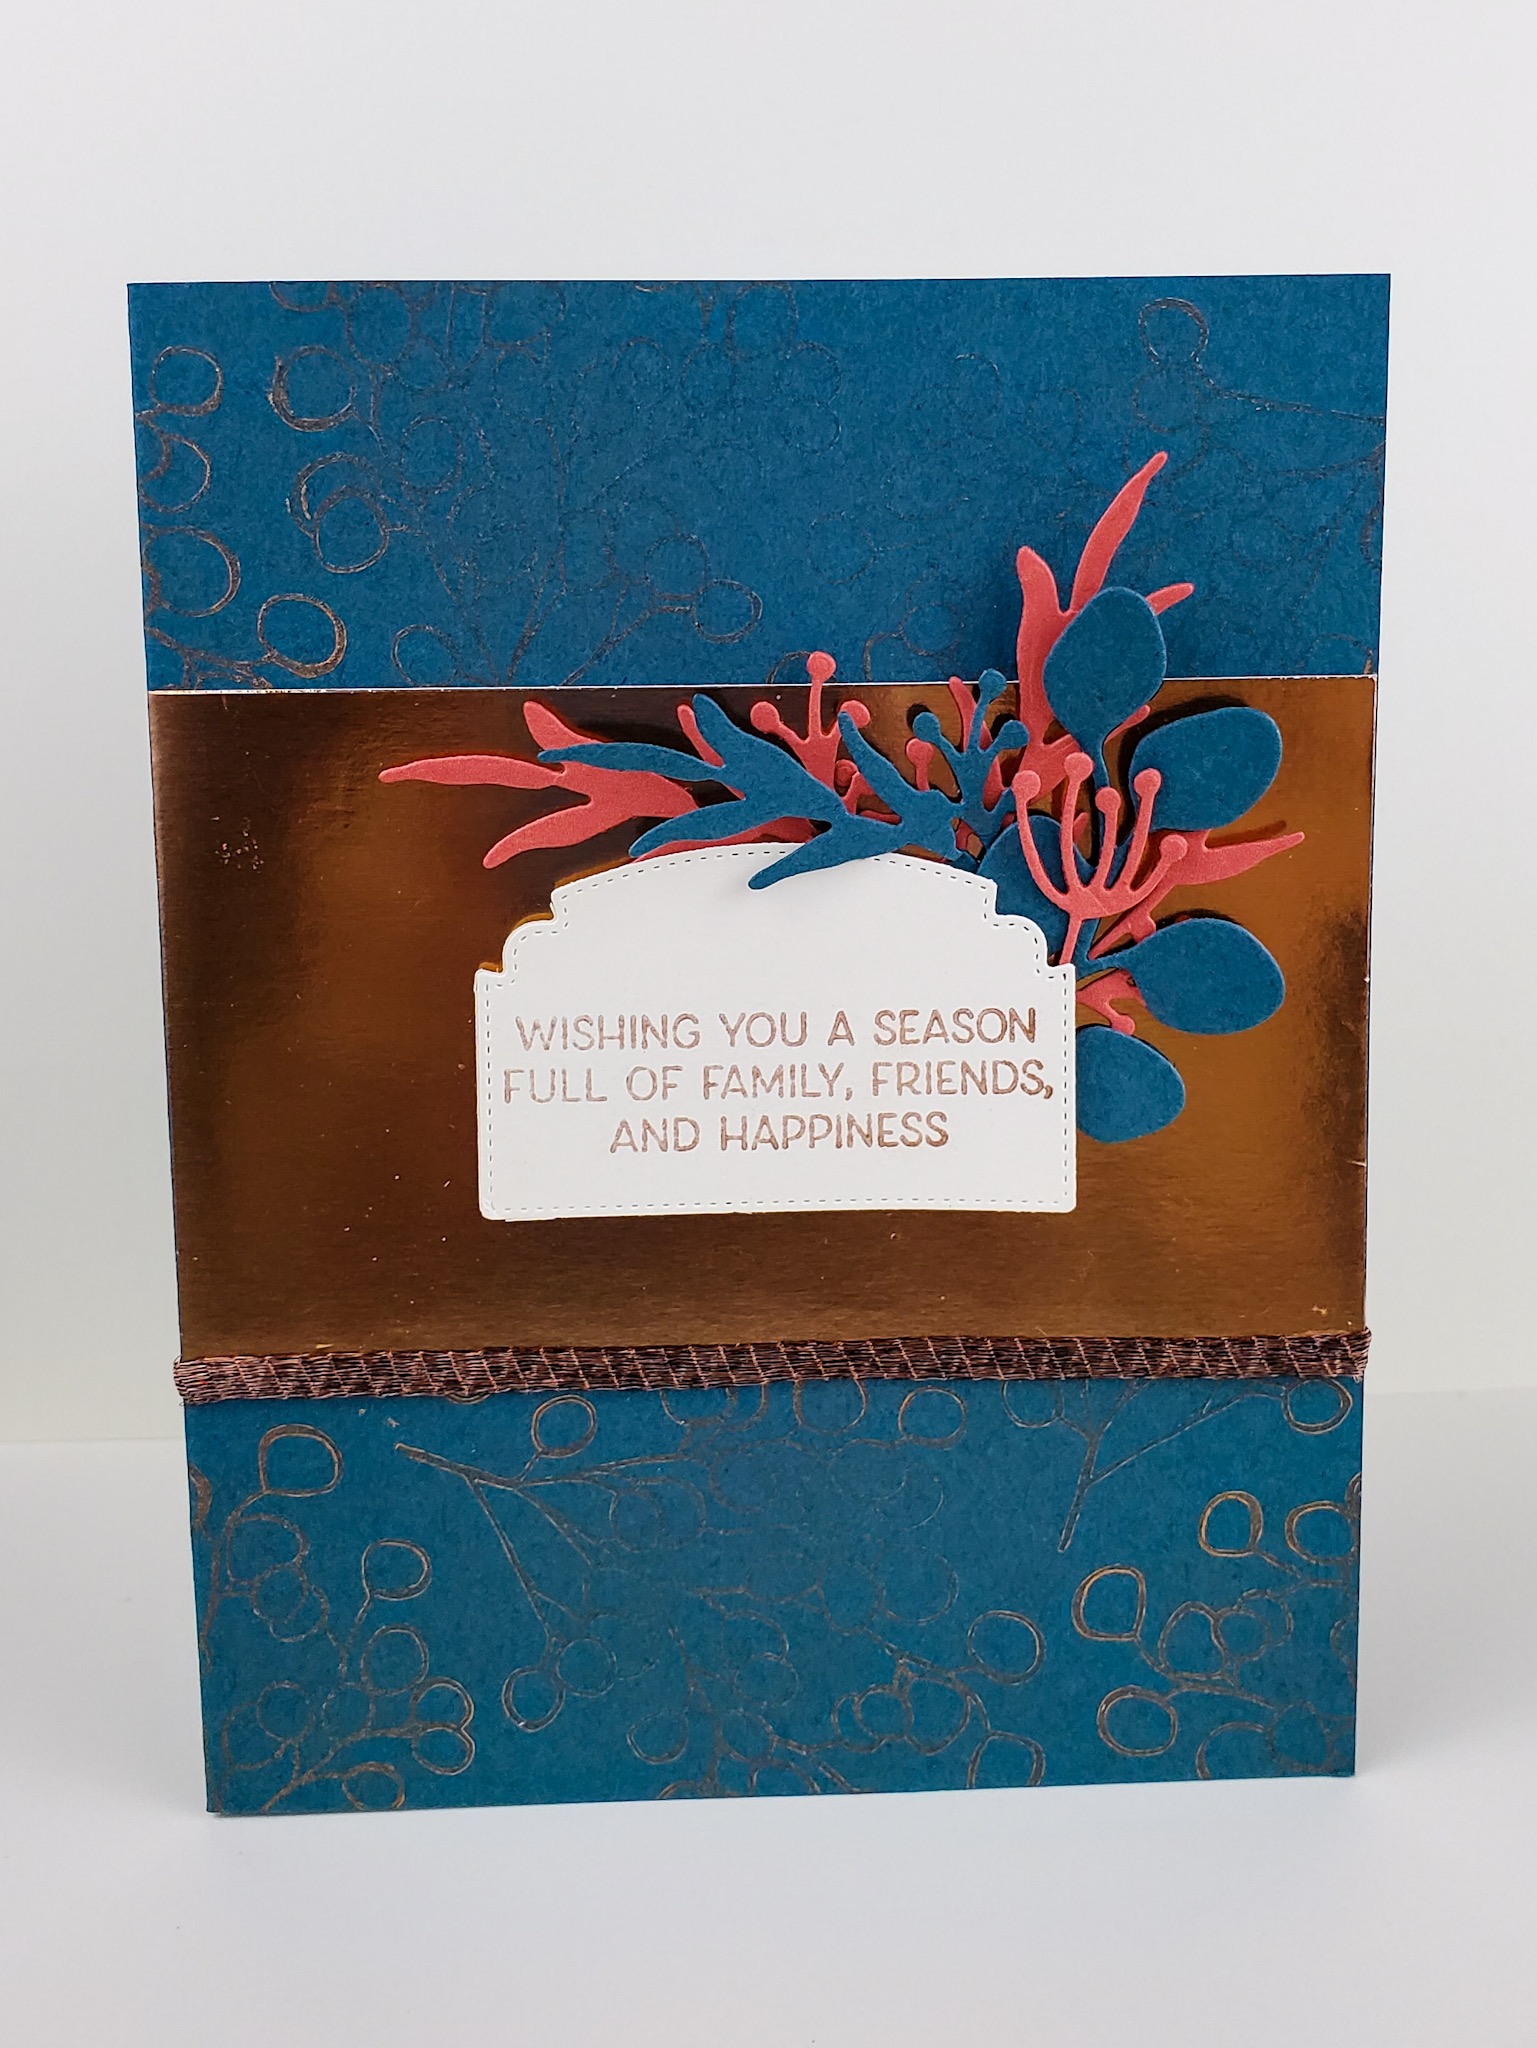
Add a warm glow with copper hues and fall colors for a card that sets the tone for the upcoming holidays with this Celestial Copper card. The photo does not do this card justice – in real life, the Celestial Copper ink sparkles and shines.

Supplies:

Pretty Peacock Cardstock 150880, 8 ½” x 5 ½”, scored at 4 ¼”
Very Vanilla Cardstock (scrap)
Terracotta Tile Cardstock 150884 (scraps)
Copper Foil 142020, 4 ¼” x 2 ½”
Frosted Foliage Cling Stamp Set 150520
Foliage Stamp from August Paper Pumpkin
Ornate Frames Dies 150664
Frosted Frames Dies 150658
In the Woods Framelits Dies 147919
¼” Copper Trim 144179
Celestial Copper Ink Pad 150707
Mini Glue Dot
Dimensionals
Tombow Multipurpose Glue
Diecutting Machine

Instructions for Celestial Copper Card

  • Stamp foliage image from the August Paper Pumpkin kit in Celestial Copper Ink in a random pattern on the front of the Pretty Peacock card front. Stamp one foliage image on the inside of the card.
  • Place a thin line of Tombow Multipurpose Glue along bottom edge of Copper Foil piece and adhere a length of Copper Trim, folding ends over to the back.
  • Stamp the sentiment from the Frosted Foliage Cling Stamp Set in Celestial Copper ink on a scrap of Very Vanilla cardstock. Diecut with the frame shown from the Ornate Frames Dies.
  • Diecut foliage pieces from the Frosted Frames Dies and In the Woods Framelits Die with scraps of Pretty Peacock Cardstock and Terracotta Tile Cardstock.
  • Adhere the sentiment frame with two Dimensionals to the Copper Foil piece. Adhere the Copper Foil strip to the cardfront with Tombow Multipurpose Glue.
  • Using Mini Glue Dots on the back of the diecut foliage pieces, tuck foliage in behind the sentiment frame.

Celestial Copper ink against a Pretty Peacock card base is a rich contrast


Share:

Leave a Comment
see more related posts: Cardmaking

Previous Post: « World Cardmaking Day with Tissue Paper Watercolor
Next Post: No Stamp Merry Christmas Card »

Reader Interactions

Leave a Reply Cancel reply

Your email address will not be published. Required fields are marked *

Primary Sidebar

Peri Beal

Cheesehead. Avid reader. Antique hunter.

Shop Online

Shop with me and get a FREE PDF tutorial bundle delivered to your inbox AND a handmade card via snail mail

Search

Papercrafting Threads

Gift Certificates
  • Email
  • Facebook
  • Instagram
  • Pinterest
  • YouTube
Retired Product
Privacy Policy

The Fine Print

Just so you know... This is a personal website and I am responsible for its content. Stampin' Up!® does not endorse the use of or contents of the classes, services, or non-Stampin' Up! products I offer.

Footer

  • Calendar of Events
  • 3D Projects
  • Cardmaking
  • Fun Fold
  • Product Tips & Tricks
  • Projects
  • Techniques
  • Of Interest
  • Print Catalog
  • Join the Fun
  • Contact Me
  • Email
  • Facebook
  • Instagram
  • Pinterest
  • YouTube

PAPERCRAFTING THREADS

Copyright © 2026 · Refined theme customized by Catherine Carroll

Privacy Policy · Affiliate Disclosure