Love flowers that don’t need watering? Join me for a short tutorial on how to make diecut tulips from your favorite cardstock or patterned paper.
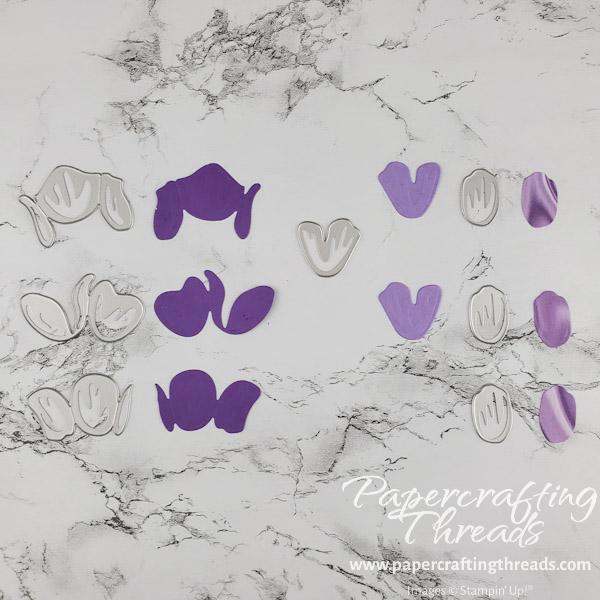
Using the Tulip Dies, diecut one each of the outer petals, two of the inner petals and three of the egg-shaped buds, as shown below. I’m using different colored papers for illustration.
Fold the outer petals on the score lines as shown below. Use a bone folder on the edges to create natural looking curling and dimension. TIP: The flower piece is upright if the little tiny flap is on the left side after folding. This is true for all three flower heads.
Add a glue dot or dimensional to the back of the egg shaped piece and adhere in center back of the main petal piece. Experiment and move the piece into slightly different positions.
Next, add a glue dot or dimensional to the back of the v-shaped petals and place over the top of the inner egg-shaped pieces. Again, experiment and adjust until you like it. And lastly, add glue dots to the inner folds of the top petals.
The possibilities and combinations of different cardstock and patterned paper are endless. The dimension and details on these tulip flower heads are incredible. I hope you found this mini tutorial on how to make diecut tulips helpful. For more inspiration, sign up for my monthly newsletter and get two free PDF downloads a month.


Leave a Reply