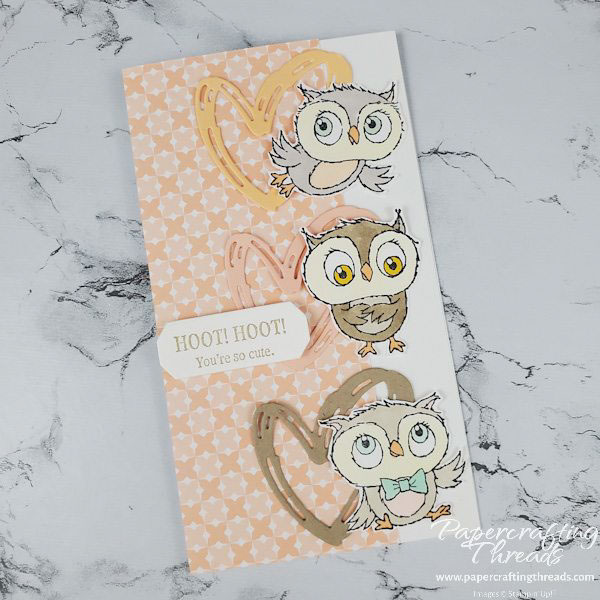
Coloring with alcohol markers doesn’t have to be complicated. Practice simple coloring with blends on these Adorable Owls and you’ll have an adorable card! Let’s get started.
scoring & cutting guide
| Paper Dimensions | Score Long Side | |||
| 6-1/4″ x 7″ Basic White cardstock | 3-1/2″ | |||
| 2-1/2” x 6-1/4” Dandy Designs patterned paper | ||||
| Scraps of Basic White, Pale Papaya, Petal Pink, & Crumb Cake cardstock |
step by step instructions
Start with scraps of Basic White cardstock and stamp each of the owls from the FREE Saleabration stamp set, Adorable Owls, in Memento Black Ink. Color each owl with the blends as shown:
No special techniques for the flying owl, other than coloring in each section with the colors noted. Pretend you’re a kid coloring with 🖍🖍🖍!
Same thing for Mr. Bowtie owl, though it looks like there’s a bit of shading on his forehead. I just went over a little section a second time and that was enough to give a shaded effect.
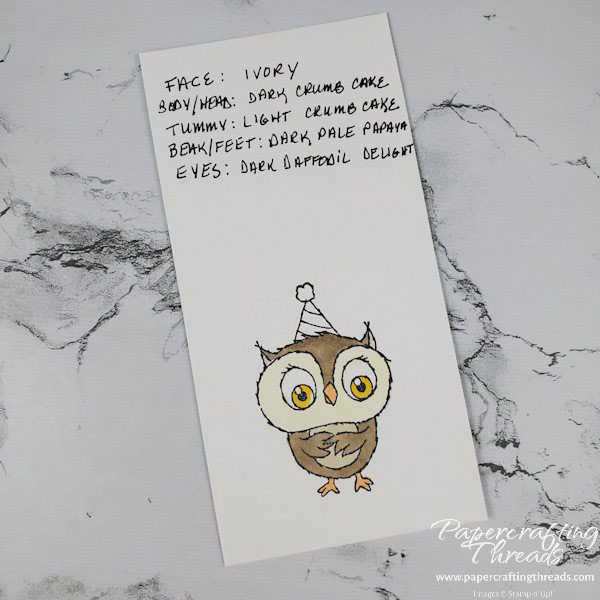
And for Mr. Party Hat, I again went over some sections on his forehead with the same blend as well as his body. No switching between dark and light, just a little extra layer here and there. And no, I didn’t forget to color in the party hat! Fussycut around the owl and cut the hat right off – any tiny lines left just look like more feathers on the top of his head. No need to mask this one. Then fussycut the other two owls.
Diecut three hearts from the Brushed Shapes Dies, one each from Pale Papaya, Petal Pink and Crumb Cake Cardstock. Stamp the sentiment from the Adorable Owls set with Crumb Cake ink on a scrap of Basic White cardstock and diecut it with the label die from the Harvest Die Set. Then assemble the remainder of the card as shown in the reference pic.
Full list of what colors I used here. Get out your crayons, I mean Stampin’ Blends, and start coloring! Don’t be intimidated by all the different theories and techniques of which shade to use where. Just start coloring. Up to you if you want to stay in the lines or not 🙂


Leave a Reply