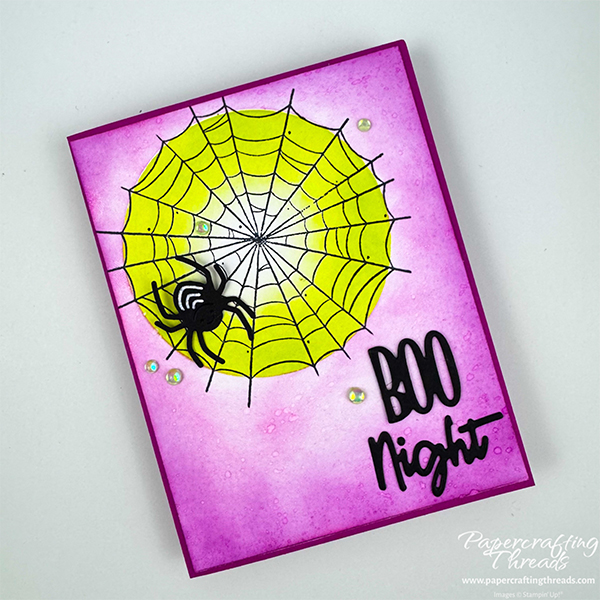
Be prepared to get a little ink on your fingers while learning these inking techniques with my spidery BOO Night card. Perfect for spooky season, the green just looks toxic and contrasts nicely with the purples, while the splotches look like they’re eating away the paper. Let’s get started!
cutting & scoring guide
| Paper Dimensions | Score Short Side | Score Long Side | ||||
| 5½” x 8½” Berry Burst cardstock base | 4¼” | |||||
| 4⅛” x 5⅜” Basic White cardstock (cut 2) for front panel and liner | ||||||
| Scraps of Basic Black cardstock for die cutting words & spider | ||||||
| 5″ x 6″ window sheet or acetate to make masks |
step by step instructions
I’ll be using the Web of Fun Bundle, a stamp and die set full of spidery images and fabulous words. Protect work surface with either a glass mat or scrap paper. Die cut a 3¼” circle from the center of the window sheet. Keep both the positive and negative as we’ll use both. Ink the web image from the stamp set with Tuxedo Black Memento ink and stamp in the upper left corner of one of the Basic White panels. Note the little black speckles (they’re supposed to be there!)
Position the window sheet with the hole centered over the web. Use a piece of Mint Tape or other low tack tape to hold window sheet in position if desired. Ink up a blending brush with Lemon Lime Twist ink and swirl ink inside the open circle shape, leaving the center of the web white. Keep adding layers of ink to deepen the color. Remove window sheet.
Place die cut circle over the web, covering as much of the green ink as possible. Ink a blending brush with Berry Burst ink, and working from the outside edges in, swirl the ink towards the web. I kept a light touch and let some white show through in spots. Then ink a blending brush with Blackberry Bliss ink and staying on the edges, add ink. I added a bit more Blackberry Bliss towards the bottom section than the top.
Use a water painter or a clean paintbrush dipped in water to add speckles to the card front. Keeping the window sheet circle over the green web, angle the painter at a 45 degree angle and tap the barrel with a bone folder, adding water droplets to the card front. Set aside to dry.
Wipe off the blending brush on a piece of paper towel or cloth to remove some of the excess dark ink, then ink again with Berry Burst and brush lightly around the edges of the second piece of Basic White cardstock. Set aside.
Assembly
Die cut the spider from Basic Black cardstock. Draw three parallel lines on the body. Add a strip of double-sided adhesive sheet to the back of a scrap of Basic Black cardstock. Die cut the words ‘BOO’ and ‘Night’ twice. Remove the backings from one of each word and double stack, creating ‘chipboard’.
Fold the Berry Burst card base in half creating an A2 card. Adhere the liner inside the card. Use a flat adhesive to add the webbed panel to the front of the card. Pop the spider body up on a dimensional, add liquid glue behind the head and adhere over the web.
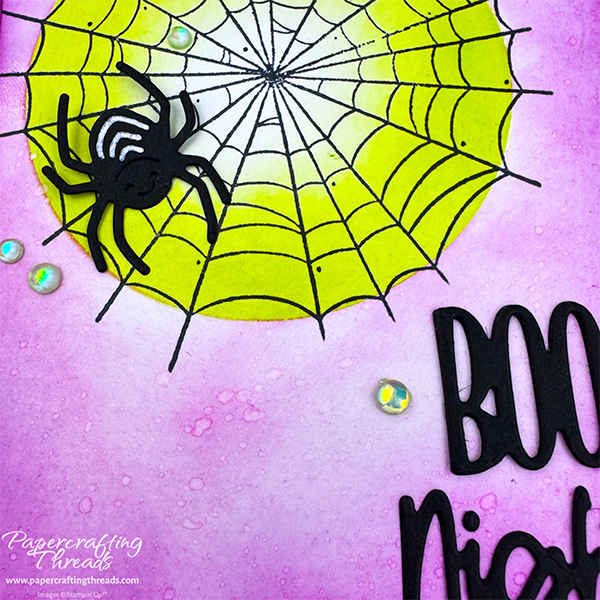
Remove the last backings from the words and adhere in the lower right corner. Scatter opal like embellishments across the card front.
Love the Web of Fun bundle and need some more ideas on how to use it? Click here for a card sketch.

Leave a Reply