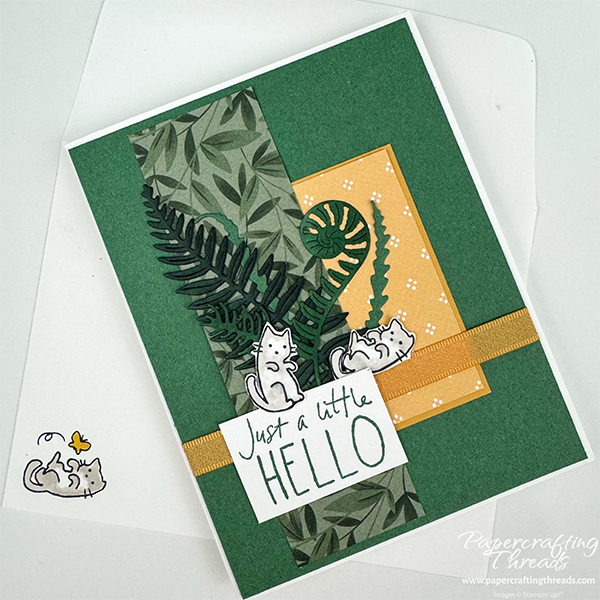
Step up your cardmaking with these six easy techniques. A simple layout turns into an eye catching card when you include these touches. And bonus that these are quick!
Mix Patterns
Combining patterns is a piece of cake, especially when you start with a pack of designer series paper, like Moonlit Flora from Stampin’ Up! The sheets are double-sided and made to coordinate with each other. I like choosing patterns with high contrast, as seen with the leafy Peaceful Pine pattern and the Golden Glow neutral pattern above. The leaf pattern measures 1½” x 5⅛”. The golden pattern measures 2½” x 3″.
Layers
While I could have chosen to use Peaceful Pine as my card base, I layered a piece onto a Basic White card base. Card base is a standard A2 size, 5½” x 8½”, scored down the middle at 4¼”. I also layered the golden pattern over the dark side of a solid piece of Golden Glow Two-Tone cardstock, which measures 2⅝” x 3⅛”. These extra narrow borders elevate the design.
Add Depth
Add depth with no bulk by blending color on die cuts. The foliage die cuts were all cut from Peaceful Pine scraps with dies from the Fern & Flora set and the Delicate Whispers set. I chose five different shapes. Once cut, I blended Secret Sea ink with a blending brush onto the largest fern like die. I used Peaceful Pine ink on the fiddlehead fern and the whispy piece, using multiple layers to get the darker colors. I left the two slender pieces plain. This gave me three different depths of color.
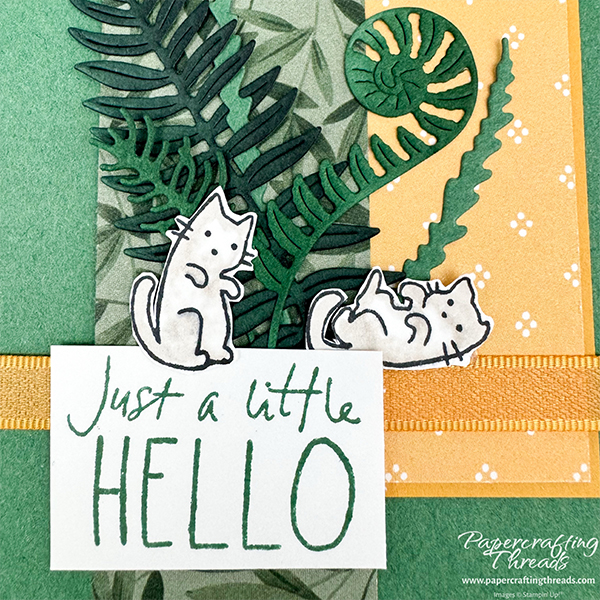
I also added depth on the kittens by using the alcohol ink Stampin’ Blends to color the kittens. I first added Dark Gray Granite, then swiped the kittens’ tummies with the Color Lifter, pushing the gray outward. Each kitten was adhered with mini glue dots.
I attached the greeting with two mini glue dots adhered on top of each other for a little dimension. I wanted this to go through the postal machine with no issues. By stacking the glue dots, I got a little lift with no bulk.
Add Embellishments
I kept it simple here by adding a length of ribbon to the lower portion of the card. I wrapped the ribbon around the Peaceful Pine layer and secured the ends on the back with Tear & Tape, all before placing it on the card base.
Finish the Inside
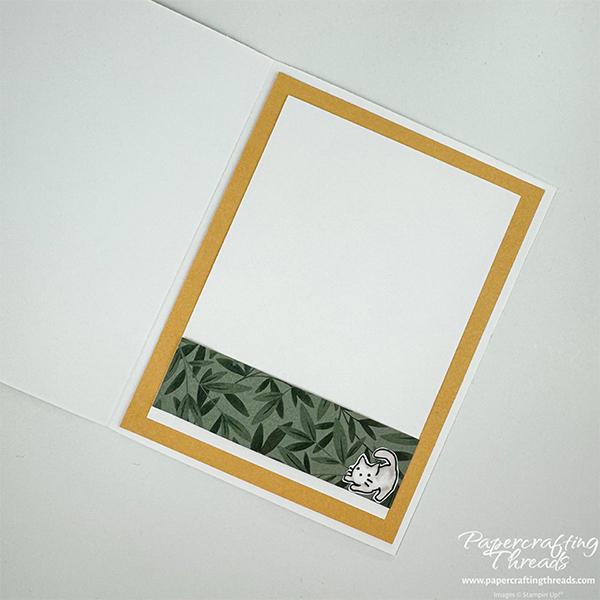
Designing the inside of a card is one more way to step up your card making. For this sample, I adhered the leftover strip from the leafy patterned DSP to a piece of Basic White cardstock. Then adhered that to a piece of Two-Tone Golden Glow cardstock.
Decorate the Envelope
And the final touch is decorating the envelope. I stamped one of the kittens from the Cutest Crew stamp set on the lower left corner of my envelope. Before coloring in with Stampin’ Blends, I inserted a piece of scrap copy paper inside the envelope so the ink wouldn’t bleed through to the back.
Shop the Supplies
Full supply list is here if you’d like to step up your card making.

Leave a Reply